Photoshop Tutorial: Using the Color Contrast filter to sharpen your photos
Photoshop Tutorial: Using the Color Contrast filter to sharpen your photos
If you've used Photoshop, you probably know that there are several ways to accomplish the same task. One of the most important, and one that applies to almost every digital image, is sharpening. This is necessary because most digital camera sensors use anti-aliasing filters that blur the image very slightly to reduce the chance of moire appearing in the image. This slight blur is typically only one pixel, but causes a slight loss of detail. To correct slight blurring, use the Unsharp Mask tool.
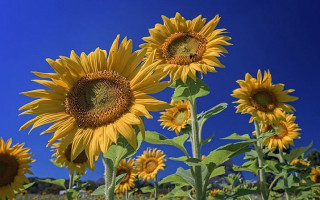
This shot of sunflowers was enhanced using the Color Contrast filter by sharpening the details in the center of the flower.
Another easy way to sharpen is with a filter, which you won't even find in the Sharpen menu in Photoshop's Filters. It's listed under the Other category at the bottom of the Filters menu and is called Color Contrast. Using this filter is a little easier than Sharpen Mask as there is only one slider to worry about and the technique of using it allows you to experiment even after applying it so you can get the image you want.
Note: I'm using the latest version of Photoshop , version 2015.0.1 on Creative Cloud .
Step 1: Editing and Flattening Layers
Before you use the Color Contrast filter, you process the image as you wish. Roughly speaking, sharpening should be your final step when editing an image because it directly depends on the size of the image. You will sharpen a 5x7″ image differently than you would a 13x19″ image. When editing is complete, flatten all layers by going to the Layers menu and selecting Flatten. Then set the file size you need based on what you'll be doing with it—printing or displaying online.
Step 2: Duplicate the Layer
Now that the image is flattened, duplicate the layer by clicking (Windows) or (Mac). Then zoom in to 100% by clicking (on Windows) or (on Mac), or simply double-clicking the magnifying glass in the toolbar. You will need to zoom up to 100% to see the details in the image clearly.
Step 3: Color Contrast Filter
From the Filter menu, select Other and then Color Contrast.
Go to the Filter menu and select Other and then Color Contrast. You will see that the entire image has turned to a flat gray color. Don't worry, this will allow you to see how the filter works.
Step 4: Adjust Sharpness
When the Color Contrast filter window appears, use the slider to set the radius.
When you run the filter, you'll see a pop-up dialog box showing a preview and a radius slider. Additionally, the image behind the dialog box will turn gray with some edges showing. This allows you to see exactly where sharpening will increase. The color contrast only affects the edges; everything else remains gray. The degree of sharpness will largely depend on the image and its size.
I printed this image of sunflowers in large format using full resolution. However, I noticed that usually the radius is between 0.5 and 5 pixels. You should be careful here, as excessive sharpening will lead to unwanted artifacts and noise. I focus on the preview. I move around until I see thin black lines on top of the gray areas. Once you see white, it means a halo will appear, which is very undesirable. The result is a subtle increase in sharpness rather than a drastic increase in sharpness. For this image I used a radius of 0.9. Above you can see that there are just a few black lines on the edges of the flower with a very faint halo. When you're ready, click OK.
Step 5: Set the Blend Mode
Once you've applied the Color Contrast filter, it's time to get rid of the gray and bring the image back to life. Go to the Layers palette and select a blend mode from the Overlay drop-down menu. Your image will return its color, and you can turn the layer off and on to see the changes.
You can also experiment with different blending modes, including Soft Light, Hard Light, Bright Light, Linear Light, and Spot Light. Additionally, you can use the layer's opacity to tone down the effect a bit if you decide it's too strong. The beauty of this technique is that it's fully adjustable (non-destructively) even after applying a filter, and since you're working on a separate layer, you can easily undo the sharpening and start again if necessary. Also, again thanks to working on a separate layer, if you only want to apply the filter on certain areas, you can use a layer mask to hide or show the sharpening effect.
Final result
In this comparison image, the High Contrast filter was applied to the top portion while the bottom portion was left untouched.
The Color Contrast filter is easy and flexible to use. This is a great way to give your images a crisper, clearer look before printing or uploading. Try it!
Improve the sharpness of a photo using the Color Contrast filter.
Most people who are familiar with Photoshop, especially those who shoot raw RAW, will already have some experience sharpening an image. Any filter that is used to sharpen a photo is based on a simple action - increasing the contrast between dark and light areas of the photo, which makes the image visually clearer. Image sharpening filters are usually used at the last stage of image processing, after all the necessary actions for “developing” and improving quality have been carried out. Yes, there are times when certain details of a photo lose their sharpness during post-processing, or you need to save details that were not in focus of the camera during shooting.
Photoshop has many tools in its arsenal that can help you solve the issue of sharpening an image , for example, a whole set of sharpening filters, each of which has different settings in its arsenal. But at the same time, one filter remains undervalued, and few people use it as a means of sharpening a photo. This filter is called High Pass and is located in the Filter -> Other section of the Photoshop menu.
Today I'll explain step by step how easy it is to use this filter to improve the quality of your photos. The technique is very simple, but quite effective. Everything ingenious is simple.
Step 1.
Open any of your images in which you would like to sharpen the details. Ideally, the image should be converted from RAW format, but a jpg file will do, although, to be honest, any methods of correcting a jpg file destroy the pixels and only worsen the picture. Here we assume that you have already done all the necessary other procedures to improve your photo. To illustrate all the processing steps, I will use this photo of a fox.
Step 2.
In the Layers palette, right-click on the background layer, and in the context menu, select “Duplicate Layer...”, and click OK. As a result, you will create a new copy layer, which will be located above the main background layer. And we will work with him.
Step 3.
Now apply our filter on a new layer; to do this, go to the menu Filter-Miscellaneous-High Contrast (Filter -> Other -> High Pass). A dialog box will open in front of you with a preview window and a slider to control the radius of the applied effect. Don't be afraid that now nothing is visible on your layer and it has turned gray. That's exactly how it should be.
Step 4.
You need to select the correct radius and click OK. The larger the radius, the more sharpening will be applied to the image. If you play with the Radius slider, you will notice that with low values, for example, less than 1.0 pixels, only high-contrast areas of the image will be visible, and if you select a radius of 10 pixels, lower contrast areas will appear on the layer. The optimal radius value for different photos will range from 1 to 5 pixels. Usually this is enough to improve the final result. But even 5.0 pixels will be too much, but given the fact that we are working with a copy of the layer, we have the opportunity to approach this task more flexibly, which I will talk about a little later.
Step 5.
Now let's blend our layers by applying the Overlay blending mode to the top layer. This blend mode works something like this: dark makes it darker, and light makes it lighter. After applying the Color Contrast filter, our top layer was colored neutral gray, and using radius correction we highlighted the edges of the contrasting (light/dark) areas of the image. And when we changed the blending mode, no changes occurred in the areas painted neutral gray. But at the boundaries of lights/shadows there was an increase in contrast, which in turn creates the visual effect of increasing the sharpness of the image.
Step 6.
If you applied too large a radius to the filter and you are not satisfied with the changes that have occurred in the photo, it’s okay, now we can change the transparency of the top layer, and thereby achieve the desired result. It’s better to do the opposite, first reduce the transparency of the top layer to zero, and then develop it until you achieve the desired result.
If, on the contrary, it turns out that you do not have enough sharpness in the photo, you can create a copy of the layer with the filter applied, and repeat this as many times as necessary for the optimal result.
Step 7
If you end up sending the image to print, before you do so, print part of it at the same scale that you will print the entire image at. Make sure that the purpose of your work is achieved.
That's all, we have enhanced the quality of our image!
The advantage of this method is that even if you apply it to jpg files, it will not destroy the pixels in the photo, since we are working on a duplicate layer and in a very narrow space at the contrasting edges.
When using this method, you can also apply a layer mask to sharpen only individual details, rather than the entire area of the image.
Now you have a fairly quick and convenient way to sharpen your photos.
Sharpening in Photoshop
Many novice photographers carefully study the works of the masters and often come across, along with dreamy photographs with reduced contrast and sharpness, photographs that amaze with their detail, brightness and sharpness.
One of the masters who takes truly sharp pictures is Andrzej Dragan. His photos are amazing, but the editing isn't that complicated. Even a beginner who knows how to work in Photoshop with adjustment layers, levels, saturation, curves and contrast can replicate the effect it creates.
Step #1
The open shot has a very soft tonal distribution. There are practically no white areas, as well as black ones. Let's make the frame more contrast. Add a Levels and move the outermost controls towards the center. We choose the position ourselves. You shouldn't overdo it. Moreover, the adjustment layer can always be edited.
Step #2
Then add another adjustment layer Hue/Saturation (Hue/Saturation). Saturation value to approximately -37.
Step #3
Next, add another adjustment layer Curves (Curves). Let's create a regular S-curve to increase the contrast. Shadows will deepen and highlights will stand out. Add three points to the curve and drag the left point down and the right point up. The midpoint can be left untouched or adjusted at your discretion to achieve the most pleasing result to the eye.
Step #4
Now let's work with sharpness. Let’s create a copy of the main layer ( Ctrl + J ) and go to the menu Filter – Other – High Pass (Filter – Other – Color Contrast). The radius value must be chosen such that only the thin contours of the object remain clearly visible. These will be the areas of increased sharpness.
Change the layer blending mode to Overlay (Overlap) or Soft Light (Soft light). The photo may appear overly sharp. It looks unpleasant. In this case, simply reduce the opacity of the layer until the sharpness is satisfactory.
Step #5
This stage will be the final one. We will study the volume of the shooting object. This is done by adjusting the highlights and shadows. The method is called Dodge & Burn .
Obviously our model's face is too bright.
Select the Burn Tool (O) and change the Exposure to 50%. This option is on the top panel.
Next, use the Dodge Tool to brighten the eyes. It is the eyes that attract the most attention in portraits. Make them bright.
Also, use the dodge and burn tools to work out the dark and light areas. Make the shadows deeper by darkening them, and lighten the bright areas slightly, but maintain balance. You should not get overexposure and failure in the shadows.