How to Take Sharp Photos
How to Take Really Sharp Photos
In this blog, you will learn how to create sharp photos, as well as how to sharpen a photo in post-processing.
1. If the focus is incorrect, blurry photos are obtained - stabilize the focus
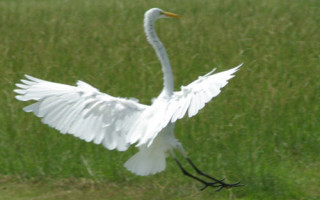
Very often, blurry images are due to the fact that the camera is aimed at the wrong point in the plot. For example, instead of a bird, the background against which it was shot turned out to be sharp, but the bird turned out to be blurry.
In addition, very often, if the depth of field is too shallow, the camera may make an error in focusing, resulting in blurry photographs. There is a simple solution to these problems, but it depends on the type of camera you are using. For a SLR camera, you can set the focus point, that is, the area over which the camera will be aimed. It is also possible to use tracking focus, in which the aiming point will change depending on the position of the moving object. Digital point-and-shoot cameras do not have focus point selection. However, the problem can be corrected by pointing the camera at the subject you want to sharpen, pressing the shutter button halfway and waiting for the camera to focus on it.
2. Shaking the camera while shooting results in blurry photos.
Even if you think you can hold the camera for a second without moving your hand, the camera may not think the same as you, resulting in blurry photos. Even the slightest movement of the hand can lead to significant blur in the photograph. To avoid blur, you need to learn how to hold the camera correctly.
In addition, at shutter speeds longer than 1/60, you need to shoot from a tripod or other support. This means that after sunset and before sunrise, or in dimly lit environments, shooting handheld without a flash may result in blurry photos. You must also remember that shutter speed depends on focal length. If you are using a large zoom (focal length 200-300 mm), then the fastest shutter speed at which you can avoid blur will be 1/200-1/300.
Photographers often make several common mistakes that result in blurry photos:
- Pressing the shutter button too sharply: press the button carefully
- Many amateurs quickly move the camera away from their face immediately after pressing the button. The shutter does not have time to close, and the photo turns out blurry. Wait for the camera to take the photo.
- Unreliable support for the camera. The camera must be placed on a stationary surface. If you used your knee as a support, the photo is unlikely to be sharp.
3. Wrong choice of shutter speed for a moving subject
If you select a slow shutter speed (longer than 1/80) for a moving subject, your photos will be blurry. The shutter speed for a moving subject depends on the speed of the movement. Very often, a shutter speed of 1/125 of a second is enough for a walking person, and 1/250 of a second is enough for a running person.
4. Processing in Photoshop and sharpening the photo
When asking the question of how to make a photo clear, many people mean increasing the sharpness of the photo. Taking a picture even with a professional camera can result in a not entirely sharp picture, not to mention photographs taken using amateur cameras or mobile phone cameras.
The presented method is very simple, but most photographers use it or its variations before starting processing.
The original photo is an example of how to make a photo clear
For example, I will use a photo of a girl that was taken in the park at close range. You can choose any photo from your archive.
For the sake of the purity of the experiment, I did not do anything with the image beforehand.
Photography can be taken with absolutely any camera or mobile phone. The main thing is that there is no noise in the picture. Otherwise, this method, instead of improving it, will worsen the photo, only enhancing the existing noise.
I have an English version of Photoshop, but for Russian owners, I will make adjustments to the names of items and parameters.
Let's take an example
Open the photo in Photoshop. I already have it open.
At the first stage, apply the Unsharp Mask filter or in Russian Contour Sharpness. To do this, select the menu item Filter – Sharpen (Sharpen) – Unsharp Mask (Contour sharpness).
In the window that opens, specify the parameters:
- Amount (Effect) –150%.
- Radius –1.
- Threshold -4.
These settings work well for portrait photos. At the bottom of the article there are examples of settings for photographs of other genres.
Press the Ok button and see how the sharpness has increased.
Possible problems and solutions
This method of sharpening has one unpleasant side effect - all sorts of unpleasant glows may appear along the edges of objects.
But these glows can be easily gotten rid of. Let's do one more simple step:
- Select Edit – Fade Unsharp Mask.
2. In the window that opens, in the Mode list, change the value Normal to Luminosity.
3. Click the Ok button.
This sharpening method is used by many photographers at the initial stage of photo editing.
Additional filter settings
As promised, here are some examples of Unsharp Mask filter settings. Please note that these are approximate parameters. You shouldn't follow them blindly.
These parameters can be used as a starting point. In other words, having specified these parameters, you need to adjust them somewhat, depending on the specific photo.
Portrait
These settings were given in the lesson above.
- Amount (Effect) – 150%.
- Radius – 1.
- Threshold – from 4 to 10.
Landscape, travel, architecture
- Amount (Effect) – from 60% to 80%. Most often 65%.
- Radius – 3.
- Threshold – 2.
Household photographs, pictures taken with low-resolution cameras
- Amount (Effect) – 85%.
- Radius – 1.
- Threshold – from 1 to 4. Most often 3 or 4.
10 Tips for Taking Clear Photos
Why photos need to be sharp.
Sharpness is one of the main concepts that characterize image quality. To take technically high-quality photographs, you need to know well what should be done and in what cases. These tips will help you take better photos and get more detailed images.
1. Fast shutter speed
The last thing we want is to end up with a blurry or blurry photo. In order to avoid movement due to hand shake, you need to set the shutter speed in accordance with a simple ratio. The shutter speed should be no longer than the reciprocal of the focal length. For example, if the focal length of the lens is 30 mm, then the shutter speed should be 1/30 s or faster. With a slower shutter speed, you risk getting a blurry image. However, this rule applies to full frame cameras. If the matrix size is less than a full frame, then you need to shorten the shutter speed by the crop factor, that is, to about 1/45 s.
If you have trouble keeping your camera still, I suggest using burst mode and selecting the middle image with the sharpest focus.
2. Using a tripod
If it is impossible to use a fast shutter speed and the subject is motionless, then it is better to use a tripod. A good tripod keeps the camera completely still and increases your chances of taking a sharp photo.
3. Focus correctly
There are 2 ways to do this. First, choose your own autofocus points or use focus lock. This will also help if you want to use a shallow depth of field. When taking a portrait, the focus should be on the eyes as they are the most important part of the portrait.
When shooting on a tripod, I switch the camera to Live View, zoom in at 10x, and focus manually. This way I know exactly where the sharpness will be.
4. Use a good lens
The quality of photographs is also determined by the quality of the lens through which light passes to the sensor. When you buy your first camera, I recommend purchasing an inexpensive prime lens to start with. You will immediately see how much the image quality will improve. Prime lenses cannot change focal length. Therefore, you will have to move around yourself to change the image scale. I recommend the 50mm or 35mm f/1.8 lenses, which can be purchased for less than $150.
5. Keep your objective lenses clean.
Even the best lens will not produce a high-quality image if its lenses are dirty. Check the lens every day and clean if necessary. Place a protective filter on the lens.
Translator's note: I recommend wiping the lens as little as possible. It is better to blow off the dust with a special blower, and if necessary, brush it off with a brush specially designed for this. Use a Lenspen to clean a dirty lens. .
6. Use a lens with image stabilization.
If your lens has image stabilization, turn it on. This will allow you to shoot at slower shutter speeds and narrower apertures. If you are using a tripod, turn off the stabilizer as this may degrade the quality of your photos.
7. Use a working ISO.
The working ISO is the one at which there is the least amount of noise in the image. Set the lowest possible ISO for your camera, usually 100 - 200. I already mentioned that the lower the ISO, the less noise. If you want to have really clean, crisp photos, then you need to use this tip.
8. Find the sharpest aperture on your lens.
Most likely these values will be f/8 – f/11. Using an open aperture gives a shallow depth of field, but also softens the image. As you start to gradually close down your aperture, when you get to f/8, you will see how much sharper the details have become, but at the same time, of course, the depth of field will increase.
9. Use of light
The more light the better. When I can't use daylight but want sharp photos, I use bounce flash off walls or ceilings, or skip it if there's good natural light. Lighting is of great importance in photography. In the photo below the sun is behind the berries and I used fill flash. Otherwise, the berries would turn out to be a dark silhouette.
10. Shoot in RAW format.
There are many benefits to shooting RAW. One of them is that you can adjust many settings after shooting. One of these parameters is sharpness. When sharpening is increased moderately, it benefits the image. However, avoid excessive sharpening, the so-called oversharpening. Photos that are overly sharpened are not very pleasant to look at.
Happy shooting!
Subscribe to E-mail newsletter
Don't want to miss photography lessons?
Do you want to immediately know about new arrivals on the site?
Then subscribe to the RSS feed or
email by filling out the form above!
Follow the latest news in:
New to photography?
Practice on our simulator right on the website and in just 5 minutes shutter speed, aperture and ISO will be your best friends!
DSLR simulator
4 ways to sharpen your photos
When you see a beautiful photograph of a natural or cityscape, the first thing you ask yourself is, “How did he manage to capture that shot like that?” Of course, the moment of shooting plays an important role in the creation of any outstanding photograph. Is the exposure set correctly and will it produce a correct, well-balanced RAW file? Do I need to bracket to capture and then be able to process wide dynamic range? Should you use a slow shutter speed to create a sense of movement or soften it (that's where ND filters come in handy)?
There are too many variables on this list, and you're probably already familiar with most of them.
Once you have a RAW file ready to go, post-processing software gives you a ton of options to make it sharper and stand out.
Using the 4 techniques covered in this tutorial, you can get your photos razor-sharp and ready to print or share online!
In this tutorial I'll show you how to make landscape photos look their best. However, these techniques also work for most other areas of photography. Since it's already spring outside, now is the time to get outside and capture some beautiful scenery!
1. Sharpening in Lightroom
The full name of Lightroom is “Adobe Photoshop Lightroom,” so when I talk about sharpening, I'm technically explaining the Photoshop method. However, whatever you call it, Lightroom has a very useful section in the Details panel of the Develop module .
Sliders should be used when the image is open at least in full 1:1 size. When making adjustments, you need to see their impact even on the smallest details.
Holding down the Alt key allows you to see the mask being created.
All sliders can also be used in conjunction with the Alt key. The top slider – Amount – will show the image in black and white. Radius and Details will soften the colors so you can see the edges, making them sharper. Masking slider switches to black and white, showing exactly where sharpening is applied (see image above).
Sliders
Amount controls exactly what you might think - the total amount of sharpening applied. The further you move it to the right, the sharper the photo will become.
Radius controls how far from the center of each pixel the sharpness increases. The lower the value, the thinner the radius of focus. The larger the radius, the thicker it is.
Details (Details) affects mainly the remaining areas of the photo, not necessarily the edges (Radius is responsible for them). If you have a photo with a lot of texture, like fabric or clothing, the Details slider will highlight them without creating an unwanted shine effect.
Masking is nothing more than just a mask. If the slider is in the left corner, the mask is filled with pure white and the effect is applied completely. By holding down the Alt key and moving the slider to the right, you will see how the white outline remains only around some areas. If you drag the slider to the right edge, only the most obvious details will become sharp.
Although this is a very effective method, it is applied globally and sometimes we only need to sharpen certain areas. This is where Photoshop comes to the rescue.
2. Unsharp Masking in Photoshop
Mask is a feature with a very ambiguous name. If you do not pay attention to the prefix “not”, this is a common tool for increasing sharpness. The way it works is to create a slightly blurred version of the original image and subtract it from the original to find the edges of objects. This creates an unsharp mask. The next step is to increase the contrast of the edges using the created mask. The result is a sharper photo.
Unsharp Masking Sliders
The Amount here is displayed as a percentage and controls how contrasting the edges will be.
Radius – the amount of blurring of the original to create the mask. The smaller the radius, the finer details will be affected.
Threshold sets the minimum change in brightness to which sharpening is applied. Threshold also works well to sharpen only noticeable edges without affecting others.
Any sharpening operations should be applied at a minimum of full 1:1 or better. The ideal zoom for working in Photoshop is 200%.
3. Smart Sharpening in Photoshop
Photoshop's most advanced sharpening tool is Smart Sharpen. It has the most options and when used correctly, you can get the best results for landscape and almost any field of photography. Landscape photography is a very difficult subject, as you often have to cope with very close and very distant contours at the same time. However, each of them requires a separate approach. By working with masks in Photoshop, you can ensure that some areas are masked while others remain sharp. This is another advantage over its younger brother – Lightroom. But back to the topic!
also save and load presets in the Smart Sharpen so you don't have to enter parameters each time.
Smart Sharpening provides the most options. With its help you can perfectly perform the finest corrections!
Amount slider changes from 1 to 500%. In most cases you don't have to go beyond 100%. Of course, no one forbids you to go further, but you will get common artifacts in the form of radiance and an unrealistic appearance.
Radius is measured in pixels and is responsible for the edges that Smart Sharpening will adjust. You can select from 0.1 to 64 pixels - a scale of 0.1 increments was created for maximum fine adjustment.
Reduce Noise is a very clear and excellent feature. This is another reason for the power and popularity of Smart Sharpening. Now it becomes clear why Adobe created presets for this filter!
In the Remove line , it is better to set Blur at small. depth of field (Lens Blur), as this item does an excellent job of reducing the glare effect.
The Shadow and Highlights sections also received their own sets of sliders for fine adjustment. Weakening the effect (Fade Amount) is responsible for the overall increase in sharpness in light and dark areas.
Tonal Width sets the limits of sharpening for certain tonal areas of the image. As an example, if you select a lower Tonal Width in these areas, the sharpening enhancement for them will be limited. A higher value expands the range of tones.
Radius here works the same way as Unsharp Masking - moving the slider to the left defines a smaller zone, moving the slider to the right defines a larger one.
It's worth noting - for best results when using these tools, first convert a copy of the original layer into a smart object. This can be done at the very beginning of post-processing or later when the layer is merged and on top. Switching to a smart object will allow you to return and make corrections at any time. Also change Blending Mode of the sharpening layers (except Color Contrast) to Luminosity to avoid unwanted glow. This is highly recommended.
4. Color Contrast Filter in Photoshop
Another great way to sharpen landscape photos (and more) is to use the High Pass . Again, you can either make a copy of the layer itself, or a copy of all visible ones (Ctrl + Alt + Shift + E). Convert the resulting layer into a smart object by right-clicking on it and selecting the appropriate drop-down menu item. As already mentioned, this will allow you to go back and make corrections at any time.
The Color Contrast filter is a very simple but effective way to sharpen a photo. Remember that with any adjustment layer or filter you can always use a mask to hide unwanted areas. Opacity slider is another way to reduce the impact of an effect.
A small Radius in the range of 1-1.5 is usually enough. Don't overdo it! We only need a little! The image will then turn 50% gray and only have a stroke showing the edges. This is exactly what we need.
Now just go to the layers panel and select Blending Mode Overlay (Overlay) or Linear Light (Linear Light). The latter has a more noticeable impact, while the former is less radical. Linear light is a better choice, since you can always adjust the opacity of the layer and soften too harsh areas using a mask. Using Luminance Masks can also be a good option if you only want to sharpen a certain tonal range.
There are many more ways to bring out detail using Photoshop – what's your favorite? Share your experience in the comments or ask a question.
How to take sharp photos. 4 photography tips
If I asked you what is the best way to take sharp photos, something like “Get a good lens” would come to mind. While the quality of your lens definitely plays a huge role in the overall sharpness of your photo, it's still not an absolute guarantee. Let's look at 4 important things that greatly affect the sharpness of your photos.
There are many other factors that come into play when discussing image sharpness or lack thereof. I even said to myself, “If only I had this lens or that lens, I could take better photos.” But have you considered other reasons why your images don't seem to have the sharpness we all strive for?
Let's face it, not all of us can afford the top-of-the-line lenses that we think will provide the sharpest photos possible. But there are many other things that you can do to make sure that you are not standing in the way of creating quality photos even with a kit lens. Here are some simple tips you can use right now to ensure you're getting the most out of the lens you're holding in your hands... or rather, on your camera - and will help you take sharper photos.
#1 Yes, the good old tripod
Here she is. The same old practice I always ask you to use - use a tripod. You simply can't escape the fact that the more stable your camera, the sharper your photos will be.
The truth is that there are fewer and fewer excuses for not using a tripod. Lightweight travel tripods are becoming more affordable. These are small, lightweight options that will fit in your camera bag without weighing you down. While it's not always practical, a tripod (even a monopod) is the single best option for stabilizing your camera. But when using a tripod isn't an option, there are still other ways to physically stabilize your camera while shooting. For example, these...
#2 How to hold your camera steady
There is no set way to hold every type of camera you might encounter. But there are certain basic principles that can help you hold your camera steady while shooting.
The most important thing to remember is that the further the camera moves from the center of gravity, the more likely it is to move. This means keeping your hands as close to your body as possible and avoiding creating space between you and the camera.
Extended arms make the camera unstable.
Hands and elbows are pressed, this is much more stable.
Also, how you hold the camera in your hands is important. One hand has a comfortable but firm grip on the shutter release, while the other hand holds the lens underneath, next to the camera body, while still being able to adjust the focus or zoom. Your left hand should press slightly in the opposite direction to your right.
Hold the camera and lens firmly, but still remain flexible. Note that the left hand is under the lens.
This will give you more stability and reduce the chance of shaking. Again, experiment with different configurations to find the best experience for you. Just remember to keep your elbows close to your torso, with your left hand firmly gripping the lens under the camera. Your right hand should grip the camera just as tightly, followed by the opposite amount of pressure on your left hand.
If you want to test yourself, take a deep breath before each shot and exhale halfway before pressing the shutter. This little detail may seem a little neurotic, but it will help you get sharp photos when the odds are stacked against you.
#3 The importance of endurance
Similar to the idea of preventing camera shake, the faster the shutter speed, the sharper your images will be. Movement is always your enemy. Unless you want to purposefully convey movement in a photo, it would be better to hold it in the frame. One of the most useful ways to reduce camera shake and subject blur when shooting handheld is the equivalence rule. It's actually more of a recommendation than a rule.
The equivalence rule is a simple calculation based on the focal length you are using. Just take the focal length in millimeters and make it a fraction. If you're shooting with a 50mm lens, your maximum shutter speed should be no longer than 1/50th of a second. If you are photographing with a 24mm lens, then your shutter speed should be at least 1/24 of a second; a 300mm lens will require 1/300, and so on. If it is impossible to calculate the exact shutter speed, then take an approximate value (downward).
Here are some examples of sharpening improvements based on reducing shutter speed in accordance with the Equivalence Rule:
Shot at 1/40 of a second with an 85mm lens - note that it's not exactly sharp. Usually when you see something that looks like a double image, it's because the shutter speed is too slow.
Now notice the reduction in motion blur when the shutter speed was reduced to 1/100 of a second.
Shot at 1/100 second with an 85mm lens.
This is a quick and easy way to prevent your images from suffering from lack of sharpness due to camera shake. Although not ideal, the equivalence rule will become your friend during shooting.
#4 So what is the “Point of Maximum Sharpness of the Lens”?
No matter what lens you use, it has what is called a sweet spot or otherwise a point of maximum sharpness. This is the aperture range of your lens at which your photos are sharpest. This range varies even between lenses of the same make and model, so you will need to experiment to determine this point in your lens.
Start with the largest aperture (smallest f-number, like f/4) and take photos at each aperture until you reach the smallest aperture (largest f-number, like f/22 or f/32). Adjust shutter speed and ISO to get normal exposure. Then examine each image, especially in the corners, to see which aperture produces the best sharpness. This is a somewhat tedious process, but I assure you it will pay off in more ways than you can imagine.
When in doubt, place the subject of the photo in the middle of the frame. The center of the lens glass is the sharpest area. So, regardless of the aperture you're going to use, the most important aspect of your photo will be to have as much physical clarity as possible. More detailed information about choosing lenses and finding the point of maximum sharpness is in the video course: DIGITAL SLR FOR BEGINNERS 2.0
How to Take Sharp Photos
Sharp photos are much more attractive. Imagine that when viewing the footage you see a lack of focus and blurriness in some photographs. But photos from a trip or a photo shoot with your friends cannot be returned. It's a shame? In this article I will offer several solutions, using which you will forget about blurry pictures.
Let's start with the reasons why the image may turn out blurry:
- Long shutter speeds can cause camera shake, resulting in a blurry image
- Poor focus on the subject
- The subject is moving, causing motion blur
- Not a very high-quality lens that is not capable of creating sharp photos
- Your ISO is set to a very high number (over 6400). This results in a lot of noise and loss of detail.
You can solve these problems if you remember each of them.
Taking sharp photos
Start by setting your "base" ISO to your lowest setting (usually 100). Remember that base ISO will produce the highest quality images with maximum sharpness. The higher the ISO (sensor sensitivity), the more noise you will see in the image. I suggest reading my article on understanding ISO.
There is a manual rule that states that the shutter speed should be equivalent to the focal length set on the lens. For example, if your lens zooms to 125 mm, then the shutter speed should be at least 1/125 of a second. If you have, for example, a 50mm prime lens, then the shutter speed should be at least 1/60 of a second. Keep in mind, if you have an entry-level crop DSLR (not full frame), then you need to do the appropriate math. For Nikon cameras the crop factor is 1.5x (just multiply your maximum lens focal length) by 1.5, while for Canon cameras multiply by 1.6x.
As I said, 99% of the time I shoot in aperture priority mode and set the aperture to its lowest setting when shooting in low light. In aperture priority mode, you specify the “F” number to the camera (for example f/3.5). The camera automatically measures and “understands” what the shutter speed should be to properly expose the image.
Don't forget to set the exposure metering mode (Matrix on Nikon or Evaluative on Canon). The camera will determine the correct shutter speed.
After you have completed the previous steps, point the camera at the subject and lightly press the shutter button (the camera will make a sound). At the bottom of the viewfinder you will see the shutter speed. If the shutter speed shows 1/100 or more, everything is fine. Take one or two frames and look at the result to see if there is any blur in the image. I usually view photos on the camera screen by zooming in on the image. When you get close, the blur is immediately visible. If the shutter speed is below 1/100, it means you simply don't have enough light. If you are indoors, open the windows and turn on the lights - this will help increase the shutter speed.
In case you still get blurry images, try to keep the camera still and try again. If that doesn't help, try increasing your ISO (but try not to go higher than 1600).
Taking sharp photos two
When shooting handheld, there is a direct correlation between shutter speed and blurry images. The lower the shutter speed (below 1/250 of a second), the higher the likelihood of taking photos that are not sharp. Why? Because factors such as your posture, breathing, and camera technique play a huge role in stabilizing the camera. Imagine that you are holding a gun in your hands: it is inconvenient for you to move and shoot at the same time. You need to stand as steady as possible with your weight distributed on both legs, rest the butt on your shoulder, exhale, and then shoot. The same technique is great for photography, especially when you have to deal with long exposures. I personally exhale when I shoot at slow shutter speeds, it helps me get sharper images.
Learn how to focus properly! You must be able to solve focusing problems. This is very important because the camera's focus directly affects the sharpness of the image. The first thing you need to know is how to differentiate between judder/blur and a focus issue. When a subject in a photo is soft or out of focus while something else in the foreground or background is in focus, it's a focusing problem. If the entire image is blurry and nothing is sharp, it's likely due to a slow shutter speed or poor camera holding technique. Here are some things I recommend to you:
- Insufficient light can cause autofocus to fail, causing the camera to not accurately capture focus.
- Make sure there is enough light for the camera to focus correctly.
- The camera's autofocus system works by looking at the contrast around the focus area. For example, you will never focus on a pure white wall because the camera will not see any areas of contrast. But if you have a white wall with a dark object on it, and you focus on the wall and the object, your camera will instantly set the correct focus. My recommendation is to place the rectangular focus area in the area of greatest contrast. Examples are: edges of objects, lines separating different colors, numbers and letters printed on objects, etc.
- Check several times until you can clearly see in the viewfinder that the subject is in focus. To do this you need to have a good viewfinder and good eyesight.
If you are photographing a person, ask them not to move while you take the photograph. When you work with long exposures, even if you do everything correctly, your images may still be blurry. This is because your subject moved while the shutter was open. This is called motion blur. Sometimes people like the motion blur effect, especially for high-speed objects like cars. To reproduce this effect, set your camera to shutter priority mode and set the shutter to 1/100 of a second or less. Ask your model to quickly move her hand without moving her body. Result: the person's body will be sharp, while the movement of his hand will be blurred.
Aperture also plays a big role in achieving optimal sharpness. For landscape photography, apertures between f/8 and f/10 are suitable, while for portraits, f/1.8 to f/8 is better, depending on what you want to do with the background. Most lenses are sharpest between f/5.6 and f/8. If you're photographing on a bright, sunny day, try increasing your aperture to between f/4 and f/8. But keep in mind that playing with the aperture changes the depth of field.
WHAT ELSE?
Clean your lenses! A dirty and greasy front lens element guarantees inaccurate camera focusing and poor image contrast.
Use a tripod for low light situations. For shots with lightning, fireworks, city lights and others, a tripod is a must!
Learn to take photographs and immerse yourself in the colorful and fascinating world of photography! And let your photos always be sharp
How to Take Sharp Photos When Photographing Children
One of the best things about children becomes one of the biggest challenges when photographing them. I…
One of the best things about children becomes one of the biggest challenges when photographing them. I mean their mobility. They are so full of life and energy that it is very difficult for them to sit still. Children's mobility increases the likelihood of getting a lot of blurry photos. So, when viewing the captured photographs, instead of joy and tenderness, you experience disappointment due to the fact that you have to delete a large number of photographs in which the features of faces, hair, details of clothing, etc. are blurred and irretrievably lost. This is a chronic problem when photographing children with smartphone cameras, but even when using more expensive DSLRs, no one is immune from it.
One solution to this problem is to use an on-camera flash, but it has many disadvantages - harsh shadows, insufficiently lit backgrounds, the possibility of red-eye, etc.
In order to get the photos you want when photographing children, it's important to know basic shutter speed information and know how to use some of your camera's controls and features.
Understanding shutter speed
The fundamental problem with blurry photos when photographing children usually lies in the shutter speed setting on your camera. Children move very quickly, so fast shutter speeds are required to get sharp photos. When you have enough light this isn't much of a problem, but as soon as the sun starts to set or you find yourself in a dimly lit room, your camera's shutter speed starts to increase so that the camera can get enough light to expose, and becomes too long to get sharp photos. fast moving children.
Unfortunately, simply shortening the shutter time is not always a solution to this problem, as this can result in underexposed images in low light conditions. This is why your camera often chooses to use flash when shooting in low light conditions in auto mode. This way, instead of slowing down the shutter speed, it simply creates its own artificial light.
If you're using a kit lens with a focal length between 18-55mm, then a shutter speed of around 1/90 sec will probably be enough to get sharp shots of moving children, although the exact value will depend on the specific focal length of your lens and how fast children are moving. For example, I generally don't use shutter speeds longer than 1/90 sec when photographing children with a 35mm lens.
So, below I will share with you some tips on how to take clear pictures of your children.
Tip 1: Increase ISO
There are three main ways to control the amount of light hitting the sensor:
-
- Aperture - By increasing the diameter of the aperture hole, you increase the amount of light passing through it.
-
- Shutter speed – the longer the shutter speed, the more light hits the camera sensor.
- ISO sensitivity – increases the sensitivity of the sensor to the light falling on it.
The first method is limited by the design of your lens. Most kit lenses simply do not physically have wide apertures that can allow a large amount of light to pass through, even in low light conditions.
The second method is easy to use if your subject is not moving. If you're shooting a static subject, the shutter can remain open for several seconds and the photo will still be sharp. But immobility and children are incompatible.
The third method - increasing ISO - until recently was an ineffective method, but the technologies used in modern cameras make it possible to increase ISO (within reasonable limits, of course) without significant loss of image quality. Modern camera sensors are so good that you can use fast shutter speeds just by increasing your ISO.
Shooting at ISO 3200 allowed me to get a reasonably sharp photo without using a flash.
Just a few years ago, most DSLR cameras couldn't boast high image quality at ISO 400, 800, or 1600. At these ISO values, photos came out quite noisy and grainy, as if they were covered in a thin layer of colored sand. Nowadays, even inexpensive amateur cameras like the Canon EOS 1200D or Nikon D3300 can shoot up to ISO 6400 without noticeable damage to the overall image quality.
Of course, at ISO 6400 the image will never be as clean and sharp as, for example, ISO 100 or 200, but ISO 6400 essentially allows your camera to capture 64 times more light than ISO 100 (or 6 stops more) . This means that an image that requires a shutter speed of 1/15 sec at ISO 100 could be shot at 1/1000 sec at ISO 6400 - very useful if your goal is to capture a sharp image.
This method cannot be used in Automatic mode. If you don't feel confident enough to shoot in Manual mode, try using Programmed Auto mode. By selecting P on the shooting mode dial, you can set the ISO value and the camera will automatically select the appropriate shutter speed and aperture.
Tip 2: Use a wide aperture
I mentioned above that using a wide aperture is one way to increase the amount of light reaching the camera sensor. And the best way to achieve this is to use a fix. These lenses can't zoom in or out—which most kit lenses can do—but they do have wide aperture apertures to let in plenty of light, even in low-light conditions.
Shooting at a wide aperture of f/1.8 allowed me to capture this baby's first steps. Using a flash could wash out the colors and also distract the child's attention.
If you don't have a prime lens, you can also use your lens' wide aperture, but you'll probably have to raise your ISO a little. Most kit lenses offer a wide aperture ranging from f/3.5 at the short end of the zoom to f/5.6 at the long end. It would seem that the difference is insignificant, but in fact it is not: the difference between f/5.6 and f/2.0 is three stops, that is, at f/5.6, 8 times less light reaches the sensor. To get a photo at f/5.6 that was nearly as sharp as the one above, I would have to shoot at either a shutter speed of 1/4 sec or ISO 6400.
If you're not comfortable working with different apertures, set your camera to Shutter Priority mode (S or Tv) in combination with ISO Auto. This will allow you to set the desired shutter speed, and the camera will automatically select the aperture and ISO values.
As I wrote earlier, when photographing children with my 35mm lens, I use a shutter speed no longer than 1/90 sec, and if they are running or jumping, I usually choose a shutter speed of 1/125 sec or 1/250 sec. The shutter speed you use will vary depending on the camera model and lens focal length, but when shooting in Shutter Priority and ISO Auto mode, the camera will typically default to the widest aperture available and then start raising the ISO to get a good exposure. In other words, you're telling the camera, "I want a fast shutter speed and no flash, so let's get that ISO and the widest aperture possible."
Of course, this technique doesn't always work, but you can try it to get clear pictures of your kids.
The only way to get a blur-free photo of this girl jumping on a trampoline was to use a wide aperture and a fast shutter speed.
This may seem a little counter-intuitive, but if you're shooting in Aperture Priority mode (A or Av), you can set the aperture to the widest possible setting, but the camera will typically increase the shutter speed to get a normal exposure.
In contrast, shooting in Shutter Priority mode will force the camera to use the widest possible aperture for the particular shutter speed selected (unless the scene is so lit that the camera decides to stop down a little to avoid overexposing the frame - but even then you will get a sharp image ).
Tip 3: Try to make optimal use of available lighting
One of the best light sources is available to each of us absolutely free and is located throughout the day in the sky above our heads. However, while the sun is certainly a good source of bright light, it is the least controllable. This means that to use it effectively, you must either position your models correctly or move around so that the light illuminates the model in the best possible way. When working with adults, this is quite easy, but children are a completely different matter; they rarely do what you want, and when they do, they can't stay in one position for too long.
If you prefer to take photos from the comfort of your couch, then you run the risk of getting quite a few blurry, fuzzy, too light or dark photos. But if you're willing to walk around the room, you'll not only get a better vantage point, but you'll also be able to find ways to make better use of the sunlight coming through your window.
In this photo, the sunlight was pouring in from the window on the right, so after finding a suitable spot, I decided to take advantage of so much light available.
This method works great even if you're not shooting with a DSLR camera.
On social networks, you can often see photos of children that are blurry because the shutter speed was too long to capture the movement, although there is plenty of light in the frame.
The trick is to figure out where to stand so that the baby is in front of you and the light source is behind you. This will help ensure that your subject (whether they are children, adults, animals, plants, or anything else) is properly lit and that you have enough light to use a fast shutter speed.
Once you start moving and learning to make best use of the available light instead of standing still and using flash, you'll start to get far fewer blurry photos, even if you're shooting with a digital point-and-shoot or smartphone camera.
Author and photo: Simon Ringsmouth
More useful information and news in our Telegram channel “Lessons and secrets of photography”. Subscribe!
How to Take Sharp Photos
Poor sharpness in a photograph is the most pronounced drawback of photographs. Blur is visible to the naked eye even to the most ordinary viewer, which means that public interest in such photographs is very low.
There are many reasons why photos become blurry. Let's look at the six main ones and learn how to take clear pictures.
Shevelenka.
Shakiness is the blurriness and smearing of a photograph that occurs due to the movement of the camera while releasing the shutter. It occurs due to pressing the button too hard or due to natural trembling of the hands. It has been noticed that movement most often appears at shutter speeds of 1/60 seconds or more.
In order to get a sharp shot, you need to reduce the shutter speed. For different focal lengths, different shutter speeds are acceptable, at which the movement does not appear. Calculating this shutter speed is very simple. The shutter speed should be set to 1/fr, where fr is the focal length. For example, if you shoot with a lens with a focal length of 200mm, then the shutter speed should be no more than 1/200 of a second.
The shutter speed calculated by the formula is not always suitable for shooting, and in this case only a tripod can help. When shooting from a tripod, you should take into account the strength of the wind, which can cause the structure to shake. To prevent movement, many tripods have a special hook. You can hang a bag or backpack on it. Additional weight will secure the tripod more firmly.
At a shutter speed of less than a second, even pressing a button or raising the mirror can affect the sharpness of the photo. To eliminate movement, you should use a self-timer or remote control. Some cameras have a mirror pre-raising feature.
The most important thing to remember is that while shooting you need to press the shutter button as smoothly as possible and set the shutter speed to the fastest possible speed.
Small depth of field
DOF (depth of field) is a very powerful visualization tool.
When shooting with a macro lens with a fully open aperture or long-focus optics, the depth of field in the pictures turns out to be small. This depth of field does not lead to blur.
Photographers most often focus on one point at a time. To do this, you need to press the shutter button halfway, focus on the subject, and then frame the frame as needed. The focus will remain on the subject, but there is one problem that may not be noticeable at first glance.
The focusing system is prone to errors, and the subject may move, causing the depth of field to shift. In this case, the frame will not be sharp.
To avoid problems, you need to choose the closest possible focus point to the subject.
When focusing, it is worth considering the fact that the physical size of the focus point is larger than what is displayed on the screen or in the camera viewfinder. On Nikon cameras, the displayed focus area almost corresponds to the actual size, while on Canon equipment, the visualization is significantly smaller than the actual size.
Optical error.
For any lens there is a certain aperture range in which the image will be of the highest quality. On average, the best quality images are obtained with an aperture of f:8 - f:13. The closer the aperture value gets to maximum open or closed, the lower the quality of the image will be.
Errors in the focusing system.
The camera may focus incorrectly. This is always worth remembering and following. To prevent problems like this, you need to know how the camera focuses.
Examples of situations in which autofocus can make a mistake.
1. Low contrast between the subject and the background. If the subject and background are the same color, it is difficult for autofocus to focus correctly.
2. There is more than one contrasting object in the autofocus area. For example, a person is standing behind a fence. The camera may focus on the fence, making the person's image blurry.
3. The repeating pattern fills most of the frame. For example, a large number of skyscraper windows that go into the distance will lose contrast.
4. Sharp, contrasting transitions in the focusing area. Example - the subject is half in the shadow.
5. If the subject is smaller than the focus area. When shooting objects from a distance, it blends into the background. The focusing system will not distinguish it.
6. The subject is a lot of small elements. An example would be a flower field or any other objects that are small in size and not bright.
Back and front focus.
Focus errors include back and front focus. Front focus characterizes the focus shift towards the photographer. If, for example, you are focusing on the model's eyes, but in the photo the focus is on her chest - this is front focus. Back focus appears in reverse. It moves further away from the intended focus. This problem can be solved by having the lens adjusted by specialists.
Many people, when purchasing a lens, try to check it for back and front focus. They use a ruler to do this, but this is wrong. The ruler size is small, and the actual size of the focus area is larger than what appears in the viewfinder and display. An error when checking focus using a ruler is quite normal and is not a drawback.
The correct check for back and front focus is best done using paper with several lines drawn on it, which are drawn at a distance of 2-3 cm.
Objects in motion
Everything is natural here. The faster the object moves, the shorter the shutter speed should be. Experience shows that for shooting static objects the optimal shutter speed is 1/60 of a second, for slow-moving objects - 1/250 of a second, for shooting sports competitions and fast-moving objects, a shutter speed of no longer than 1/500 of a second is used.
At a fast shutter speed, objects in the frame appear frozen and clear. Long shutter speeds are good for night photography or shooting while shooting.
Camera settings
Often photographers shoot in JPG format, although RAW is preferable. JPG is a compressed and processed file. The processing is performed by the camera processor. JPG images are sharpened by software, while RAW is a raw file. This is why RAW looks more blurry than JPG, but it can be processed more flexibly using RAW converters and other image editors.
Conclusion
The article described the six most common mistakes that lead to unsharp images. Most often, photographs suffer from movement or incorrect depth of field. By learning all the nuances of proper photography and camera settings, you can easily learn how to take clear and sharp pictures. The main thing in this matter is practice and self-analysis.