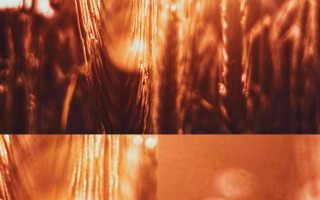
Glare when shooting in the sun
Why does glare appear in photographs and how to avoid it?
How often, when you come home after a long shoot and look at the photographs taken, do you realize that half of the material will go to the trash bin because they were exposed to unwanted glare or highlights? Yes, these kinds of defects in a photograph can be turned into an artistic effect. But what to do when you didn’t plan to photograph glare and they shouldn’t be in the photo?
Now we’ll talk about what these “flares” actually are, how they arise and how to make them appear in your pictures.
What are glares?
Flare is an optical defect that occurs when light that is not related to image formation enters the optical circuit of the lens and reaches the camera sensor. In photographs they appear as circles or polygons, the number of sides of which depends on the number of aperture blades in the lens. These defects can significantly reduce the overall contrast and sharpness of the photo. Glare occurs due to the optical characteristics of lenses. Light that hits the matrix from outside the image first passes through the optical circuit of the lens. There it is arbitrarily reflected from the elements of the circuit. These reflections inside the lens appear in photographs as flares.
How to avoid glare?
1. Do not take pictures against a light source
The easiest way to avoid glare in your photos is to simply turn your camera away from the light source. Yes, sometimes it is not possible to completely change the composition of the frame. But even a slight rotation of the camera can be enough to eliminate glare. In this case, the plot and composition of the frame will be preserved.
2. Use a lens hood
A lens hood is another effective method in combating stray glare and flare. Due to its elongated shape, the hood protrudes beyond the edges of the lens and prevents side light from entering the lens. Moreover, if you are lucky enough to have not a cheap Chinese piece of plastic, but an expensive and high-quality lens hood, then its inner surface will be made of light-absorbing material. It will prevent light from reflecting off the inner walls of the hood. More details about other functions of blends are written in this article.
3. Get a different lens
Choosing the right lens will help reduce the amount of glare in your photo. If before shooting you understand that you cannot avoid getting a light source into the camera lens, or you deliberately want to photograph against the sun, for example, it is best to opt for fixed lenses. Since their optical design consists of fewer elements compared to zoom lenses, light will be reflected less times in the lens itself and, as a result, there will be less circular flare in the pictures.
4. Put on a polarizing filter
Often, glare in photographs may appear not from a direct light source entering the frame, but from its reflection in different surfaces. A polarizing filter can help solve this problem by completely or partially removing glare and reflections from non-metallic surfaces such as water or glass. But the polarizer performs not only this function. You can learn more about its capabilities by following this link.
5. Lower exposure
This method will not completely eliminate flare and highlights, but you can significantly reduce their size simply by lowering the exposure. An underexposed photo can be easily corrected in any photo editor, but you will definitely not have overexposure. But smaller highlights in the photo will be easier to remove in Photoshop.
What should I say at the end?
Although glare and flare do not have the best effect on a photograph (the contrast and sharpness of the image are greatly reduced), they can still be used as a creative effect. The flare in the photo fills the photo with a lot of sunlight, this allows you to convey the atmosphere of warmth and summer. I really love adding sun glare to my photos. And if I can’t catch it while shooting, I often enhance this effect during post-processing.
How to get rid of glare in photos
One of the most annoying problems in photography can be unsightly glare that appears at the most inopportune moments. They are known to occur when a light source hits a reflective surface. This can be seen in any image: from glare on glasses when shooting portraits to reflections on the surface of a body of water. Don't forget about the windows, glare appears on them, even if you try to take a picture through a car window!
Regardless of why flare occurs, unintentional glare can ruin even the best images. Luckily, there are a few different ways to work around, reduce, and even completely eliminate unwanted bugs to make your photos a little less messy. Well, in general, not so bright!
We have translated for you an article in which photographer Christina Harman shares several tips for reducing glare when photographing.
Filter the light
If harsh sunlight causes glare in portraits or close-ups, consider diffusing the lighting. If you take a diffuser with you, you can gently filter out some of the harsh sunlight. You can use a reflector or even fill flash to “bounce” some of the light back onto your subjects, helping fill in dark shadows.
Reflect the light
If you're shooting with flash or some kind of external light source, bouncing the light off another surface (rather than the subject itself) can help reduce glare. When using a built-in flash, when it is impossible to rotate it in a direction other than the standard one, you need to use simple reflectors and diffusers for on-camera flashes. This is necessary to make the lighting softer and more attractive.
Change positions
If you notice glare while photographing a specific subject, try simply changing your position first. By moving slightly and placing the sun behind your shoulder, you can certainly reduce the glare in the frame. You can also try to move the object itself, protecting it from the sun or other light source.
If glasses are an issue, encourage your subject to tilt their head away from the light source to reduce the chance of reflections from the glasses.
Consider a different shooting time
If it's natural light and changing the position doesn't work, you can come back later when the lighting improves. For example, the height of a bright sunny day is a time that is replete with glare and reflections. Instead, wait until the sun is slightly lower in the sky for optimal lighting that is much easier to work with. Also remember that clouds are your best friend when it comes to lighting, they will help diffuse the light so that the chance of glare is minimized.
Use a polarizer
A polarizing filter is guaranteed to reduce reflections and glare, and produce brighter, more saturated colors in your photos. If you want to remove glare from water, leaves, rocks, or even a store window, try putting on a polarizer and rotating it until the glare disappears.
If you are photographing a sunset, then it is good to use a gradient filter. With it, you can get rid of glare and preserve bright colors, such as the sky.
Use a lens hood
A lens hood can be a good way to reduce one type of glare. This is lens flare. These simple yet reliable fixtures are specifically designed to eliminate sun spots while still letting in plenty of light. Having a lens hood saves the photographer from many problems in photography.
Compose an image from several
An alternative when dealing with unnecessary light in the frame is to take two images with different exposures and combine them together in post-processing.
Expose one image for the highlighted areas and another for the rest of the scene. Use a tripod to ensure you get shots from the same point of view.
Remove glare in a photo editor
As a last resort, you can eliminate the glare in post-processing. Of course, it is impossible to do this if the glare covers the subject’s face or a key area of the image, but when the highlights are shifted and located to the side, it becomes possible to painlessly remove them using the restoration and cloning tools in the photo editor.
Just accept it
If you can’t fix the problem, play around with it in your composition. Sometimes "fun bunnies" can add an unexpected artistic twist. Just make sure that the highlights you include in your photo are intentional and used to enhance the overall composition.
While flare can be an issue, learning how to work around and eliminate it will help ensure that you don't miss out on capturing the shot you want simply because you have problematic lighting in a scene.
Take these tips into consideration and then be patient. You will be pleased with the result!
Photogora video channel
Do you know how to properly photograph against the sun to get a good photo?
Hello readers! With you again, Timur Mustaev. If you compare shooting with a DSLR camera indoors and a photo shoot outdoors on an ordinary sunny day, these are completely different things. In the first case, there is often not enough light, this is a problem. In the second, there are no difficulties in terms of the same ISO and searching for options where to get a little more light. Here is just: what to do, where to remove all these rays!
Therefore, on the agenda is the solution to the question of how to use the bright sun for the benefit of your photographs and, most importantly, how to photograph against the sun.
One on one: photographer against the sun
It’s not hard to guess what kind of picture it might look like when there’s a bright light behind the object being photographed. The sun can be called its most intense representative. This is one of a series of sad discrepancies called “what I see and what my camera sees.” The camera cannot display such contrasts.
As a result, the photos look so dark that you can’t make out anything, or so light that it dazzles your eyes. What would you like best? What about the client? If you do not know the specifics of this type of lighting and are inept in handling equipment, the sun will turn out to be your worst enemy.
You've probably heard from photographers or while studying the basics of photography on your own that you should never take pictures when the sun is in front of the lens.
Firstly, it spoils the optics, and secondly, which is already clear, photographs in principle cannot be obtained. I hasten to please you - there is a significant “but” in these arguments. Photography, like any field of knowledge, has its exceptions. Shooting against the sun is one of them.
Using light from the side or back is standard and provides many opportunities for a well-exposed shot, but unfortunately can be technically boring. Our topic is much more interesting. You just need to understand what you can do and what you can’t do.
Recommended Rules
So, the rules for organizing the filming process:
- Camera settings . I recommend shooting in manual mode, where you can perfectly line up all the parameters and get a great result, or aperture priority, since f is extremely important here. Bright lighting predetermines the need to cover the aperture: start with 8-9, but do not get carried away with high values, which generate more distortion. Immediately select the Raw format. It saves the situation in many cases. Not only does post-processing have a chance to “pull out” such a Raw image, but you can also create a high-quality HDR image.
- Shadow . If the conditions are such that you need to get an acceptable quality photo of a person or a certain object, and the sun is right in front of you, then find a shady place - there will clearly be a better chance of getting a good shot. But this item is suitable only for those who do not have the goal of playing with the sun in the photo. It acts more as a disturbing factor than as an important part of the future picture.
- Tools at hand . You can easily use an object, such as a piece of paper or your hand, to block the direct sunlight and protect the camera and the image itself. In this case, it is useful to have a lens hood. I can’t say that it significantly blocks the penetration of intense rays into the lens, but it is better to use it on a sunny day. In addition, hoods come in different varieties - both with short and more protruding edges.
- Special technical accessories . The same reflectors that can be purchased in technical stores will perform the necessary role and remove and redirect excess light. They do their job very well and are relatively inexpensive.
- Flash . I think that at first many people, if they saw a photographer taking pictures of someone with a flash on a clear day, would have a good laugh at him. But as it turns out, it was in vain. Most likely, such a specialist already understands the topic of our article and works competently with lighting. The flash will compensate for the hard shadows of the subject and highlight them. Of course, you can turn on an on-camera flash, but the best option here and in most cases will be to buy a good external flash. It is advisable to use a flash diffuser.
- Using a filter . Typically a neutral gray filter is used to soften the sun's rays. A polarizing filter will also be very useful if there is a reflection in the frame, such as water!
Nature in the frame
It turns out that shooting with a DSLR camera directly in front of the sun is half the trouble. Real problems await you if you suddenly want to capture the sun in the frame! And, most likely, you will want to do this at sunset and dawn, when the sun is at its most beautiful. This is a magical clock for nature photography, also called the golden hour.
There will probably be fewer difficulties here, since the brightness will be lower, but it is still logical to apply the techniques outlined above: increase the aperture value, block the sun, that is, partially hide it behind some object (tree, building, etc.), shoot in high resolution and be sure to use an external flash if you want the person to be visible against the sun and not be a black silhouette.
It would also be appropriate to use light filters, for example, neutral gray. They are often used by landscape painters. By lowering the exposure, they draw more detail in the brightest areas.
I love shooting at sunset. Even with my best efforts, various shortcomings arise. A common phenomenon when a luminary is included in the frame is stripes around it, blurred outlines. To make the sun look even in the frame, everything has to be carefully edited in Photoshop.
Oddly enough, there will be more problems with a DSLR than with a film camera, which is capable of capturing the solar disk as a soft transition of the entire range of light. The matrix will not be able to provide this, and half of the lights will be “knocked out”. It will be necessary to choose either in favor of what is in the shadows, or the information that remains illuminated. As an option, you can consider lightening or darkening individual parts of the image.
Parting words for photographers
When you deliberately plan to take pictures against the sun or even with its presence in the photo, then, most likely, you set special shooting goals for yourself. You don’t just want to get a bright shot of a landscape or object, you want to add a lot of light, sunshine, joy or romance, novelty and originality to the image. The tasks may vary.
What I want to say is, don’t expect your photos to be perfect. You yourself understand that this is somewhat stressful for the camera. Appearing glare, sharp contrasts, over- or underexposure, etc. are rather a gift, and you can use them to your advantage. They will add charm to the image!
That's all for me. But before we say goodbye to you, I want to recommend good video courses that will help you understand your SLR camera and teach you how to properly process photos:
- Digital SLR for a beginner 2.0 (if you have NIKON) or My first SLR (if you have CANON) - a course that will help you use your SLR camera correctly. Will reveal all the subtleties. He will teach you many tricks and guide you on the right path. A great video course, especially for beginner photographers who really want to get the most out of their camera.
- Lightroom is an indispensable tool for the modern photographer - fast post-processing and grouping of your photos. An excellent tool for processing RAW files. A wonderful program and a very intelligent, easy and useful video course.
- Photoshop from scratch in VIP 3.0 video format. If you are a complete beginner as a photographer and don’t understand Photoshop at all, and believe me, any photo is processed, this is a pattern. This course will simply not replace you. Once you become familiar with the basic functionality of Photoshop, you simply won’t want to part with it.
- Photoshop for the photographer 3.0. VIP. The last course is intended specifically for photographers to work in Photoshop. Correct processing, retouching, all possible elimination of defects in photographs, and so on. Everything is shown with examples and everything is clear if you have the basics of Photoshop. Listen, if you really want to get into photography, then everything in this course is something you must know if you want to become a professional!
Happy everyone! Come back to my blog again! Always glad to see you. Subscribe to the blog, share the article with your friends.
How to take photos against the sun and get great photos
Surely, when you took your first steps in photography, you were taught to hold the sun behind you so that it, as the main source of light, fully illuminates your subject. When shooting in the sun, you will most likely have some problems, such as a faded sky and a poorly lit main subject. In general, the location of the sun is not good at first glance. But when you learn how to use light correctly, you'll realize that when the sun is in front of you, you can take great photos. In this photography tutorial, you'll learn all about the techniques you need to create stunning shots when shooting against the sun.
This photo was taken facing the sun shortly after sunrise. The sun also illuminates the grass with a glow from the glare.
Glare effect
Unless you are photographing a sunset or sunrise, you should avoid pointing your camera directly at the sun. Try to compose the shot so that the sun is behind the frame.
Following this rule will result in two effects: you will see that your entire frame has a "glow" from the sun's rays, or very likely you will also see an arc of light that passes through your frame. Both of these effects can be used to your advantage to create a more artistic looking photo. If you want to avoid this, use a lens hood. You can also try holding your palm over the lens to prevent sunlight from entering the lens.
There is a glow in this image caused by glare. You can see it coming into frame in the top left corner.
Effect of diffraction of solar rays
The effect of solar diffraction is technically another aspect of lens flare. This is a more desirable and beautiful effect, and you have more control over how it occurs.
To achieve the effect of diffraction of sunlight:
1. Compose the frame so that the sun hits it, but partly is behind the obstacle. The time of day is not as important, but it is easier to control this effect during the golden hour and at sunset or sunrise.
2. It is necessary to hide most of the sun and leave only a small part of it in the frame. If you make it too small, the effect of diffraction of sunlight will not be noticeable. If you leave too much sun it will brighten your frame. Placing the sun behind the leaves of the tree is the ideal solution here.
3. This effect is caused by the aperture of your lens. The amount of sunlight exposure is determined by the number of aperture blades on your lens. Each petal will have 2 rays.
4. The effect itself occurs when you close the lens aperture to a narrow value. The f/11 values will give us just such an effect.
5. Photographing against the sun often leads to the fact that instead of the main subject, only its silhouette appears, and its details will fall into the shadows. If you want to bring out the details of your subject, you will have to make exposure compensation to overexpose the photo. Exposure compensation plus can be +2 or +3 steps.
6. With a narrow aperture and plus exposure compensation, the shutter speed can be long. Therefore, either use a tripod or compensate for this slow shutter speed by increasing your ISO.
Closing the aperture allowed the sun to appear in this photo as a solar diffraction effect.
Shooting silhouettes
Silhouettes are not only the cost of shooting against the sun, but also the subject itself. When you photograph in the sun, you always have a good chance of creating silhouettes. Getting the best silhouettes requires a little preparation. You need to plan your shoot and choose the best angle to shoot.
1. The first step is to decide what object you will be silhouetted. Is it a person or an architectural structure? Perhaps it is a lonely tree in a field.
2. In what direction will you photograph this object? When should you arrive at your location in the morning or evening so that the sun is behind the subject when you photograph it?
3. If you're shooting a subject's silhouette against just the sky, you'll often need to kneel down and shoot from a low point. Shooting from a low point, most of your subject will appear as a silhouette, since most of it will be against the sky. As a rule, where the horizon line intersects the silhouette, or rather below these lines, the object will not be visible as a silhouette and will merge with the background, which is why it is more advisable to shoot from a lower point.
4. Look at the position of the sun in the sky. Is it too bright and the light from it is too intense? Can you hide the sun behind an object? Is it possible to create the effect of diffraction of sunlight behind a silhouette?
It was the perfect place to get a silhouette. The man is silhouetted against the sky and the reflective surface of the water.
Sunsets and sunrises
Sunsets and sunrises are one of the most popular scenes for shooting for almost every photographer. This time of day fascinates photographers of all levels, and you definitely don't even have to be a photographer to appreciate these colors in the sky. This time of day is also the best time to photograph against the sun. Especially when it's close to the horizon, so the sun doesn't overload the photo with too much light.
So what should you look for to get the best results?
Know the point of sunset and sunrise - the sun changes position in the sky in winter and summer. Use resources like SUNCALC to find out exactly where the sun will set and rise on your desired date in your chosen location.
Check the weather - cloudy days will not allow you to photograph the sunset or sunrise properly. Always check the forecast and try to choose optimal conditions. Also, don’t look for a completely clear day; 30-50% cloud cover is what you need. The sky is more beautiful when the rays of the rising or setting sun reflect off the clouds
Know the location – Knowing a great spot to shoot on a good sunrise day is a good thing. Knowing exactly where the best shooting point is is even better.
Focal Point - Unless the sky is truly epic for your sunset or sunrise, you'll need a focal point to bring interest to the photo. A lone tree or structure often makes a great subject. Likewise, a river that has a reflective surface and perhaps provides a guide line will also work well.
Filters – For landscape photography, when you are photographing in the sun, gradient neutral density filters are often needed. Be careful not to let the sun create unattractive or unwanted glare when using them.
Post Processing – Post processing can enhance your images. Using techniques such as stitching together multiple frames taken at different settings and applying gradient filters can improve your photos.
Sunset and sunrise are always captivating to take photos with the sun in the background.
Equipment
There are several useful accessories that you should have when taking photos against the sun. Depending on the type of photography you're shooting, you'll need either any or all of this list:
A lens hood is essential to minimize or eliminate the effects of flare in your photos.
Filters – Using a polarizing filter is a good idea for landscape photography in general. Photographing against the sun means that using neutral density gradient filters is also a good idea.
Flash. If you want to backlight a person or object when photographing against the sun, you need to use a flash. Without it, you will have silhouettes of people or objects. If you want to avoid this, you will need additional light.
Reflector - Can be used to reflect and direct sunlight onto the person or object you are photographing. They are more commonly used for portraits and can be used on their own or in combination with flash.
In this photo, an external flash was used to illuminate the couple.
Digital mixing
Digital blending is a post-processing technique that uses luminance masks to control the light in your photo. This method can lead to improved quality of landscape photos taken against the sun. This is a big topic, described in more detail HERE
To get the best results from this technique, you'll need a tripod and exposure bracketing (taking three or more photos at different exposures from the same spot). Next, you'll need to take the time to learn luminosity masks so you can get natural, professional results.
This shot used digital blending using luminance masks. The rocks in the foreground were lightened and the sky darkened.
Conclusion
For a photographer, the sun is the main source of light. Knowing how best to use it is vital to getting good pictures. In this article, you learned how to photograph against the sun, which is more interesting and creative than shooting with the sun behind you.
Do you like photographing against the sun? What techniques and ideas do you use in your photography? Do you have any sample photos you can share with our readers? Write your comments and attach your pictures!
Beautiful highlights when shooting in the sun
Why you should shoot in the sun
Spring and summer are a great time to be outdoors and take advantage of the sunshine, and shooting in the sun is a really creative way to capture those experiences. Shooting in the sun creates flare on the lens, but instead of dismissing your photos as bad, you can learn to use this effect creatively and get some pretty impressive results.
How to Avoid Silhouettes
Silhouettes are fun, sure, but not what we want to get out of shooting in the sun. To really get the most out of the setting, you want to avoid this and pay more attention to your model's even skin tone. Silhouettes are caused by the camera trying to show everything in the photo, not just your subject, and, having calculated that there will be too much sun and sky in the photo, it gives you an exposure that produces a silhouette.
To avoid silhouettes in your photos, you need to change your metering mode to “spot.” Spot metering means that your camera will expose for what's in focus and then the rest of the image. This will likely cause the background to be overexposed, but this is part of the effect of shooting in the sun. Take a look at the two images below: the first was taken in partial metering mode and represents a silhouette, while the second was shot in spot mode, which allowed the model to be exposed much more evenly.
Another great way to avoid silhouette effects is to use an external flash. Now some people will find this idea quite strange, but this is actually one of the best cases to use it. I personally used a transmitter to send a signal to a flash a few feet away. This produces a much more natural effect while still retaining some of the natural shadows on the face. Take a look:
Focusing
When shooting against the sun, your camera will have difficulty focusing on the subject, even if you manually select focus points in the camera settings. I recommend using focus lock, pointing the camera at your subject with the sun hidden behind it, easily using autofocus, locking it, and then moving on to how you want to compose the shot. Be careful when shooting wide open as the depth of field will be very shallow and the slightest movement will cause it to go out of focus.
In fact, I even like it when the subject is slightly out of focus, I find it complements the effect. Experiment and see how it can work for you.
Time and place
Think about what time of year it is and how this might relate to your photography: spring flowers, autumn leaves? In my photo series, the beautiful rapeseed flowers really enhanced the colors of the photo. Try to find somewhere more interesting than your front garden. Timing is one of the most important aspects of the photo you want to take, as it determines how high the sun is in the sky. Ideally, you should position the sun close to the subject's head to get a really good shot, this will make it easier to play with it and your main subject.
Depth of field
Depth of field is a great way to add another interesting element to your photos. Here are two photos as an example, the first was shot at F/4, and there is too much rapeseed in focus with quite a bit of contrast. Compare this to my second photo, which I shot at F/1.4, and you'll see that on the left, the plant models are in focus, but behind the path, everything that's there fades into evenly blurred bokeh. This is a really nice touch and this photo ended up being one of my favorite photos in the series.
Working with the environment
Now that you know how to take a photo, it's great to try and experiment a little by playing with your surroundings. Look for things that the sun can penetrate and make the model move so that you can interact with them. This is a really great way to practice basic composition in your photos and improve them greatly. Both of these shots were taken at ISO 250, F/4.5, at 1/250 shutter speed.
Landscape with the sun in the frame. Practical advice
Nikon D810 / Nikon AF-S 18-35mm f/3.5-4.5G ED Nikkor
Agree, when shooting a landscape, sometimes you just want to include the sun in the frame and complement the composition with it. However, in practice, instead of the sun, there is often just an overexposed spot in the frame. In this article we will give some practical tips on this topic.
Nikon D810 / Nikon AF-S 18-35mm f/3.5-4.5G ED Nikkor
Instead of the sun in the sky, a large white spot appeared in the frame, devoid of details - overexposure. This is a technical error by the photographer.
Learn what a camera's dynamic range is: how to work with it and how to expand it. After all, expanding the dynamic range will be very useful when shooting a “sunny” landscape.
Don't be afraid to take the sun into your frame! Many novice photographers are afraid to take a luminary into the frame: supposedly, they can burn the camera matrix. It is a myth. Regular shooting against the sun will not affect the sensor in any way. The only danger can be when shooting with super-telephoto lenses (with a focal length of more than 400 mm), and even then not for the matrix, but for the photographer’s eyes when shooting the sun through an optical viewfinder. When working with such optics, they use ND filters and try not to frame the frame through the optical viewfinder, giving preference to the Live View mode. You can take pictures without fear with regular regular and wide-angle lenses (which are usually used to shoot landscapes).
Proper photo exposure is the first step to success. Choose an exposure that will preserve the maximum amount of detail in the frame. The Live View screen with exposure simulation will help with this: on it you will see a picture of the brightness that will ultimately appear in the photo. This mode is available on all modern Nikon SLR cameras. To save detail in the highlights (including the sun), try making the frame a little darker than necessary. This is especially true when shooting in RAW - when further processing the image in this format, you can easily lighten dark areas if necessary.
Take photos in RAW! This format will help preserve as much detail as possible in the light and dark areas of the frame. In addition, it is very flexible in processing, so you can further improve the image at home on your computer. By shooting in RAW on your computer, you can both create realistic HDR images with wide dynamic range, and expand the dynamic range using the Active D-Lighting feature found in Nikon's native converters.
If you shoot in JPEG, you can take advantage of the HDR and Active D-Lighting stitching features right on your camera. Active D-Lighting is available in all Nikon cameras, and HDR is available in all models except the most affordable ones (Nikon D3200, Nikon D3300).
Selecting HDR and Active D-Lighting functions in the Nikon D810 camera menu
The higher the sun, the brighter it is! To make it less overexposed, let it go lower. Let it hang right above the horizon! Also, the brightness of the sun can reduce the presence of fog and haze in the air.
Nikon D810 / Nikon AF-S 18-35mm f/3.5-4.5G ED Nikkor
Some lenses allow you to get such rays around the sun when shooting at closed apertures.
Protect yourself from glare! Glare, “sunbeams” often appear when shooting against the sun. They can lead to a drop in contrast and detail in the photo. When it comes to flare, everyone immediately thinks of a lens hood. But it can only help partially. A hood is a visor, like a cap. Do you remember whether the visor of your cap protects your eyes from the sun’s rays? Will it save you if you look directly at the sun? Hardly. By the way, if you don’t have a hood, you can easily replace it with your hand or, say, a sheet of cardboard, simply placing them in the direction in which the “glare” rays fall on the lens (the desired position can be set experimentally). Different lenses have different resistance to backlight (when shooting against the sun).
In fact, the strength of the glare will largely depend on the design and manufacturing technology of the lens. Nikon has created a special nanocrystalline coating, Nano Crystal Coat, designed to minimize glare in photos. So lenses with this coating can be fully recommended for shooting against the open sun.
Lenses equipped with Nano Crystal Coat have an “N” symbol on the lens body. For example, like this Nikon AF-S 16-35mm f/4G ED VR Nikkor lens.
Nikon AF-S NIKKOR 24-120MM F/4G ED VR lens and lens hood.
However, many modern lenses that are not equipped with such a coating also do an excellent job of this job. For example, the pictures in this article were taken with a Nikon AF-S 18-35mm f/3.5-4.5G ED Nikkor lens, which has minimal glare.
Nikon D810 / Nikon AF-S 18-35mm f/3.5-4.5G ED Nikkor
The sun in the frame can make your photo much more expressive. And the evening or dawn sun also provides stunningly beautiful lighting. Go for it, and you will succeed - don’t let technical nuances come between you and beautiful photographs!
Beautiful highlights when shooting in the sun
Why you should take photos in the sun
Summer and spring are the best times to spend it outdoors. And using the light of the sun, shooting becomes quite creative and will help preserve all the impressions. When photographing in the sun, glare appears on the lens lenses, which should not be taken as a defect in the photo, but rather, learn to use them creatively and do wonderful work.
How to avoid silhouettes
Silhouettes themselves are very beautiful, but not what we now want to get from photographing in the sun. To get the most out of the setting, you should avoid this, and also pay attention to the model’s skin tone. In images, silhouettes are obtained as a result of the fact that the camera tries to process everything together, and not specifically the model, and, considering that there is quite a lot of sky and sun in the photo, it gives the exposure.
To prevent silhouettes in your photo, change the exposure metering mode to a suitable “spot” one .
“Spot” metering means that the camera will set the exposure according to the model, that is, according to the focus point, and after that it will start according to everything that remains in the field of the image.
Here, of course, there is some effect of photographing in the sun, but this may also result in overexposure of the background. Another thing that can help get rid of the silhouette effect is using an external flash. This may seem strange to many, but this is actually the best way to use it. To get an even more natural effect and at the same time preserve some natural shadows on the model’s face, a transmitter for transmitting signals to the flash, which is located several meters to the side, will help.
Focusing
When shooting against the sun, it will be very difficult for your camera to focus on the desired subject, even when manually selecting focus points. It's a good idea to use focus lock while pointing your camera at your subject or subject with the sun hidden behind. With this method it is easy to use autofocus, as well as lock it and move on to composing the frame. Don't lose focus when you're shooting wide open, because the depth of field will be minimal and the smallest movements can throw you out of focus. However, sometimes going out of focus has additional effects.
Place and time
The time of year also has a relationship with photography. Look for places more interesting than your own front garden. The most important component of the frame is time, because it can convey how high the sun is in the sky. It will be ideal if you manage to position the sun close to the model's head.
Depth of Field
Another interesting element to add to your photos is depth of field. As an example, it wouldn't hurt to look at these photos. The first was taken at F/4, and there is quite a lot of rapeseed in focus with very little contrast. The second photo was taken at F/1.4, here you can see that the plants (to the left of the model) are in focus, and all the others, behind the path, have turned into uniformly blurred bokeh.
Working with the environment
Already having knowledge of how to take a beautiful photo, you can try to experiment a little. Find things that the sun can easily penetrate through, and also ask the model to move in such a way that you can play with them.