Comparing RAW converters
Comparing RAW converters
Each photographer can choose the most suitable RAW converter for himself, but which one is better? Which one is more convenient to work in? Which one gives the best processing results?
The following converters will participate in the comparative tests: Lightroom 4.1 build 829322 (LR), Capture One Pro 6.4.1 build 57301 (C1), DxO Optics Pro 7.2 build 104 (DxO), Capture NX 2.3.2 (NX), Bible PRO 5.2. 1 (Bible), Raw Photo Processor 4.6.0 build 1584 (RPP). For the test, RAW files of the PhaseOne P25+, PhaseOne P30+, Nikon D3X, Nikon D800, Nikon D700 systems will be used.
All processing was carried out using standard filters and modules.
The first test image shows a factory and the Moscow River. Nikon D800 camera.
Lightroom made the photo too blue. Although, of course, the picture was actually blue, because it was a clear sunny day outside, and the sky was well reflected in the water. So LR isn't lying. It conveys a realistic look, although it would be more pleasing to the eye to see less blue. NX2 also gave a blue tint, but in addition the red building turned out to be insufficiently contrasting and overexposed. RPP made the color look good enough, but the overall contrast of the photo was lacking. In terms of color correction, C1 became the leader. The elaboration of shadows, colors and overall contrast is excellent. There is a slight blue shift in some places, but it's almost unnoticeable.
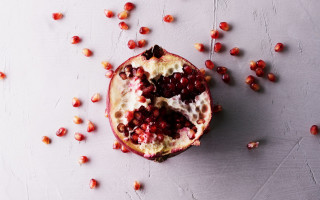
The next shot of the girl was taken on a PhaseOne P25+. This digital back model is only supported by C1, LR and RPP. None of them showed a decent result. C1 and RPP gave too blue a shadow, and LR gave a “pink face”. If we do not take into account the shadows, then we can say that C1 gave the most pleasant skin color.
The next photo is from the same camera. Here all the converters performed very well. Upon closer examination, you can notice a yellowish tint on the leaves in LR. In C1, the green color of the leaves and the detail of the image are high, but in RPP the green is more realistic, so in this case it takes precedence.
The next photo was also taken with a digital back, but this time it's a P30+. A color target (X-Rite Color CheckerPassport) was used for this shoot. In LR, the color profile was built using it. RPP showed very good detail and micro-contrast, but the overall picture was not very good. Learned too dry colors. LR gave a lot of red and weak contrast. C1 produced the highest quality results. C1 is a native converter for digital backs, so it gives the highest quality results in all aspects.
Another shot from the P30+. RPP, as in the previous test, showed excellent contrast at all levels, but the colors were again dry. LR and C1 have a nice color that is as close to real colors as possible. The C1 produced better contrast, so it has another win, although judging by the color rendition. then LR showed a better result.
And once again P30+. RPP again repeats its mistakes with color, but gives good micro-contrast. In terms of color quality and micro-contrast, C1 wins again, LR is again in second place.
More photos from the P30+. All converters showed radically different results. It’s difficult to give ratings, so you just have to compare how differently the converters render colors.
And the last shot from the P30+. Immediately noticeable are the spots of different colors on the hair after RPP treatment. LR gave a slightly yellowish tint to the face. C1 showed good results.
Now let’s look at a picture taken with a 700 camera. The photo was taken in difficult conditions for color rendering. On one part of the frame one can see a cloudy sky, and on the other there are fluorescent lamps and the light from them. In addition, multi-colored walls add additional difficulty. DxO and NX2 gave very poor results, so these converters are no longer needed. RPP also screwed up. The color turned out dirty. C1 gave a good, but slightly oversaturated result. Bible, which is not that famous, showed a very decent result, but LR still won.
Now let's move on to the pictures taken with the D3x. These shots were taken in the studio using constant light sources. We immediately reject the dead colors of the DxO and RPP converters and the yellowish shades of LR. The native NX2 converter demonstrated a lack of detail and greening of the picture. Between Bible and C1, the winner is C1, although its performance is not very good. The C1 showed the most realistic picture, although the Bible showed excellent blacks.
The following photo was taken using pulsed light sources. DxO did a terrible job of converting the image. Bible gave a purple tint to the hand. In RPP, the photo became very dark, resulting in very high contrast. LR came out with a neutral version. Out of NX2 and C1, the winner was C1 as NX2 gave a yellowish tint to the face.
Another shot taken with the D3x. DxO and RPP converters are immediately out of the race. LR again shows a neutral result. NX2 again has a strange tint on its face. This time it's green. Bible this time demonstrated the most natural colors. C1 made the face slightly overexposed.
Now let's work with the material shot on the D800. The native converter produced a very good picture, very similar to HDR. RPP did a good job of detailing the clouds, although the image came out with low contrast. LR is somewhat similar to the output of a native converter. C1 showed the most realistic picture without oversaturation of colors. This is definitely the best option.
Here's what we can say in conclusion:
- DxO is just terrible. All its modules cannot save it.
- NX2 is not stable. He takes very good and very bad pictures. It also doesn't have enough controls to change parameters.
- Bible Pro performed well. It works quite quickly and creates a good picture. It has one huge minus. This converter does not support modern cameras and is not updated.
- RPP gives a too correct, dry picture, but it has great potential and is not bad overall.
- Lightroom is quite stable. The result is always good, although not without flaws. Often there is a shift to yellow shades. The big advantage of LR is the presence of an image library and convenient batch processing.
- Capture One Pro demonstrated consistently excellent quality regardless of photography style or shooting conditions.
- It's worth going back to Raw Photo Processor. The next image shows a rose, which no converter could handle. Only RPP did all the red colors well.
Blog Bondar Andrey
Photographer's notebook
How to open Raw files: list of the best Raw converters
The need to work with Raw has long been beyond doubt, at least among fellow photographers; The only caveat is that there is no consensus on choosing the optimal “software” and therefore the holivars:
- Converter A is better than converter B
- Converter A is worse than converter B
will never leave people's minds (alas). I suggest remembering that choice is always a compromise, and the selection criterion is personal benefit from use - quality, speed, convenience, etc. Therefore, choice without searching and testing is impossible (it is very important for beginners to understand this).
In this note I will list the main commercial and free programs that some are familiar with, others are not. And reference materials that will help level out the nuances of the operation of a particular converter, facilitate the process of mastering the next program (I write, re-read, if necessary, I’ll update the content).
Proprietary software
Among the paid solutions, we can highlight:
- Adobe Camera Raw. Standard Adobe Photoshop plugin. Concise interface (not everyone likes it) and excellent performance. If you correct the basic settings and understand the logic of the process, then the most convenient solution is in conjunction with Adobe Photoshop; There are no problems with this solution - its key feature.
- Adobe Photoshop Lightroom. Package premium when purchasing Adobe Photoshop. The conversion module is the same as in ACR, but there is the possibility of cataloging (in fact, this is its main advantage over ACR); supports plugins, classic interface for programs of this type.
- Capture One Pro. The key feature of the solution is ICC camera profiles, color and the ability to work with it. Flexible interface settings allow you to customize this program for yourself. Layers are a separate advantage that allows CO to cover the basic needs of photo processing.
- DxO PhotoLab. Like Capture One, the program contains its own camera profiles and, nicely, takes into account the camera + lens combination. Nothing more supernatural: flexible interface settings, retouching tools, etc.
Learning the functionality and capabilities of Lightroom can be accelerated thanks to the Profile school and the course by Dmitry Shatrov (always up-to-date information).
It is better to study Capture One on your own, because there is not a lot of useful information and high-quality lessons or courses on the RuNet, but the educational developer portal is convenient and, as far as I noticed, free.
Free software
If, for objective reasons, you need to choose from free solutions, then I suggest you pay attention to the following programs:
- RawTherapee. A solution based on dcraw (see note), designed for reading data from Raw files and then working with them. Despite the simple and rather friendly interface, the user must have a good understanding of all the main nuances of Raw conversion: debayering and demosaicing algorithms or noise reduction methods, for example (for the program to be useful).
- DigiKam. A solution based on LibRaw (see note) is intended for raw conversion, editing and cataloging of photographs. The specifics of the program, its ability to create albums, assign tags and create an album structure, coupled with geolocation, allow it to be regarded as an analogue of Adobe Lightroom.
- Darktable. Another analogue of Lightroom, which is designed to make it easier for a photographer to work with a large number of photos. It supports floating point calculations (and RawTherapee is different in this) and image search using a number of parameters, and I don’t know what’s better than its analogues, I haven’t installed it. 🙂
- RPP (Raw Photo Processor). Raw converter. The reason for its popularity is its film profiles, ascetic interface and excellent output picture. The latest versions use the LibRaw library, but it is not on the official website. The program does not work on Linux and Windows, only macOS.
LibRaw is a library based on dcraw (console Raw converter), a template for RAW converters, but the basic functionality - reading, decoding and unpacking data from Raw files, converting them, taking into account white balance, interpolation and other things, allows us to use this program. More details on the SkyLama TV YouTube channel.
There is a practical guide to RPP. Author: Dmitry Novak.
The division is not accidental, because at the start every penny is precious and saving on a license is both pleasant and significant, and an opportunity to reduce costs.
Peace to all, and favorable light on the sites of photographic battles.
Yours,
Andrey Bondar.
RAW processing. Selecting a RAW converter
In one of our previous articles, we discussed an important topic - which format to shoot in - JPG or RAW. As we know, the RAW format is “raw”; it requires additional processing and conversion to JPG or TIFF. There are programs for working with RAW - RAW converters. And in this article we will answer two of the most important questions:
- What RAW converters are there?
- How and which RAW converter to choose?
What RAW converters are there?
At their core, all RAW converters can be divided into two groups:
— “Native” RAW converters from camera manufacturers
— Universal RAW converters from third-party manufacturers.
When you bought your camera, along with it you received a disk with a RAW converter from the manufacturer of your camera. Almost every camera manufacturer has its own RAW file format and its own software for converting it (DPP from Canon, Nikon Capture from Nikon, etc.). This does not mean at all that they make a really good, high-quality and multifunctional product. They are simply obliged to provide such software to their client (that is, you) and they provide it.
In practice, the main and, in fact, the only advantage of “native” converters is that they provide fairly high-quality reproduction of colors and the entire image as a whole. After all, camera manufacturers know the properties and features of their cameras better than anyone else. But in terms of processing capabilities, operating speed and general functionality, “native” RAW converters are noticeably inferior to products from third-party manufacturers.
Therefore, if you work with a large volume of photos and you need extensive processing capabilities, it’s better to immediately forget about “native” converters... and start reading the next paragraph of our article.
There are a lot of RAW converters from third-party manufacturers: Adobe Lightroom, Apple Aperture, Bibble Labs Pro, DxO Optics Pro, Lightcrafts LightZone, Nikon Capture NX, Phase One Capture One and many others. They all have their pros and cons, but like any other software niche, they have their leaders. So, there are a lot of programs for working with graphics, and there is a leader - Adobe Photoshop. Among RAW converters there are three titans:
— Adobe Lightroom
— Apple Aperture
— Phase One Capture One 4
Why should you use them?
Firstly , they all provide excellent RAW processing capabilities.
Secondly , each of these programs has great functionality and also has its own unique features.
And thirdly , these are the most common RAW converters. This means that you can find the most lessons, articles and plugins for them on the Internet. If you have any questions about use, thousands of users of these programs will be able to help you with answers on forums or blogs.
Now let's look at the strengths and weaknesses of each of these converters.
Adobe Lightroom
Lightroom (hereinafter referred to as LR) is a “full cycle” program for working with photographs. You can process photos, create a web page there - a gallery with your works and upload it to your website, and then, without leaving the program, you can send the photos to print.
- One of the very important functions of LR is its extensive capabilities for cataloging photographs (working with keywords, tags, ratings, groups).
- LR's main strength in terms of photo processing is its easy access to greater capabilities for working with color and black and white. LR is an ideal option for color stylizing photographs, converting them to black and white, and performing other artistic tasks.
- In LR it is possible to create presets - i.e. saved photo processing settings. Having made processing on one photo, you can apply it to any of your other photos with one blade. On the Internet you can find a lot of presets created by photographers around the world, with interesting processing methods.
- Thoughtful integration with Photoshop. With one click you can open a photo from LR in Photoshop.
- LR uses the Adobe Camera RAW “engine” to process photos (the RAW converter built into Photoshop also runs on it). But it does not always adequately interpret the colors and the image itself received from the camera. And as a result, truly serious work with colors in LR is impossible. “Really serious” is the level of professional color correction. For regular work with colors, and especially color stylizations, LR is perfect.
- The ability to eliminate noise in photographs and also sharpening algorithms in LR are implemented very poorly. Because of this, the photo after LR has to be modified in Photoshop.
Apple Aperture
At its core, Aperture is an analogue of LR and its main competitor. This is also a “full cycle” program; Aperture has no less capabilities for photo processing than LR. But unlike LR, which runs on the ACR engine, Aperture runs on its own engine. Color rendition and interpretation of the entire image from the camera is generally better than that of LR, although it also has its drawbacks. But at a non-professional level, these differences are rather subjective. As they say, it depends on the taste and color. We can highlight only a few objective pros and cons of Aperture over LR:
- Aperture's interface is one of the most user-friendly and sophisticated RAW converters available today.
- The algorithms for eliminating noise and increasing sharpness are an order of magnitude better than in LR.
- There is no ability to create presets for photo processing.
- There is no integration with Photoshop as convenient as in LR.
- And finally, the most important disadvantage is that Aperture only works on Mac OS.
Phase One Capture One 4
Capture One 4 (hereinafter referred to as C4) is a full-fledged professional RAV converter. And it is precisely because of this that he has strong advantages and no less strong disadvantages in his work. To successfully work with C4, you need to understand color and how to work with it. Successful work in C4 is only possible when the photographer has an idea of what result he wants to get and what technical techniques need to be used to achieve this. If these conditions are met, C4 becomes a powerful tool for working with RAW files.
- C4 works with ICC profiles. For each camera model, Phase One has developed its own ICC profile, which gives the most accurate color rendition and the most adequate picture from the camera as a whole. None of the third party RAW converters can achieve this quality. This is why most professionals work with C4.
- C4 has very great capabilities for color correction and subtle, thoughtful photo processing.
- The algorithms for working with Shadow/Highlights in C4 are the best among RAW converters at the moment.
- C4 implements a convenient batch image processing system. This is a very important function for photographers shooting reports.
- Algorithms for eliminating noise and increasing sharpness show the best results among RAW converters.
- The algorithms for converting RAW files to C4 are made at a professional level. For example, enlarging an image by 140% when converting from RAW to JPG or TIFF will have virtually no effect on the quality of the image.
- C4 is exclusively a RAV converter. There are practically no options for cataloging files, printing, creating pages for the web, etc.
- The C4 interface is quite ascetic. There is nothing superfluous in it; all the tools are aimed at performing specific operations. At first, this may make you feel uncomfortable when working. C4 is designed for basic work using hotkeys. Not everyone likes it, but if you work a lot with photos, hotkeys are an irreplaceable thing.
- As mentioned above, working in C4 requires an understanding of color, as well as fairly deep knowledge in the field of processing and color correction.
Which RAW converter should you choose?
Knowing the strengths and weaknesses of the most common RAW converters, it is important to decide what you need. Which functions in the RAW converter are primary for you, and which are secondary.
If you shoot a lot and it is important to you that your photos are conveniently and securely cataloged, your choice is Lightroom. Equally important, LR also provides the easiest possible access to extensive processing capabilities. And this is a very important parameter, because... in-depth and complex work with color and photo processing is the domain of professionals. Their tasks require appropriate tools - such as Capture 4. C4 is also indispensable for batch processing of reportage filming. If you really feel the need for such a program, Capture 4 is exactly what you need.
Comparing RAW converters
To come in
Choosing the best Raw converter.
This is one of those topics that falls into the treasury of correct color rendering and digital correction. I will certainly say that everything written is purely subjective information that is subject to comprehension and repeated checks, nevertheless, I spent a lot of time on a comparative analysis, I think it will direct me in the right direction. Tests were carried out using frames from a Pentax K-5(II) camera/
Preface.
Color in photography has a huge, psycho-emotional impact, often being a compositional spot; in landscape and portrait genres, the accuracy and palette of color rendering is very important, where each pixel is a determining part of the picturesqueness of the whole picture, because a pixel is an integral toolkit of a creator or artist, as you please. We cannot neglect this, so we will choose “quality paints”.
With the arrival of the new camera, I had to work hard when choosing a Raw converter. I was quite surprised that not many of them support Pentax PEF, so I tested them on Adobe's DNG.
What criteria were important to me:
1. Color accuracy.
2. Accurate and soft WB (white balance).
3. Working with individual colors.
4. Software flexibility and speed.
5. DD (dynamic range)
6. Possibility to save with elongated lights and shadows - the volume of the picture.
“Classical converters work with 16-bit integers. In other words, a pixel of the same color has a value from 0 to 65536 (to increase accuracy, converters usually expand the range of 12-14 bit values received from the camera to 16 bits). These numbers do not have a fractional part, for example, there are no other values between 102 and 103. In contrast, floating point numbers contain a much larger range with a precision of 6-7 significant digits. This is especially helpful in areas where data can be recovered. This also turns out to be useful in intermediate chains of calculations for overexposed and underexposed images without loss of information. Fractional values also help avoid posterization on smooth color transitions.”
But not all converters work with 32-bit floating point numbers.
Now I will show you the difference. So 32 bit: UFraw (UFO), Raw Therapee 4 (RT), Oloneo PhotoEngine 1.1.4 (HDR),
And regular: CameraRaw (CR), Lightroom 3.3,4.2 (LR), Capture One Pro 7 (C1), DXO Optics Pro 8.0, Pentax Digital Camera Utility 4.0 (silky) in the photo I will use abbreviations in parentheses.
Checking for color match. Better on complex colors. It is good to test on the following colors: violet, cool red, magenta, yellow, gray. I came across a purple Lada, and we’ll look at it.
Test No. 1. By default, open the converter in the default settings and save it as is.
LR 3.3 and RT did a good job.
Test No. 2. We are trying to align the BB at a point, we take it from 4 bricks, on top of the silicate wall.
I arrange them in descending order according to color Pentax Digital Camera Utility 4.0 (silky), Raw Therapee 4 (RT), UFraw (UFO), Lightroom 4.2 (LR)
Test No. 3. Microcontrast.
All pictures look good. The only thing we can say is that the greens of Pentax Digital Camera Utility 4.0 are more accurate according to the memories, warmer.
But let's get closer. Pentax Digital Camera Utility 4.0 ate up the detail, Lightroom killed the color, but UFraw and Raw Therapee 4 look juicy, which is what is needed.
Having played with different converters on many landscape photographs, we can say the following.
Pentax Digital Camera Utility 4.0 The best color rendition of general masses, color in micro-contrast is washed out, coarse settings (large step), poor handling of noise and aberrations, the most accurate color rendition of all.
Oloneo PhotoEngine 1.1.4 (HDR) Good color, but few options for overall work.
Capture One Pro 7 (C1) Excellently pulls out highlights and shadows, warms up cool shades, especially blue ones, good batch processing, user-friendly interface, removes aberrations well.
Lightroom 3.3,4.2 (LR) The best comprehensive program, excellent noise reduction and sharpness, color in micro-contrast is washed out, slight inaccuracy in color rendition.
UFraw (UFO) Free, plugin for the program.
GIMP, fast results, work in Lab space by default, no batch processing, uploading one file at a time, unstable when zoomed in, difficult to install on W7. DXO Optics Pro 8.0 Good comprehensive program, good color, but very sensitive BB lever (small gap at transitions), color in micro-contrast is washed out
Raw Therapee 4 (RT)
Free, good comprehensive program, excellent color, color enhancement without affecting pastel tones, color in micro-contrast, preservation of intermediate results and history.
Conclusions: The more comprehensive and convenient the program, the better in general, the most comprehensive Lightroom for all occasions, but color and micro-contrast are not for everyone, if you are an artist, where color is not in last place, then you should choose something better at the expense of functionality, definitely there is no favorite, DXO is close to it, a little better in color, but the BB lever is rough, Pentax Digital Camera Utility 4.0 (silky) is a very accurate but very inconvenient program, all functions except color are defective, Raw Therapee 4.0 is an excellent free product , there’s a lot of things, the program can do a lot, but you’ll also have to figure out a lot. My choice fell on two programs: Raw Therapee 4.0 and UFraw, and UFraw is preferable in the sense that you work with three sliders and very accurately, there is no way to go astray as in Raw Therapee 4.0, but there is also no batch processing - for For those who love what they need, I won’t write about RPP, the whole Internet has been chewed up by it, and I couldn’t roll it out on the LION virtual machine, but according to reviews there are also a lot of different nonsense from yesterday, and asking about this is a big question. A small clarification about noise - the best noise reduction program is Noiseware v2.0 with batch processing capabilities, tested! So, noise reduction as a criterion is somewhere far down the list of priorities.
RAW converter
Modern digital photography is very much associated with image processing programs. Sometimes, it is the photo editor who creates exactly the photograph that we ultimately consider to be the work of the photographer.
Modern digital photography is insidious, sometimes it turns into simple mathematical tricks, which I already wrote about in the articles 'Subpixels', 'Gigapixels', 'JPEG', 'RAW Tricks' and 'RAW Adjustment'. Any photograph taken in the so-called raw format - RAW, for printing or viewing on a computer, must be converted (converted) into a simpler format with an unambiguous representation of the data. Typically, such a program is called a RAW converter. There are simply a huge number of such converters, but due to the specifics of the raw files of each individual camera, converters sometimes cannot recreate the “correct” photo from these raw data. It is often said that for the best results you need to use exclusively “native software”, which sometimes comes with the camera.
Below is my experiment that anyone can repeat. The essence of the experiment is very simple - you need to convert the same raw file using different converters and see what happens :) The photo from the experiment was taken on Nikon Nikkor-SC Auto 1: 1.4 f=50mm, I specifically chose a lens without microprocessor contacts to exclude any specific improvement of the image by the converter by correcting lens deficiencies from the database. The photo was taken in difficult lighting conditions: very cloudy weather, two flashes.
Link to archive with photographs. (The archive takes up 96.9 MB, to view the packed files, the archive must be unpacked). Attention: the photos are not for the faint-hearted, they are especially dangerous for skintone and pixel experts to view :)
The archive contains the following files:
- DSC_5549.NEF - original RAW file obtained during shooting. Nikon D700, 14bit, lossless compression, vignetting control, ADL, long exposure noise reduction, high ISO noise reduction were turned off. Everything was shot in SD picture control mode (standard mode): contrast correction - 0, brightness - 0, saturation - 0, hue - 0, sharpness - position 5 out of 10. White balance - “flash”. If you turn on all the native “improvements,” third-party software copes with displaying data even worse. EXIF can be viewed with any available program that you are used to. If there is no such program, then this can be easily done using the service at https://regex.info/exif.cgi.
- DSC_5549.JPG - original JPEG file obtained during RAW+JPEG shooting, settings described above. JPEG L with quality priority.
- DSC_5549(acr-original).jpg - file converted using Adobe Camera Raw 6.0 (ACR 6.0) in default mode.
- DSC_5549(acr-auto).jpg - file converted using Adobe Camera Raw 6.0 in auto mode.
- DSC_5549(capturexn2-original).jpg - file converted using CaptureNX 2 v 2.4.5 in default mode.
- DSC_5549(capturexn2-pt).jpg - file converted using CaptureNX 2 v 2.4.5 with PT shooting mode selected.
- DSC_5549(lr-auto-tone).jpg - the file was converted using naked Adobe Photoshop Lightroom 5.2 using the 'Auto tone' command. When exporting to JPEG, 100% quality was used, other settings were default.
- DSC_5549(lr-original).jpg - file converted using naked Adobe Photoshop Lightroom 5.2 in default mode with standard profiles installed with the LR installation. When exporting to JPEG, 100% quality was used, other settings were default.
- DSC_5549(photoshop-from-original-jpeg-with-auto-levels).jpg - and this is what an on-camera JPEG processed with the Photoshop “auto levels” command looks like.
- DSC_5549(viewnnx2-after-quick-adjust).NEF is what ViewNX 2 did from the original RAW when setting the white balance to 'Calculate automaticaly' and selecting PT mode.
- DSC_5549(viewnx2-auto-pt).JPG - ViewNX 2 when setting white balance to 'Calculate automaticaly' and selecting PT mode.
- DSC_5549(viewnx2-original).JPG - ViewNX 2 by default
- DSC_5549(inverted original jpeg).JPG - original JPEG rotated 90° for viewing using the built-in utility for WINDOWS OS
- picassa-view-original-nef-file.jpg - this is what the original RAW file looks like when viewed by Google Picassa, a snapshot of the program window.
Setting up a converter is a very delicate and necessary matter.
I want to share some experience in using converters. I really like the way native ViewNX and CaptureNX display photos. In order to convey the image as accurately as possible - since I saw it on the camera display and in life, I use “native” converters. I do the finishing touches (retouching, color correction and other tedious routine) in Photoshop. I like a slightly sadistic mechanism: first, basicly correct the original RAW (NEF) file using ViewNX, export the result to TIFF (16-bit uncompressed), and then modify it in Photoshop. This way I get the photo parameters closest to the original. ViewNX has three very strong negative aspects:
- changes the original RAW file, after which the camera will not see it
- does not have noise reduction, which greatly limits ViewNX when converting images at high ISOs
- Requires enormous computer processing power
CaptureNX is also a very interesting and very useful converter with many subtle “native” settings that other converters do not have (for example, the dust removal function). But for some reason it didn’t catch on with me; I only use it for very thoughtful tinkering with RAW files.
Well, of course, Lighroom is very helpful when you need to cope with a large volume of files. They haven’t come up with anything better for batch RAW processing yet :) I’ve already begun to notice that I’m behaving like a gamer - when working in LR, I keep my left hand near the ‘asd’ keys for quick access to some functions. There is nothing better than turning on LR in the evening, pressing the letter 'F' twice (switching to full screen mode) and starting to get creative with your photos.
LR load when processing photos in the Develop tab. Processor I3-3240, 8GB DDR3
Leave your thoughts about converters in the comments.
Thank you for your attention. Arkady Shapoval.
For registered users
| Models | Photographers | Stylists | Fashion designers | Model agencies | Fashion Kids |
RAW converters and color.
It so happened that in September last year I decided to change system X to system Y. For the first time I encountered an unexpected color result in Adobe raw converters when I changed the camera to a newer one within the system; the picture from the new camera seemed faded and not bright enough to me. In general, there is a lot of information on the topic of converting RAW data; the detailed presentation with examples is enough for one small book. But I will not go into technical details, but will simply outline some general points about the essence of the work of RAW converters, and talk a little about my personal experience. And for those who want to understand the material in more detail, I will provide links to find the necessary information.
So, the operating principle of any RAW converter:
1. Take raw data from a file.
2. After adjusting the exposure and white balance, apply a color profile unique to each camera and converter to the resulting image.
3. Apply a hidden contrast curve, individual for each camera, to obtain a brighter picture.
4. Apply to the resulting image the tools available to the user through the interface, such as working with colors, stretching shadows, and others.
As a result, what you see on the monitor screen after loading a RAW file into the converter is not at all what the camera “sees,” but the result of the converter’s sequential “layer-by-layer” processing of the source data.
Now by layers:
1. Everything is clear here, the camera converts the data received on the sensors into digital form, which is then used by the converter.
2. A color profile is a set of corrections for each section of the color space, which changes shades, their saturation and brightness.
Roughly speaking, if the camera sees color in its own way, then the color profile is designed to change the final color picture in the desired direction. For example, the camera sees the color of grass as cool green, and the color profile shifts this cool green into a more correct warm green. The same thing happens with the entire color range, including blue tones, green, red, orange, including skintone, in general, all colors. For example, standard Adobe camera profiles include an average of 5,000 to 10,000 such shifts for all areas of the color space, all degrees of brightness and saturation. For those who want more details, search on google: HSV color space, color profiling, Colorchecker, Adobe DNG Profile Editor
3. The picture from the camera is “flat”, not saturated and has little contrast, close to the real scene that we see with our eyes. After the converter overlays an s-shaped curve hidden for the user, it acquires its usual bright appearance. All converters do this, which became a big discovery for me when I began to understand the topic.
The problem with the standard profiles of all popular converters is that they are often “crooked”. Literally and figuratively. If you load a frame into the converter and see that the beautiful blue sky has suddenly acquired a purple tint, you need to blame the color profile. The same goes for all other colors. All the common stories about “Canon coloring”, “Nikon turning yellow” and disputes about good and bad color between cameras and systems grow from here. The second problem here is that profiles, in addition to general shifts of primary colors, may also have a “twist” of shades as they move from light to dark or from less saturated to more saturated. These are kind of picture enhancers implemented by camera manufacturers, especially in their picture styles, since such torsion gives a subjectively more interesting play of shades. The classic picture is when the skin is more red in the shadows and more yellow in the highlights, when in reality it is the same color in both. Some photographers also call it halftones and say that this is how it should be. Don't believe them, it's just a cool color profile
An example of torsion of skintone shades. On the left is a twisted profile, more yellow in the highlights and redder in the shadows. On the right there is an even profile, the skin color is the same everywhere.
For those who want to understand in more detail, search in google: hue twists, Colorchecker
Now about the hidden contrast curve. The contrast curve greatly eats up the visible dynamic range, this is especially noticeable if you have both very bright areas and deep shadows in the frame. I can say that about a couple of stops of exposure are consumed by eye. If you pull out highlights or shadows using the Converter tools, those adjustments are applied as additional adjustments without changing that hidden curve, which is a little weird.
1. Calibration profile with the contrast curve reset, the image is close to what the camera sees.
2. Adobe Standard, shade corrections and contrast curve applied.
3. Custom calibrated profile, more saturated shades while maintaining overall contrast.
4. The profile follows the standard image style for the camera, stronger contrast is noticeable, blue color fades to colder and redder shadows on the skin.
Another example using the same profiles as above.
What can be done about this?
I’ll say right away that not everyone needs to rush to create their own color profiles.
If you like the picture that your favorite converter produces by default, then just use it and don't bother. If this picture does not suit you in some way, if you want a more correct color, closer to reality, or a color customized to your taste, you need to create your own color profiles. Adobe products can work well with profiles. Capture One also supports working with profiles, but its solutions are less convenient to use. For those who want color that is closer to reality, the most popular profiling solution is Colorchecker from xrite.
To create a profile, you can use both software from xrite itself and Adobe DNG Profile Editor. Both programs use different approaches to work with the same color table, and produce different results. There are many tutorials on the Internet on working with this color chart with detailed instructions. A search on Google or YouTube will help you find them: Colorchecker. For those who want to experiment with color space and understand how color profiles work, Adobe DNG Profile Editor is suitable. It is also suitable for those who want to change the hidden contrast curve; once you understand the interface, you can create a profile with your own curve based on any profile.
A few words about popular converters:
Lightroom, CameraRaw
Standard Adobe Standard profiles unfortunately do not differ in their accuracy and consistency from year to year and from camera to camera.
Here, depending on your luck, on different cameras the standard profile will show different results in color and contrast, which is easy to observe in frames of the same scene. For example, for the popular Canon 5dIII camera, the standard profile is simply terrible, its color is faded and unnatural in certain ranges. Both products support profiling, so they are perhaps the only convenient option for more accurate color reproduction and color calibration.
Working with a hidden contrast curve is not available through the interface, but is supported when creating a profile in the DNG Profile Editor. These converters have been my main ones since the beginning.
CaptureOne
has profiles twisted to suit your taste and is quite convenient to work with in color. In general, I can’t say anything good about its standard profiles. Difficult to profile, but seems to be supportive. Does not support working with a hidden contrast curve.
Aperture
A now closed project from Apple. A very convenient converter with good standard profiles, also twisted but without fanaticism, unlike the same DxO. Does not support profiling, but has the ability to reset the contrast curve. It has noticeable artifacts in the shadows; to put it simply, it doesn’t know how to extract information from them at all, which is strange and why I don’t use it.
DxO
is positioned as accurate and correct in every sense, but, like other converters, it has rather twisted profiles. It supports working with a hidden contrast curve through the fifth point, allowing it to be changed when the profile is changed to neutral.
RPP
is inconvenient to use and does not support profiling, but it works with raw camera images, which can be an advantage in some cases.
And finally, some general thoughts and conclusions:
- Among modern semi-pro and pro segment cameras, there are no cameras with poor color or cameras with better color; they all record data with sufficient depth (not counting dynamic range and deep shadows). There are only good and bad color profiles for each specific camera.
- Using the converter tools to make colors from one camera similar to colors from another camera, provided that for these cameras the converter uses profiles that differ in their results, is only possible to a rough approximation. Smooth transitions of shades and saturation cannot be repeated due to the lack of tools for converters for such delicate work.
- The difference in color between different cameras can be minimized by having a profile that brings the color of one camera to the color of the other, or by having profiles that bring the color from both cameras to some standard.
I hope this short article will help you understand the working mechanisms of raw converters, and will also help dispel some misconceptions about the difference in color between cameras and systems.
How to choose a RAW converter, part 2
The first part talked about conversion in the camera itself and about “branded” RAW converters. In the second part we will talk about third-party RAW converters.
Using third-party RAW converters
One of the most popular and widespread options is the use of third-party RAW converters.
There are only a few types of RAW converters - these are either RAW converters themselves, or RAW converters that are part of integrated software, which includes a convenient cataloger, RAW converter, graphic editor, etc.
As a rule, RAW converters from third-party manufacturers are included in software products that are recognized industry leaders. Some of them (for example, Photoshop or Lightroom) have long become the de facto standard for image processing.
Fat pros:
Industry leaders did not become leaders by accident. These are excellent software products with the help of which the entire photographic world makes money and creates masterpieces;
The quality of RAW converters is quite high, but depends on the settings and configuration;
Support for a large number (if not all) of currently available cameras that work with files in RAW format. RAW files from all manufacturers are supported;
Convenient and thoughtful interface. Many possibilities from which the photographer or designer selects the necessary options;
Powerful software practically does not hinder the photographer’s progress, allowing him to be creative without regard to technology;
A huge amount of literature from recognized graphic luminaries allows one to master these rather complex products;
Many forums and sites on the Internet are enlightened with lessons on Lightroom and Photoshop. On any of these forums, users can receive comprehensive answers to all their questions.
Fat cons:
Due to the fact that RAW converters are powerful professional tools, the photographer requires time and knowledge to properly configure, master and use them;
Unfortunately, third-party RAW converters may not be able to keep up with updates in response to the release of new cameras, so the photographer may be left without support for the RAW files of a brand new camera for some time;
Some third-party RAW converters are released only for one platform, without supporting another at all. For example, a number of converters exist only for Mac OS X and are not available in the Windows version;
Some RAW converters from third-party manufacturers are produced with a limited operating time (there were official boxed versions of converters that stopped working 5-6 years after activation). At the same time, the program offers a free update, but the new version does not work on the old computer! Not enough memory, etc.
Updating software and third-party RAW converters usually requires upgrading your computer hardware. For example, replacing 32-bit computers with 64-bit ones.
For those who finished reading!
What criteria should you use to choose a RAW converter?
So. Choosing a RAW converter! What to look for? You should think about and choose the file format in which images will be saved in the camera.
You can learn more about formats from the materials Five reasons to shoot in JPEG and Five reasons to shoot in RAW
For those who have just acquired a camera that shoots in RAW
It is rational to shoot either in RAW+JPEG, see the material Five reasons to shoot in RAW+JPEG, or shoot in RAW and process it with a camera, if the camera allows it.
It is clear that this method is good as a temporary one (there is no computer yet) or as an auxiliary one that allows you to save time.
There are two alternatives for processing RAW files on a computer:
Branded RAW file converters;
Third party converters.
Branded RAW file converters
Branded RAW converters are supplied with the camera and can be used, especially for amateur purposes.
Branded RAW converters work successfully under popular operating systems. Canon and Nikon branded RAW converters received the greatest recognition. The proprietary RAW converter supports all cameras, from compact to SLR, working in RAW format. However, it must be taken into account that the “proprietary” converter only supports cameras from its own manufacturer .
If a photographer (or a company) has all cameras from the same manufacturer, then a branded RAW converter is perfect.
And vice versa. If the user has a compact camera from one manufacturer and a DSLR from another, then this solution is not suitable for him!
Third party RAW converters
When choosing a third-party RAW converter, a photographer has to focus not only on his own preferences, but also on the features of the computer equipment at his disposal.
In addition, it is often necessary to take into account the usual workflow, see material RAW converter and workflow part 1 and RAW converter and workflow part 2
The choice of a third-party RAW converter is greatly influenced by the operating system of the computer on which the photos are processed.
The fact is that some RAW converters are released only for Mac OS X , for example, Raw Photo Processor 64 or Aperture , others function only for Windows .
Such common programs as ACDSee Pro, DxO Optics Pro, Capture One Pro, Lightroom, Photoshop are available in versions for Mac OS X and Windows .
For a photographer who uses different types of cameras from different manufacturers in his practice, it is more rational to practice processing using a RAW converter from industry leaders.