Sharpness in Lightroom
Sharpness in Lightroom
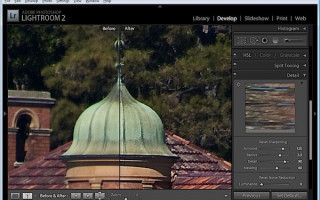
Once you've completed the basic color grading of your image in Lightroom, it's time to turn your attention to sharpness. Today I'll show you how to sharpen in Lightroom. Many people do not pay attention to the sharpening tool in Lightroom, so that they can then enhance it in Photoshop, and in vain.
Tools for sharpening can be found in the Detailing section of the Corrections module.
It's best to work with an image at 1:1 scale, as this will ensure that you can see all the applied sliders in action in the image. If the scale is less than 1:1, then you will have to work with a small preview window. To select 1:1 scale, click on the indicator in the upper left corner of the screen.
You have four sliders in the Sharpness category. The value controls how much sharpening is applied to the image. This can be considered your fine tuning tool.
Radius is one of the key settings. The Radius value varies between 0.5 and 3. As a rule, it is better to start with 0.5 to 1, and then increase the value if the sharpness is not enough. Images with large areas that are not very detailed, such as portraits, may require a larger radius value, while images with a lot of sharp detail may benefit from a smaller radius value.
The Details slider reduces ghosting in the image. The higher the value you use for Details, the larger the halo will be on the edges. The lower the Detail value, the less the halo effect and the smoother the edges.
You can see how the sliders work at 1:1 scale. Hold Alt or Option as you drag the slider. The higher the Detail value, the more grayscale lines you'll see in the preview, which shows the sharpening effect.
The Masking slider works to mask out areas of uniform color. It's designed to enhance the edges and remove the sharpening effect in areas of the image that contain fades of color that you probably don't want to touch.
Again, you can hold down the Alt key while working with the sliders. The slider ranges from 0 – 100. With a value of 0, everything in the image will be sharpened, and with a value of 100, only the edges will be sharpened. In the preview, the white areas are those in which the sharpening is enhanced, and the black areas are those in which the sharpening is not enhanced.
If you are not using a 1:1 scale, you will need a preview window to see the results of applying Masking and Detail. To make it visible, click on the arrow in the upper right corner of the Detailing section.
When you first start learning about sharpening, it can be difficult to see what effect sharpening creates in an image. If you press the backslash key, you will return to the unedited image, not the way it was before sharpening was applied.
This is when virtual copies can come in handy. Rewind in history to the moment when you started working with sharpness. Right-click on the image and select Create Virtual Copy. This will create a virtual copy of the image whose history begins with the current view, i.e. after all basic corrections.
Now, when you sharpen the image and use the Before and After settings, you will be able to see the changes after applying sharpening because this will be the only change you apply to the virtual copy.
Typically, if you're displaying images online, you'll want to sharpen them so that the appearance of the image on screen matches how it will appear online. On the other hand, more intense sharpening is usually used for printing, since some of it will be lost during the printing process.
Understanding sharpness in LR
Adobe Lightroom 3 has a huge number of photo editing tools. And for anyone thinking about optimizing their output images, understanding sharpening settings is one of the key knowledge in creating great images.
Instead of several rather different sharpening approaches as offered in Photoshop, Lightroom 3 uses a different option with four sliders that are used to optimize photos.
Let's look at how the tools work: Amount, Radius, Detail and Masking.
Amount slider
Moving Amount to the right determines how sharp your entire picture will become. Much like how you turn up the volume on your stereo system. Up to a certain point everything will be fine, loud - but at a certain position the music will scream too loudly. So it is here. The Amount slider must be handled with extreme caution, otherwise you may overdo it.
When the Amount slider is set to zero, all other sliders are turned off. This is a reference point that shows the potential of how much detail there is in the image and what we will get later.
When we start increasing the Amount value, we change the contrast of the details and make the transitions from light to dark more obvious.
In the example above, the setting is set to “40” and the photo immediately becomes sharper (the other sliders here immediately appear from the “default settings”).
Preview Amount
For a more clear understanding of sharpness, in Lightroom there is the ability to quickly view an image in black and white, when color is not distracting and we can evaluate what and how it really looks. To do this, you need to move the cursor to the slider (in this case, Amount), and, without releasing the left mouse button (just a button on Mac), press the Alt key (Option on Mac).
This is a very important concept because color contrast (for example, red-green, yellow-blue, etc.) can give us a false impression of the actual sharpness of the image. By eliminating color, you can get a better idea of the sharpness of your shot.
Radius slider
If the Amount slider is responsible for how sharp the entire image is in general, Radius determines the width of the area on both sides of the edges of the details in which the pixel contrast will be increased. The Radius slider ranges from 0.5 to 3.0 pixels. A small Radius means that the contrast of only the pixels closest to the border will be increased. And the larger the Radius, the more pixels “in depth” from the border will be captured when changing the contrast.
Just as brush size dictates the scale of the detail we paint, Radius helps determine how finely or coarsely we represent fine details.
A small radius is best for enhancing the edges of small details in an image. In the example above, this small radius keeps the riverbank grass clear and makes individual leaves stand out from the larger plants. By using a Radius value close to 0.5, you'll notice that the contrast of the image takes on a slightly "airy" appearance at the micro level, as the contrast at the edges sharpens more tightly and affects fewer overall pixels in the frame.
The larger radius of 2.5 in the image below distributes the sharpness more “widely”, resulting in the blurring of fine details in the grass. In this case, the sharpness deteriorates in the image, since it consists of many small details.
Radius Preview
Just like with Amount, we can evaluate the impact of the Radius value in black and white. But in this case, we see the "width" of the contrast of the edges of small details in the image. Again, this is done by moving the cursor to the slider (in this case Radius), and holding down the left button (just a button on Mac) of the mouse and pressing the Alt key (Option on Mac). You can move the Radius slider to see changes in how much edge sharpening you apply to the photo.
In this example, we can see that most of the frame is rendered in gray, and the edges affected by the Radius tool are highlighted with lines of increased contrast.
Typically, a sufficient radius value from 0.5 to 1. For photographs with a large number of small details, the radius should be as small as possible; for portraits, on the contrary, the radius can exceed 1. Values close to 2 give a “popular” effect and are used in mainly for creative image presentations.
Detail slider
Detail also works with the edges of images, but in a slightly different way.
The higher the Detail value, the more halos you will see around the edges of objects in the photo; the lower the value, the less “glow” there will be, and the less clear the result.
In my understanding, this element is a “continuation” of Radius, when working with which you can achieve finer detailing of all small elements of the image. Those. — Radius has more influence on the edges of photographic objects, and Detail — for all the small details, from grains of sand to the veins of leaves.
Setting Detail to "0" gives overall sharpness consistent with the Amount setting, but does not "reveal" the fine details of the photo. In portrait photography, this may be correct, since a small amount of detail can hide imperfections in the skin, and will give emphasis, for example, to the eyes, but for landscape photography it will not be enough, because here detail is important.
Unlike Radius, Detail settings can affect a relatively larger amount of detail in a photo. At the relatively high Detail setting of 70, the micro-details in the image really come to life. With these detail settings, the grass in the close-up area of the Detail panel already becomes quite bright against the background of the boulders (although this comes at the expense of artifacts in other parts of the frame).
Using Detail also means caution, as you may end up with too much artifacts and moire in your image, which can kill your efforts to get a sharp image.
Preview Detail
The Detail preview mode is very similar to what we see in the Radius option. In general, both in Radius and in Detail we see an improvement in the edges of the image, but in the Detail preview - as you might expect - we see more fine details and less contrast at the edges of image objects.
In the preview above with the Detail set to “70”, you can see a smoother structure of the contrast shot, here the sharpness is distributed approximately equally throughout the entire fragment. Areas like the shadow on the right side of the frame don't have as much texture, so there's less contrast in them. In contrast, the sunlit surface of the mountain on the left is covered in fine details that are good for this shot.
Mask slider
Masking and Sharpening in Lightroom 3 lets you selectively apply sharpening to a specific photo—specifically, around the edges of the image and areas with off-color color. The purpose of this tool is to highlight edges and de-sharpen areas that have smooth color transitions and that you might not want to be sharp.
In the default setting, the Masking value is set to "0" and sharpening is applied evenly to the entire image. As Masking increases, it begins to selectively remove areas of out-of-focus detail, keeping sharpness closer to the sharp edges of frame elements.
This tool allows for truly selective sharpening, which is very useful in portrait photography when you want to keep skin smooth, or want to minimize digital noise at high ISOs, or ensure smooth gradients.
The photo above features a deep blue sky. This is a great example of using the Masking slider to maintain soft undertones on the sky while sharpening the fine details of the dog's fur.
Preview Masking
Viewing is done in the same way as in other tools - Alt (Option on Mac) while holding the mouse button on the Masking slider. Like Photoshop, the black areas show where the sharpening tools will not be applied, and the white areas show where they will take effect.
In this case, the Masking value is set to 30, the sky is completely masked out to black, meaning no sharpening is applied to it, and the white areas show that other Amount settings are being applied around the fur and plants in the foreground. 25, Radius 0.5, Detail 86). Areas that are gray will be partially sharpened depending on their proximity to the edges and edge contrast areas of image objects.
For me, this Masking adjustment is one of the huge benefits of using Lightroom 3 and working with RAW images. Previously, I applied sharpening very carefully to the entire image, and then refined selective parts of the image in Photoshop and got rid of artifacts and moire there. With Lightroom 3, we have a solution that saves tons of time, provides flexibility in processing and great image quality.
Sharpness for different objects
So why does Adobe include various sharpening adjustments in its default presets? It's just that different types of images will require different combinations of settings.
Each image requires different sharpening needs depending on the subject being photographed. As a first point of reference, Adobe provides two presets in Lightroom, and analyzing their options gives some insight into the mechanics of the settings we've already covered above.
Sharpening Preset: Wide Edges
Wide Edges (Faces):
Adobe's preset for portraits, which it calls something like "wide-edge sharpening." This option uses a slightly wider radius to highlight more of the line of contrast on the same eyes. A low Detail value, together with a high Masking number, ensures that this sharpness will provide acceptable skin detail.
Lightroom Preset: Narrow Edges
Narrow Edges (Landscape):
In contrast to the previous one, in “narrow edges” sharpening is applied evenly across the entire field of the frame. The overall level of sharpening is slightly higher, but now with a much smaller radius, which, together with a high Detail value, brings out all the details in the image. In this case, it is assumed that the shooting conditions (and typical landscape settings) were chosen with a closed aperture for maximum depth of field and maximum detail, as well as low ISO values to minimize noise. Therefore, Masking is set to zero here.
Of course, these presets are a “starting point”, as each specific shot has its own individual sharpness requirements depending on lighting, camera, ISO, lens, aperture, scale/distance from the subject in relation to the camera, etc.
That's probably all for today. ))
If anything is not clear, ask questions in the comments.
Post published by Lightroom in the life of a photographer. You can leave comments here or here
Sharpening Photos in Lightroom
Sharpening has been available in Lightroom since version 1, giving users the ability to professionally sharpen photos for capture and custom prints. The first type of sharpening in the Develop module is covered in this exercise, and the second is covered in Chapter 11 on printing.
Sharpening is done in the Develop module of the Detail panel and requires a 1:1 zoom in the image to clearly see the effects of the adjustment. But the fact is that when viewing a small area of a photograph enlarged, it is very difficult to get an idea of how increasing its sharpness will affect the entire image as a whole. This is why there is a separate preview window at the top of the Detail panel, as shown in the image on the left. If you don't see it, click on the left-facing triangle to the right of the Sharpening label in this panel. From this window, you can further zoom in on an area of the image to check the sharpening results, while viewing the entire photo at normal magnification in the central preview area.
To enlarge a specific area of an image in the Detail panel, click on it in the preview window of that panel. You can then move around within this window by clicking and dragging the cursor. Although the preview window defaults to a 1:1 magnification, you can set it to an even higher magnification by Ctrl-clicking (Macintosh) or right-clicking (Windows) inside the preview window and selecting scale 2:1 from the pop-up context menu, as shown in the figure. In addition, if you click on the small icon in the upper left corner of the Detail panel (circled in the picture), then by placing the crosshair cursor over the selected area of the image in the central preview area, you will see the same area enlarged in the window preview in the Detail panel. To lock this area in place, click on it in the central preview area. And to disable this viewing mode, click on the mentioned icon again.
The Amount slider lives up to its name by adjusting the amount of sharpening in a photo. The image below shows the result of sharpening the image by moving the Amount slider to 91. While it's not visible in the central preview area, the image in the preview window in the Detail panel is much sharper (which is why it's so important to select the magnification in this window). The Radius slider adjusts the number of pixels on the edges that are affected by sharpening. I personally leave this slider at its original 1.0.
Tip: Turn sharpening on and off
If you want to temporarily disable changes made in the Detail panel, click the small switch in the upper left corner of the Detail panel.
Using the Detail slider, the appearance of ghosting is eliminated - the most unpleasant consequence of increasing sharpness. Usually a halo appears around the image in the form of an outline, with which someone seems to have deliberately outlined the image. If the Detail slider is set to an initial setting of 25, this is enough to prevent ghosting in most photos. But if you want a significant amount of sharpening in a photograph, such as an architectural, landscape, or one with sharply defined edges, then the Detail slider will have to be moved to around 75, as shown in the figure, which reduces the anti-ghosting effect to some extent, but makes the sharpening more "energetic" " If you set the Detail slider to 100, the result will be the same as after applying the Unsharp Mask filter in Photoshop.
And the last slider, Masking, is, in my opinion, the most wonderful in the Detail panel, because it allows you to precisely specify where to sharpen. As you know, the hardest areas to sharpen are areas that should be out of focus, such as the skin of a child or woman in portrait photographs, because it emphasizes texture, which is undesirable. But at the same time, it is necessary to increase the sharpness of details in areas of the eyes, eyebrows, lips, clothes, etc. This can be achieved with the Masking slider, masking areas of the skin and increasing sharpness in the most detailed areas of the subject’s face. To show this slider in action, you need to open a portrait photo of my personal editor Kim Doty and her adorable son Sean.
The best way to understand how the Masking slider works is to try it out. So, zoom in 1:1 on the image in the central preview area, otherwise you won't get anything done. Then press the Opt key (Macintosh) or Alt key (Windows) and click the Masking slider without releasing the mouse button. The image will turn completely white, as shown in the image on the left. If it doesn't, then you haven't enlarged the image in the center preview area to 1:1 scale, so click the 1:1 button at the top of the Navigator panel and repeat the above steps again. A solid white color on the screen means that the sharpness will be increased evenly in every area of the image, and essentially the entire image will be sharp.
By clicking the Masking slider and dragging it to the right while holding down the Opt key (Macintosh) or Alt key (Windows), you will find that the image gradually fades to black without sharpening the black areas. This is the purpose of masking. At first you'll only see isolated black spots, but as you move the Masking slider to the right, more and more areas of the image away from the edges will turn black. As shown in the image, the Masking slider is set to 79 and most of the skin on the child's face is highlighted in black, i.e., not subject to sharpening. And the details in the edge areas of the image (eyes, eyebrows, hair, lips and the outline of the face) are highlighted in white, that is, they become completely sharp. Thus, unsharp areas of facial skin are actually masked, which is simply wonderful!
By releasing the Opt key (Macintosh) or the AIt key (Windows), you will see the result of sharpening. As shown in the picture, the child's facial features became sharply but gracefully defined, and the skin on his face remained soft and delicate. However, it should be kept in mind that it is advisable to use the Masking slider only if you want to show the subject soft and delicate, without emphasizing its texture. Now, to complete this exercise in image sharpening, let's return to horse racing photography.
The picture on the left shows a newly discovered horse racing photograph with adjustments made to the sharpness of the image. You can now further adjust the sliders in the Detail panel to your liking. But if you don't feel quite confident in this yet, then take advantage of the excellent presets available in the Presets panel in the left area of the side panels. In this panel, you'll find two sharpening presets: Sharpen - Landscapes and Sharpen - Portraits. So, if you click on the Sharpen - Landscapes preset, the Amount slider will automatically be set to 40, the Radius slider to 0.8, the Detail slider to 50, and the Masking slider will remain at its original zero level. Notice the increased level of detail thanks to more aggressive image sharpening. When you select the Sharpen - Portraits preset, the sharpness of the image is reduced. In this case, the Amount slider is automatically set to 35, the Radius slider to 1.2, the Detail slider to 20, and the Masking slider to 70.
The figure shows a comparative view of a horse racing photograph before and after image sharpening. To achieve this result, I first selected the Sharpen - Landscapes preset, and then moved the Amount slider to the right to around 125 (I don't usually do this, but in this case I needed this sharpening to more clearly illustrate the effect discussed here in the book ). Next, I moved the Detail slider to the right to 75, since a detailed photo like this needs more aggressive sharpening, and I left the Masking slider at its original zero setting to ensure that all areas of the image are sharpened evenly, without leaving any of them out of focus. . And in this state of editing, I saved the settings in my own preset called Sharpen - High, so that I could quickly use it at any appropriate moment.
© 2009-2010 | Bluvelvet Network | Copying site materials is permitted if there is an active indexed hyperlink to the source.
Working with background and sharpening in Adobe Lightroom
Despite the fact that Lightroom is positioned more as a convenient cataloger and RAW converter, the program offers image retouching options. The popular Photoshop does a great job with careful color correction and can work with layers. However, Lightroom is quite capable of reducing noise, blurring the background, or changing its color.
So, if you need to do basic processing on a batch of photos quickly and easily, Lr will do the job just fine. By the way, for Lightroom the license price will depend on where you will use the program. So, you can purchase a licensed version for educational or government institutions, as well as for commercial organizations.
How to Blur a Background in Lightroom
In order to create a blurred background effect, it is not at all necessary to install Photoshop and master all the nuances of working in a photo editor within a few hours. Thanks to Lightroom's simple interface and fast operation, you can easily create an image with beautiful bokeh.
To achieve the blur effect, you need to open the “Develop” tab and select the “Radial Filter” tool. To maintain a sharp defined area, you need to drag the oval window to the desired location. Adjust the Clarity and Sharpness sliders to the values you need. To make the transition between areas smoother, use the “Feather” option.
How to Make a White Background in Lightroom
When working in a photo studio, a situation may arise when the background in the image is not uniformly white. In this case, it can be corrected in a photo editor by importing the image into Lightroom. Go to the Develop module and select the Adjustment Brush tool.
To get the perfect white background, you need to adjust the exposure, contrast, shadows and highlight sliders to their maximum values. Set the Feather to 0, and with your brush selected, edit any areas that differ from the color you want. To see heterogeneous areas more clearly, you need to set the curve values and set the color warning.
How to Darken a Background in Lightroom
The technique for creating a dark background is identical to the technology described in the previous step. Select the adjustment brush in the Develop tab and adjust its size. To get a darker background, you need to set the exposure, shadows and light values to “-100”, leaving the contrast at maximum.
Next, follow the same steps as for lightening the background - shading large areas and more carefully editing the area near the object. Don't forget to set the color warning option to see the light areas more clearly.
How to remove noise in Lightroom
When shooting at high ISOs or slow shutter speeds, so-called noise may appear in your images. Easily distinguishable color spots/grain have a significant impact on the quality of the photo. If the shooting conditions did not allow you to remove noise using the settings, you need to use the Lightroom photo editor to suppress grain.
Noise reduction tools are located in the “Develop” tab. Select the "Details" window, which contains sharpness settings, as well as sliders for adjusting color and luminance noise. By adjusting these values, you can easily remove noise from photos. When editing, do not forget to set the photo size to 100% to visually evaluate the result.
How to Sharpen in Lightroom
Increasing sharpness is one of the main tasks of a photographer when creating the perfect shot. Even the most expensive lens cannot always cope with this task. In this case, you have to resort to the help of professional photo editors. In Lr, you can change the sharpness settings in the Develop module by working in the Details tab.
Under the "Sharpening" heading there are four sliders that you can use to set the desired sharpening value. By changing the position of the Amount cursor, you can make the photo sharper. The “Details” parameter allows you to avoid the appearance of halos along the contour of parts. Its default value is 25.
How to lighten part of a photo in Lightroom
Using a photo editor, you can significantly improve the quality of a photo by working with settings for brightness, contrast and other characteristics. When shooting, the camera may focus incorrectly and darken the already dark parts of the frame.
To brighten dark areas, you need to change basic settings such as exposure and contrast. By working with these two parameters, you can significantly improve the quality of the photo. If the image lacks volume, change the Tone Curve settings. If the colors in the frame are unsaturated, it makes sense to change the settings in the HSL tab.
How to change color in Lightroom
To change the color in an image, you can use not only Photoshop, but also the Adobe Lightroom photo editor. Tools for working with colors and their shades are located in the “HSL” panel.
For example, if you want to replace the orange color of an orange in a photo of fruit with yellow, you need to move the “Orange” slider all the way to the right. You can make any of the colors in the photo more saturated and lighten, depending on the tasks.
How to remove aberrations in Lightroom
When processing photos in the program, when you enlarge the image, you can notice clear colored edges around objects. These artifacts are called chromatic aberration. Such streaks can be removed using the tools in the Lens Correction tab. In modern versions of Lightroom, when processing, you can check the box next to the “Remove Chromatic Aberration” option. The program will automatically correct color distortions.
If aberrations are not removed using automatic processing, it is possible to correct them manually. You can adjust the range of green and purple hues, as well as their saturation, using the Purple Hue and Gren Hue sliders.
How to Change Color Profile in Lightroom
When editing photos on wide-gamut monitors or high-quality prints, you may need to change the Adobe RGB color profile. By default, Lightroom uses the sRGB profile when displaying and saving photos.
To change the color profile, in the export settings you need to select the tab called “File Settings”. In the Color Space window, set the color range you need.
- We are a subsidiary of the company “1C” 1C franchising
- Today we can offer perhaps the best prices in