We fight noise. Photoshop lesson
We fight noise. Photoshop lesson
Today we will fight noise in photos using a powerful and high-quality plugin for Photoshop called Imagenomic Noiseware Professional. This, as I said, is a powerful tool where you can manually reduce every component of noise by moving a bunch of sliders. But since everything is simple on our website, I’ll reassure you, for most tasks there are enough automatic presets to remove noise to a minimum, we only need to make 2-3 clicks. First, you need to download and install this plugin, then load Photoshop, and open the desired photo in it.
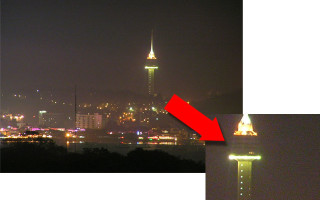
So let's take this old photo taken with an old Olympus camera - C760UZ. Just here a lot of noise came out, because... The photo was taken with a long shutter speed of 4 seconds. Open Imagenomic Noiseware Professional as shown below.
And here we are in the plugin window
Here we see a bunch of settings, plus our photo in which some of the noise has already been removed. How to optimally remove noise for our photo? Don't worry, we'll have enough automatic settings. go here and select noise reduction depending on the scene (the “Night scene”, “Portrait”, “Landscape”, “Full noise reduction” settings are mainly relevant).
For our case, “Night Scene”. But you can always choose any setting, perhaps you will not be satisfied with the one to which the scene is assigned. At this point, depending on the task, various noises are removed (noise from high ISO, color noise, etc.). There is also a function for complete noise removal, but it is not always reasonable to use it, although the picture will stop “noisy”, but other defects may well appear, such as “Stepping of the sky”, i.e. the sky will not be a smooth gradient, but steps with distinct edges. Remember about the golden mean, and that noise cannot be removed 100% painlessly. I hope that after installing this plugin, those of your photos that were “noisy” will become more beautiful and attractive. By the way, this is what happened to me
PS I did not consider the plugin built into Photoshop, because... In terms of fish quality, it lags far behind Noiseware Professional.
You can watch it as follows. Open the desired photo in Photoshop. Then.
When reprinting an article, the link www.profotovideo.ru is required
. Before reprinting articles from this site, please read the rules >>Rules
Noise reduction in Photoshop
Author: Sergey Bunin. Publication date: April 24, 2017. Category: Photo processing in Photoshop.
Here, for example, is a shot in which we had to make a compromise when shooting, as a result of which we will have to suppress noise in Photoshop .
Small noises have the right to be in the image, but the presence of strong and pronounced ones requires their suppression, at least to an acceptable level of non-irritating force.
It is recommended to evaluate the noise level at 100% image display scale. We enlarge our image by pressing the key combination “Ctrl+Alt+0 (zero)”.
I think you can see the presence of both chromatic noise and brightness noise.
Next, go to the “Filter” menu and turn to the “Camera RAW” filter.
In the application that opens, we will be interested in only the “Detailing” tab, and on it the “Noise Reduction” field.
At the bottom of the panel you are once again reminded to increase the scale to 100% for a more adequate assessment of the applied settings.
In the application, this can be done by selecting the required parameter from the pop-up list by clicking on the arrow under the lower left corner of the viewing window.
After analyzing the image, we immediately boldly suppress color noise by moving the “Color” control to the right to a value at which chaotic color inclusions in the image disappear.
Do not move the regulator too much. When suppressing chromatic noise, you need to pay attention to small colored details in the image, as colored halos may appear around them or may be completely discolored. Therefore, try to apply noise reduction to a minimum extent. Using the “Color Information” and “Color Smoothness” controls, you can adjust the transitions between colors in small details of the image.
To combat brightness noise, move the “Luminance” control to the right.
The purpose of the “Brightness Information” and “Brightness Contrast” controls is, I think, intuitive. I usually don't touch them.
Below in the picture you can see how, after suppressing noise, the texture of the girl’s skin blurred, became not natural - plastic, and how individual hairs and eyelashes in front of the eyes lost their detailed display - they lost focus.
If we try to eliminate these defects by sharpening, we will again return to increasing noise in the photo.
Is it possible to selectively apply noise reduction to an image, that is, to reduce noise only in certain areas where it is required?
As we have already found out, the brighter parts of the image are less susceptible to noise, since the noise level directly depends on the brightness of the subject being photographed. Therefore, we can separate the light areas of the photo from the dark ones and thereby make selective noise reduction corrections only on the dark areas.
On the right, in the text field of the “Content” line, click on the arrow and select “Color” from the drop-down list.
After selecting the “Color” option, the following dialog box “Color Picker (Fill Color)” appears, in which we select a bright green tint. Click “Ok”.
Also, by clicking “Ok” we confirm the decision in the “Fill” window. The image in the viewport is overlaid with a green fill layer.
To interact with a fill layer only with the underlying layer, apply the clipping mask mode to it. Holding down the “Alt” key, move the cursor in the form of a hand with a raised index finger over the border between the two top layers and at the moment its appearance changes to a square with an arrow pointing down, click the left mouse button. On the left side of the fill layer's thumbnail, a downward-pointing angled arrow should also appear.
Call up the “Layer Style” settings window.
In the center of the window, in the lower part, there is a field with two gradient scales “Overlay if”.
Since we will be limiting the effect of the noise reduction correction on the underlying layer, we will work with the underlying layer scale.
Move the mouse cursor over the right white slider and move it to the left, revealing the light areas of the image and details that you don’t want to blur (hair). In relation to this photo, the control has moved to a value of =24 levels.
So that the boundaries between the areas are not so sharp and jagged, let’s move the mouse cursor over the white slider and, holding down the “Alt” key, drag it to the right. The slider splits: the left part remains in place, and the right part is moved, while visually assessing the smoothness of the transition. The readings of the slider parts will now also be displayed as a double value through a fraction.
As a result, between the black slider and the left part of the white slider, those dark pixel levels are determined that will be affected by noise reduction correction with a 100% impact, and the levels between the parts of the white slider will be affected by noise reduction with a smooth fade.
Turn off the visibility of the indicator layer with a green fill by left-clicking on the eye icon to the left of the layer thumbnail. Or you can remove it completely.
We evaluate the result of selective noise reduction. At 100% display scale, hold down the “Alt” key with the left mouse button and click on the eye icon of the lowest background layer. When you first click on the icon, the visibility and, accordingly, the effect of the correction of the upper layers is turned off - the result is “BEFORE”; when you click the second time, the effect of the correction is turned on - the result is “AFTER”.
The suppression of noise in dark areas of the image, unfortunately, is poorly visible in screenshots, but the fact that the girl’s face remains unchanged is visible to the naked eye.
This is a quick and interesting way to carry out selective noise reduction correction in Photoshop .
Happy creative success!
If you don’t want to miss interesting lessons on photo processing, subscribe to the newsletter.
The subscription form is below.
Basic photo processing techniques in Adobe Photoshop: noise removal
Adding sharpness
Photoshop won't be able to add sharpening where it wasn't originally there. The point of sharpening is to increase micro-contrast at the boundaries of light and dark areas. The most clearly visible are already existing boundaries, both those that we would like to emphasize and those whose appearance is undesirable.
Unlike noise removal, we recommend sharpening as a last resort, when the image is fully processed and ready for publication. Moreover, for different sizes of photographs, depending on how exactly the picture will be used, the degree of adding sharpness should be different.
Add sharpening in Adobe Camera Raw
Similar to the fight against noise, to increase sharpness, you can use the Adobe Camera Raw filter, which runs for both RAW files and JPEGs.
Open the RAW file in Photoshop (in this case, Camera Raw will launch automatically) or select the menu item Filter → Camera Raw Filter .
The same menu item Detail/“Detailing” . Only this time we are interested in the Sharpening/"Sharpness Adjustment" .
Amount/"Effect" is responsible for the degree of impact.
Radius/"Radius" adjusts the size of the details, the sharpness of which will be enhanced.
Detail/“Detailing” - the degree of impact on small details and noise.
Masking allows you to limit the impact only on the largest, most contrasting boundaries.
We recommend performing all actions at 100% frame magnification and periodically viewing different parts of the image. This will avoid unnecessary artifacts and control quality.
But moving the sliders at random is not the right solution. It’s more logical to start by setting the Radius . Our task is to adjust the Radius in such a way that the details that need to be sharpened become most obvious, but without the appearance of halos and artifacts.
To adjust the radius parameter, when clicking on it and then dragging, you must hold down the Alt . Then the preview image will become gray with indistinguishable details (like a texture with frequency decomposition or direct influence of the High Pass / “Color Contrast” ).
The value of the Radius depends on the resolution and size of the original image and its structure. For pictures with a lot of small details (for example, landscapes), the radius value will be smaller than for those with not a lot of small details (for example, studio portraits).
After setting the radius, you can adjust the Amount , monitoring the changes. But with increased sharpening comes increased noise, because Photoshop doesn't know what's detail and what's noise. To indicate to it the boundary after which the details begin, you need the Detail . Alt -click or drag on it , a preview will appear showing what details will be affected by our sharpening efforts, but usually a simple final preview is more visual.
When the Detail 100, noise is maximized; with lower values, only large, “useful” parts are affected.
The value of the Detail should not always be reduced to zero: in this case, the picture may appear more blurry than it was originally, since against the background of new sharp details the eye begins to perceive the absence of natural “comfortable” noise as a lack of focus. Usually choose a value in the region of 3–15 (usually 3–7).
Masking allows you to strictly delimit the zones where sharpening occurs and where it does not.
As the value of the Masking , the impact on the image area decreases and remains at an extreme value only at contrasting edges. Alt key while clicking on the slider or dragging it , you can see where the sharpening will occur and which areas will be excluded from the effect.
All these and many other photo retouching techniques are discussed and described in detail in the course “Photo Retouching in Photoshop CC. Basics" at Fotoshkola.net.
This is the image obtained as a result of the correction:
LESSON: Getting rid of video noise in Photoshop. Plugin overview.
This lesson is a continuation of the topic of video correction in graphic editors. In previous videos, we learned how to do color correction in Photoshop using LUT profiles , as well as use image sequences to correct video in Photoshop .
In this video I will show you several ways to get rid of video noise using a graphic editor - Adobe Photoshop.
As we know, digital noise is a pain in the ass for all videographers and photographers. Often, it is the smaller amount of noise in the image compared to analogues that forces videographers to throw out big money for cameras with a larger sensor and less noise at high ISO values.
In today's tutorial I will be using three videos with different noise levels.
Next I open Photoshop .
Now we have to record a new Action. I open the corresponding panel and create a new “action”.
In this tutorial I'll show you several ways to remove noise from video in Photoshop.
The first, and perhaps the most natural way is to use the built-in “ Reduce Noise ” filter. It is available in the ' Filter ' - ' Noise ' menu.
Here, if there is no opportunity or desire to delve into the settings in detail, you can use the “Basic” option, where you can change the strength of the filter, try to maintain clarity, since we all know that when using noise reduction, the sharpness of the image is in any case slightly lost.
But if you want to dig deeper, you can use the advanced settings. The main difference is that in advanced mode you can adjust the strength of the noise reduction separately for each channel.
The built-in filter algorithm is not the coolest on the market, but it may be quite enough for, so to speak, everyday simple tasks.
After the filter is applied, I save the image in .png format to a specially created folder. After the file is saved, I stop recording the new Action .
Next, I go to the folder with the .png sequence and delete the file I just saved.
Now I go back to Photoshop , open the “ File ” menu, then “ Automate ” - “ Batch ”.
the Action I just created .
the .png as the source .
Folder as a target and select the folder where the created files of the new sequence will be saved.
After clicking “OK”, the machine will begin to recalculate all the images in the sequence.
If you are satisfied with this option, great. You don't have to read any further.
If you are interested in what other filters can be used to better remove noise from your videos or photos, I will tell you about the filters that I use in working on real projects, and which have often helped me out in critical situations with heavily damaged footage and pictures.
Topaz DeNoise.
If you are not yet familiar with the line of plugins from this company, I highly recommend taking the time.
It's worth it! The Topaz DeNoise plugin is perhaps my favorite of all the noise cancelers.
The plugin interface is similar to the interface of other plugins from this company.
On the left side of the window you can select one of the presets. Of course, you can change any parameters in each of these presets. In the central part of the plugin window is preview.
The tabs at the top of the plugin window provide a quick before and after comparison.
On the right of the screen is a window for navigating through the image and, directly, settings. The plugin settings are divided into 3 parts
1. Noise Reduction (noise reduction) - this is the most important parameter of the plugin;
2. Detail Recovery (recovery of image details);
3.Debanding . _ Banding is noise in the form of parallel stripes along the entire perimeter of the image, which occurs at too high ISO values when shooting.
to Noiseware , the company produces the most popular plug-in for skin and facial processing - Portraiture .
Noiseware plugin has gained the respect of users of graphic editors for quite some time.
It seems to me that this plugin is so popular because of its ease of use, as well as very flexible settings for selecting areas of the image to be processed. It has 13 built-in presets .
The presets are named according to various life situations (for example, “night scene”, “portrait”, “strong noise”, etc.) This plugin, like Topaz DeNoise , allows you to adjust the noise level separately for each channel, shadows and bright tones (shadows , highlights). I like the ability of this plugin to process individual areas of the image based on the amount of detail in them. You can restore details, and, accordingly, partially the sharpness of the image, either using the “ Detail Protection ” function, or using “ Detail Enhancement ”.
Sometimes I use this plugin for photo editing.
The most important advantage of this plugin is that it allows you to process not only the entire image, but also part of it. When the plugin is turned on, it immediately analyzes the image and automatically finds points in it to create, so to speak, a “noise profile” of the image.
After creating the “noise profile”, you need to switch to the “ Reduce ” tab. Here, the settings, just like in the plugins just discussed, allow you to reduce noise separately for each channel. At the bottom right of the screen there is a “ magnifying glass ” window, which allows you to quickly see the result at different points in the image.
I'm not showing you today the also quite popular Noise Ninja . Since, unfortunately, I could not find it in the public domain, and I wanted to show you exactly those plugins that you could quickly find on the Internet on well-known resources.
Conclusion:
I prefer working with the Topaz Denoise .
The path to achieving the desired results with this plugin is quite simple, and the quality of work is high. In terms of image processing speed, in my opinion, the built-in filter of the program wins.
I'm not showing you today the also quite popular Noise Ninja . Since I unfortunately could not find it in the public domain, I wanted to show you exactly those plugins that you could quickly find on the Internet.
How to remove noise in Photoshop?
Good day to all! We continue to slowly fill the Lessons for Advanced section! In this article I want to tell and show you one of the fastest and easiest ways to remove noise in Photoshop . In order to explore this topic in more depth and detail, I specially selected an image in which I will show how to remove brightness noise and color noise from an image.
In general, noise is a whole, unpleasant problem with digital photographs taken in the dark, and now we are solving this problem. First, let's open our image with noise and evaluate the situation as a whole.
Go to the File/Open or use the hotkeys CTRL+O . By the way, you can also open the image using the “ Open as… ” function ( ALT+SHIFT+CTRL+O ), find and select our image with noise, then to the right of the “File name” field, select open as “Camera Raw” file type and our image immediately opens in the Camera Raw filter.
I open my image first, in the usual way, to further show how to go to the special “Camera Raw” filter, select the desired tab and perform noise removal operations. Now let's evaluate my image, which contains color and luminance noise. Here it is:
Image with color and luminance noise
There is more than enough noise in this image. You've probably already begun to doubt that we'll succeed... Of course, we won't be able to completely remove all the noise, but it's easy to make the image less noisy. Let's move from theory to practice!
Step #1
So, I opened my image in Photoshop, now I need to go to a special filter - “Camera Raw filter”. To do this, I go to the top menu Filter/Camera Raw Filter , or use the hotkeys ( SHIFT+CTRL+A ).
Go to the Filter/Camera Raw Filter menu...
Step #2
The Adobe Camera Raw filter window opens in front of us. Place a checkmark at the top in the “Control view” item to immediately see changes in the image while working in the filter. Next, select the “Detailing” tab, I have this third icon on the left. In the lower left corner you can change the image scale, we will need this soon.
Adobe Camera Raw Filter Window
Step #3
In order to make it more convenient to work and see everything that happens to the image, we increase the scale to 300%. Please note that the color and brightness noise immediately became clearly visible. First, let's remove the color noise.
Find the “Color” slider and slowly move it to the right until the color dots disappear. Don't try to remove luminance noise at this stage, for now we are only removing color noise (color dots). As soon as the color dots disappear, immediately stop moving the slider.
Zoomed the image up to 300%
This is what we got at this step after some simple manipulations with the “Color” slider. Notice that the colored dots (color noise) have completely disappeared from the image. Now all that remains is to remove the brightness noise.
Color noise in the form of color dots is completely removed
Step #4
Now let's move on to removing luminance noise. In order to do this, find the “Luminity” slider and slowly move it to the right side, while simultaneously observing our image. When it is enough, we determine it individually in each case, but the “Luminance” value in any case is always higher than the “Chromaticity” value. Here's what happened:
This is the picture we got, the noise has almost completely disappeared
Step #5
As a result of all our manipulations, the sharpness of the image decreased. In order to increase sharpness, you need to move the “Effect” or “Brightness Details” sliders to the right. You can move these two sliders or any one of them.
But keep in mind, you need to move the sliders very carefully, because the opposite effect occurs; the more you add sharpness, the more noise appears. At the end, do not forget to click the “Ok” button to save all changes.
Carefully add sharpness
Now let's look at the result of all our work to remove noise from the image. As a result, we received an image with virtually no noise, the result is quite decent. I think now you will no longer have the question of how to remove noise in Photoshop .
This is what happened after noise removal processing
Now I have a few questions for you. Please share what methods you use to remove noise in Photoshop? Did everything work out using my method? If you have questions, write in the comments.
If you liked this lesson and you find it useful, then right now share the link to this lesson with your friends on social networks, do a good deed and let other people benefit from this material too! Social buttons networks are located below.
That's all for today, thank you for your attention, see you in the next lessons!
13 comments
Please Victoria! I'm glad that the lesson was useful to you :)
Thank you. The lesson turned out to be very simple, but useful for me. True, I have Photoshop c6, but everything worked out. For some reason I can’t download all your lessons...
Please Alexander! What lessons are you unable to download?
Yes, I’m following... BUT WOT shows that your side is dangerous...
strange..try updating your antivirus program!
The image in the Adobe Camera Raw window looks quite good after processing, I save it, open it in another editor and see horror, as if there was no processing.
Can you tell me what's wrong?
What editor do you open it in?
Thanks a lot. I corrected an old black and white photograph. It turned out well
There are actually a lot of ways!
For each specific case. This is the simplest, although the result is mediocre. Here's what I can suggest: 1. Chroma noise?
Do you want to remove them while maintaining maximum image quality? Easily! We use channel-by-channel image processing! That is, in RGB mode we open each channel one by one and see which of them has the maximum amount of noise. Most often this is the “blue” (blue, B) channel, especially if the photo is from a mobile phone. Let's use Camera Raw and see happiness! If necessary, we apply it to other channels. 2. Brightness noise?
Even easier! We switch the image to LAB mode (image-mode-LAB) and using the same REV camera we remove noise and edit the brightness channel! 3. This is a professional trick that has been silent for a long time.
Open the image in LAB mode, select only the brightness channel, transfer it (copy) to a new file. There we subject it (a black and white image) to all imaginable processing, for noise, clarity, etc., then we copy this file and paste it onto the brightness channel of the original. Next, we convert the image to RGB, and do the same (with caution) with all three channels.
You can send me samples by email, and when I have free time, I will process and send them back, as an example. By the way, this is just a small part of the techniques I use. There is an external channel overlay, which corrects the photo very well, and a lot of other useful techniques! Good luck and creative success to everyone. Best regards, Arthur.
Arthur you are a real expert :)
I can remove noise using Camera Raw, I can recommend this solution
Removing noise from photos in Photoshop
Today we'll look at what noise is in digital photographs and how to avoid it.
Noise in digital photographs is a legacy of the grain found in the negatives and positives of film photographs. However, grain is considered a noble phenomenon, but noise is not. In order to understand where the noise comes from and how to deal with it, you need to understand its nature.
Digital noise appears as an element of a digital image. Its dimensions are close to the size of a pixel. There are two types of noise - chromatic and luminance. The noise level depends on the set ISO value - light sensitivity, as well as the black level. Black level is a systematic correction based on the value of the dark current level. The level of dark current is measured by the device from a group of pixels that are in complete darkness. Let's not dive too deeply into the physics of the process. To put it as simply as possible, chromatic noise appears at high ISO values. Each camera has its own high ISO setting. Let's give an example. The Canon 350D exhibits noise at ISO 600. The noise is quite clearly visible. At the same time, the Canon 5D mark II only begins to make noise in the photo at ISO = 3000.
You need to remember one rule. It's better to avoid noise when shooting than to deal with it during processing. You should also adhere to a few more rules:
1. It is better not to shoot at night and in the twilight with a high ISO value.
2. It is better to shoot dark indoor spaces with a tripod.
3. When shooting sunsets or sunrises, it is better to use long shutter speeds rather than high ISO.
4. In low light, use a flash, but never set your ISO too high.
If after shooting you find noise in the photos, you can use software methods to suppress it. It will not be possible to completely get rid of noise, it will not be possible to eliminate it, but it is quite possible to significantly reduce the noise level. All programs give a side effect after applying the filter. It manifests itself in a decrease in contrast and blurring of the image. If, for example, you use a photo of a car, then using a noise removal filter will lead to the loss of details in the edges of the body, the pattern of the wheels, the radiator grille, etc. Although smoothing the texture of the photo will benefit the photograph. To restore the sharpness and details of the image, you will have to use not only a noise removal program, but also use masks and layers.
We will compare the operating principles and effectiveness of two noise reduction programs. The test will use an image of a Mazda car from Pre mus.
We will consider two popular software products - Imagenomic Noiseware Professional and Noise Ninja. They are both available as an add-on for Photoshop and as a standalone application. Let's start the test.
This is our test shot:
Let's try out the Noiseware plugin first.
This is what the interface looks like:
The basic functions of the program include: noise reduction, strengthening and protection of parts. There is also a set of presets for different types and genres of shooting. There are blanks from portraits to landscapes. There are also tabs for more detailed settings of the plugin - these are Detail, Frequency, Color Range, Tonal Range. Without going into the details of the program, let's look at the effect of applying the filter.
As you may have noticed, the result is obvious. In a few clicks we managed to rid the image of a huge amount of noise and remove noise. Loss of parts is negligible. Notice how smooth the sky has become.
The second is the Noise Ninja plugin.
This is what its interface looks like:
In this test, we do not use any special settings. All processing is performed automatically. And this is what we got.
The amount of noise has decreased significantly. Like Noiseware, Noise Ninja also reduced the detail on the grass.
The following image shows the effect of applying a duplicate of the original layer with a mask that restores the detail of the grass.
This is what it looks like:
Anyone who edits photographs experiences problems caused by noise. The use of the described filters significantly improves the quality of the image. I hope this lesson was useful to everyone who is faced with the problem of noise in photos.