Introduction to Tilt&shift lenses
What is a tilt shift lens and what is its scope of application?
Greetings! I’m in touch with you, Timur Mustaev. Most likely, you, readers, have heard about a camera screen that is very convenient in a functional sense, which can extend and unfold. What can you say about a moving lens? Interested? Well, get ready to find out what a tilt shift lens is.
Basic provisions
Let's first look at the general aspects, namely: what is hidden behind the term tilt-shift and how optics with this name differ from others.
Tilt shift means turn and shift. Consequently, a lens with such characteristics can move and tilt its front part. Due to the fact that the angle between the plane of the photograph and the plane of the camera sensor changes, we have greater opportunities to work with perspective, as well as different sharpness of the objects in the photograph.
Optics for photographic equipment can be distinguished according to different criteria. Here is the manufacturer, focal length, aperture ratio, etc., but tilt-shift lenses are considered a completely special category.
You don’t often see them in the work of an ordinary photographer, and beginners may not even know about the existence of such a thing. But their functions are amazing and can be useful in many situations, namely:
When photographing architecture
Usually, when photographing buildings (and in general any objects with straight lines), the unpleasant effect of their distortion is obtained. The houses appear to be falling as their vertical walls begin to become arched. This is a common occurrence, especially when using a wide-angle lens.
If you happen to have a tilt-shift lens in your hands, then you don’t have to worry about such defects: all architectural structures will be straight. Not during post-processing, but during the shooting stage, you can adjust the tilt of the lens so as to correctly display the perspective.
For landscape
In addition to the fact that here the transfer of a sense of depth (perspective) depends only on you, you can also control the zone of clarity of objects falling into the frame.
With a regular lens, getting every part of a photo sharp is difficult. Even if we significantly increase the aperture value, the problem will not be completely solved - some objects will still appear blurry when viewed closely. In addition, a large f will create new problems.
Helpful information
You don't have to worry about how to work with this type of lens. It is attached to the device in the same way as the others. It is quite easy to adjust: all control is located directly on it and comes down to its physical tilt, turn, rotation.
Where can we find such optics? If you consider yourself a “Nikonovite” or “Kenonovite”, there will be no difficulties in purchasing.
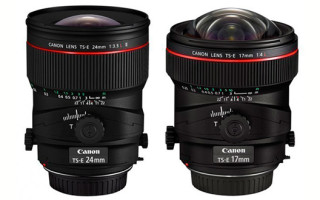
Canon, for example, has four TS-E lens options, covering focal lengths from 17mm to 90mm. Nikon can offer three PC-E lenses with focal lengths of 24-85 mm, as well as a PC lens with a focal length of 19 mm.
Unfortunately, the optics, called tilt-shift, are only manually controlled, including focus settings. Therefore, you can't rely on autofocus. Careful site installation and a keen eye will go a long way.
It is recommended to place the camera on a tripod to ensure maximum sharpness in all areas of the photo and, accordingly, a large depth of field.
Craftsmen even offer amateur photographers to make their own shift lenses. For example, it is proposed to take an old Helios for manufacturing, or rather its part with lenses, a rubber mount for the steering rack and a bayonet cap in which a hole is made. And all this is held together with strong threads and electrical tape. Of course, you can try it if you don’t mind the existing lens and the time spent on the experiment.
You can already judge the result when you try to photograph something. In my opinion, the design will not inspire confidence, and if you take photography seriously and use various types of lenses, then all the equipment must be of high quality and reliable.
The price of such “toys” for photographers will be significant. And if your funds do not yet allow you to buy a tilt-shift lens, you can, to a certain extent, replace it with an adapter with the appropriate properties. You just need to be careful - the shift adapter is not suitable for all cameras, but only for those that have a wide image field, that is, for full-frame cameras.
For a more detailed study of the camera, technical and functional parts, an excellent video course will help you. It contains only the necessary and important video lessons that will help you in your development as a photographer.
Digital SLR for a beginner 2.0 - who has a NIKON camera.
My first SLR - who has a CANON camera.
Bye everyone! Visit my blog, subscribe. Let's expand our photography knowledge together!
Introduction to Tilt&shift lenses
Meet the optical superheroes: They can straighten tall buildings with a single shift, give you insanely deep focus without insanely small apertures, or limit focus to a single lash. And they do it while you're shooting, without fiddling with software. They are popular with architectural, food, portrait and nature photographers who strive for perfect perspectives, and a treasure for those who want to produce unusual effects.
Shift vs Fall
©TRENT BELL
Bell panned his 17mm f/4L Canon TS-E lens from top to bottom to capture three separate horizontal images, then stitched them together in Photoshop CS5. Shot on Canon EOS 5D Mark II, 0.3 sec at f/11, ISO 500.
When you tilt your camera to photograph a tall building or other structure, it may appear as if you are falling—the parallel lines will converge as you rise. With a tilt/shift lens, you can hold the camera parallel to the structure and move the lens up to capture more of the structure and less of the foreground.
How it works: A T/S (tilt/shift) lens covers a much larger image circle than standard lenses, so you have plenty of leeway to move the sensor or film up, down or sideways within the circle.
How to do it: This is an intuitive action. To shoot something above the camera position, simply move the lens up. (A bubble level in the sub shoe will help keep the camera level with your subject.) Conversely, to shoot something lower—if you're photographing a structure from an elevated position—pull the lens down. And yes, you are limited by how far you can move.
©IAN PLANT
Plant used shift (to keep the trees upright) and tilt (to keep all the trilliums in focus) on his 24mm f/3.5L Canon TS-E lens with a Canon EOS 5D. Exposure 2.5 sec at f/16.
This funny, albeit real, term refers to the apparently almost infinite depth of field achieved by tilting the T/S lens in a certain way relative to the subject. Besides the great depth, it has another advantage: You can achieve the effect with a fairly moderate aperture, and therefore use faster shutter speeds. This is why nature photographers love T/S lenses - they allow shutter speeds fast enough to keep wildflowers from blurring on a windy day.
How it works: By tilting the focus plane in the same direction as the subject plane, you get a much larger subject plane in focus, almost everywhere. Technically, this does not increase the depth of field, which is simply the zone of “acceptable” sharpness for a normally focused lens. With the Scheimpflug principle, the image is truly in focus at various points along the plane of the subject being photographed.
How to do it: Trial and error. To start, set the lens tilt to zero, and focus about one-third in the area you want to be sharp. Then tilt or rotate the lens relative to the subject plane: For a flower in the foreground and a tree in the neutral zone, tilt down; for a picket fence at an angle towards you, you need to turn the lens sideways towards the fence. Then play with the focus again. Then fiddle with the tilt again - and repeat. Check the depth of field by stopping down the lens for the shooting aperture. A tripod is of course a must.
©SATORU MURATO
Murato kept most of the Boston street out of focus by raising his 80mm f/2.8 Hartblei Super-Rotator lens up rather than down. Shot with Canon EOS 5D, 1/250 sec at f/2.8, ISO 200.
This is not actually the official term for this species, but it fits. Here you are deliberately bending the lens in the opposite direction of what will give you increased depth, and thus severely limit the focus to one small area of your image. Popular uses include portraiture, where only a part of the image, such as an eye, is in focus, or a miniature effect, where limited focus can make a street scene look like a toy town.
How it works: When you tilt or rotate the lens away from the subject plane, the focus is locked to a narrow pivot point on the focus plane. Again, this does not technically limit the depth of field, since the blurred areas of the image were left out of focus, not out of depth of field.
How to do it: As with the Scheimpflug Effect, we use trial and error. Start by focusing with the lens straight, centered on one feature you want to keep in focus - for example, near the person's eye in a portrait. Then tilt or rotate the lens in the direction opposite to the plane of the subject—for example, the plane of the face. For a toy landscape, it helps to shoot from a high vantage point so you're looking down. A larger aperture limits the area of focus more, so also check the depth of field during your preview.
©MIKE BAXTER
Baxter kept his Canon EOS 5D out of sight with a side-shift Pentax FA 33-55mm f/4.5 lens mounted with a Zörk shift adapter; 1/2 sec at f/16, ISO 200.
OK, we made up this term, but it fits. You can use lens shift to shoot in the mirror without – the ghost of Dracula! – appearance of you or the camera in the mirror. This is a handy trick for shooting interior decor, as well as artistic still life photography with mirrors. Convenient for photographing certain products, as it allows you to literally shoot around objects.
How it works: If you hold the camera parallel to the mirror, but to the side, and then move the lens sideways towards the mirror, the image will appear to be taken head-on. Although, objects in front of the mirror will appear rearranged from the central projection. Amazing!
How to do it: Exactly what it sounds like. Set the composition (a tripod is almost mandatory), then move the camera a step to one side or the other so that you and it are out of the reflection. (Sometimes you can do this by lowering the camera and moving the lens up.) See which view in the mirror looks better - when you move to the left, to the right, or crouched. In the case of a very wide angle T/S lens and/or a very large mirror, you may not be able to move enough to dematerialize yourself.
Now that we've shown how great it is to use tilt-shift lenses, are you considering purchasing one?
Canon and Nikon practically own the tilt/shift DSLR lens industry. Canon makes 17mm f/4, 24mm f/3.5, 45mm f/2.8 and 90mm f/2.8 TS-E lenses. Nikon offers the 24mm f/3.5, 45mm f/2.8, and 85mm f/2.8 PC-E Nikkor. These are all manual focus lenses, although they can be used in auto exposure modes. Hartblei makes 35mm f/2.8, 65mm f/3.5, 80mm f/3.5 and 120mm f/2.8 Super-Rotator T/S lenses for many DSLR manufacturers, plus a 45mm f/3.5 for several medium format cameras. Schneider makes a shift-only lens, the 28mm f/2.8 PC Super-Angulon, that can be mounted on a variety of cameras using a T-mount.
Create six original effects with one shift lens
Tilt-shift in photography is usually associated exclusively with creating photographs with a miniature effect. The miniature effect isn't the only thing you can achieve with a tilt-shift lens. In this tutorial we'll show you six completely different effects you can create with Tilt-shift.
Tilt-shift lenses are also popular due to their shallow depth of field. The creation of a miniature effect has made shift lenses extremely popular. The miniature effect is created by shifting the lens relative to the sensor. During shooting, the lens is parallel to the sensor, but moves up and down or side to side, allowing you to control the image.
Shifting the lens allows you to increase or decrease the amount of the scene that is in focus. If you want to get an original image without resorting to software, a shift lens is your only option.
Shift lens: Correctly converging verticals
It is very useful to use a tilt-shift lens when photographing architecture. By shifting the lens, the vertical lines will run parallel, which is a very important point in any architectural photography. If you try to photograph the walls of houses with your regular lens, you will notice that the lines are not parallel. In this case, an up and down shift is used.
Capture panoramic scenes with a tilt-shift lens
With a shift lens, you can create beautiful horizontal landscape photos that you can later combine into a single panoramic shot using Photomerge in Photoshop.
Once you have positioned the camera, the only thing you need to do is create three images, one offset to the left, one centered, and one offset to the right. With Tilt-shift you can create extremely wide panoramas that can be created by rotating the camera, while the vertical lines remain parallel.
Shift lenses help you avoid obstacles while shooting
Sometimes it is very difficult to take a beautiful photo, since some foreground objects make it difficult to place the subject beautifully in the frame. In this case, a shift lens can greatly help you, which, thanks to the shift of the optics up and down, will be able to bypass the interfering foreground object.
Creating a Miniature Effect with a Shift Lens
The miniature effect is created by moving the lens up and down. It is best to take photographs with a miniature effect from a high point. This way you will have a large field of view and good visibility. Tilt of the lens upward means that the plane of focus moves in the opposite direction of the subject, thus creating a narrow space in focus, leaving the rest of the frame out of focus.
The miniature effect will be more noticeable when shooting at a large aperture. At the same time, you need to clearly focus on the focus area, since the rest of the space will be blurred.
Tilt-shift with a shift to the side
This effect is very similar to the miniature effect, but at the same time, the camera moves from side to side. This option will be ideal when shooting a scene with the same objects, for example, like the flower vases in the example. The result is a well-focused subject in the center of the scene, and blurring of other objects to the sides.
Increasing depth of field with a shift lens
Using Tilt-shift to create an image with a large depth of field is a very delicate process that requires great care. In this case, it is very important to preserve the sharpness of the main subject, which might be impossible when shooting with a conventional lens at a large aperture. Once you have the composition you want in the viewfinder, slowly tilt the lens.
5 facts about tilt-shift lenses
A tilt-shift lens is, whatever you say, a useful thing. Take, for example, the effect adored by many: large-sized objects being photographed are depicted as tiny figures. Many compact cameras have built-in software filters that simulate this effect. However, it is created using a tilt-shift lens. Below we've answered five common questions about tilt-shift lenses so you can learn a little more about their capabilities before using them.
What are tilt-shift lenses?
This type of lens is often called perspective-correcting. Tilt-shift lenses have the ability to tilt, rotate (from English tilt), the image plane at an angle to the plane of the photosensitive layer. And also shift (from English shift) the image plane along the plane of the photosensitive layer.
How does a tilt-shift lens work?
The design of the lens is such (which outwardly distinguishes it from many “relatives”) that the front part is movable. It can tilt at a given angle relative to the sensor plane. As a result, you can get an extremely small depth of field in one part of the scene being filmed, and close to infinity in another.
- Note translator - you can learn more about depth of field from the article “Fundamentals of Photography #3”
The ability to shift the front of the lens along the plane of the light sensor can be useful in architectural photography. When photographing a building with a regular lens, you will most likely encounter a distorted image of straight lines. The verticals will curve and converge towards the center of the frame.
Images of tall buildings using a regular lens may turn out distorted.
The use of a tilt-shift lens in architectural photography is an opportunity to correct the perspective image at the shooting stage. Instead of making corrections at the processing stage.
Who makes tilt-shift lenses?
Canon offers 4 TS-E (tilt-shift) lenses that cover the focal length range from 17 to 90 mm. Nikon produces 3 lenses (PS-E, perspective control) with focal lengths ranging from 24 to 85 mm.
“Native” tilt-shift lenses are compatible with both full-frame cameras and cameras with an APS-C format sensor.
- P rim. translator - you can learn more about the sizes of modern light-sensitive sensors and related features from the article “Fundamentals of Photography #4.5” .
When is it appropriate to use a tilt-shift lens?
It will come in handy when photographing architecture. It will allow you to “keep” vertical the high walls of buildings, which, when photographed with a conventional lens, “strive” to bend into an arc and lean towards the center of the frame. This distortion becomes more pronounced the higher the building you are photographing and the closer you, the photographer, are located to it.
By tilting the plane of the front lens at an angle to the plane of the light sensor, a tilt-shift lens is very useful in landscape photography. In scenes where it is necessary to depict objects, both distant and nearby in relation to the shooting point, in sharpness at the same time.
How to attach a tilt-shift lens to a camera? Are there any special features?
Such lenses have a typical mount. They are attached to the camera in the same way as regular lenses. The lens itself has elements that allow you to control the angle of inclination relative to the sensor plane and the amount of displacement relative to the optical axis of the lens.
Author of the article: J. Meyer
Introduction to Tilt&shift lenses
To come in
Tilt-Shift: What is it?
The tilt shift effect is already well known to photography enthusiasts. For anyone who knows what it is and how to achieve this effect, just a few photos to look at. For everyone else, a short description and explanation of the effect.
Tilt-Shift is an interesting effect that makes the illusion of a toy world out of ordinary photography. Only a small area of the image is in focus; most of the image is blurred. The colors and contrast are increased and it gives the impression of unreality. The tilt shift effect can be achieved in several ways:
Shooting with a tilt shift lens: For real tilt shift photography you need special lenses, such as the Nikon lens in the picture.
Source: Wikimedia | by RitchyBlack
With this lens you can capture a large area of the image. In addition, the lenses inside the lens can be tilted and rotated, changing the perspective.
Shift allows the photographer to change the position of the image captured by the lens relative to the digital camera's sensor. This means that the center of perspective of the lens no longer corresponds to the center of perspective of the image, creating an effect similar to using a crop to the side of an image captured by a lens with a wider angle of view.
Rotation allows the photographer to rotate the plane of sharpest focus so that it is no longer perpendicular to the optical axis of the lens. This gives rise to a wedge-shaped depth of field, the width of which increases with distance from the camera. The tilt shift technique works mechanically.
Software: tilt shift effect, that is, a perspective shift can be achieved using different programs for creating photographs in this style. The programs use a special algorithm that blurs with the required strength at a given point, while the programs completely replicate the optical effect of blur. Due to this effect, the objects in the photo look like toy miniatures. This is a budget opportunity to get tilt shift photography, because... special lenses are very expensive (about 50 to 80 thousand rubles). In addition, using programs, a photographer can endlessly experiment with settings and create any number of thumbnail options. If the photo was taken using a tilt-shift lens, then there will be no opportunity to edit and correct this effect.
Lensbaby is a lens developed by Lensbabies that includes the delights of the Monocle and Tilt Shift. Lensbaby is quite flexible and can be used to tilt and slide. The disadvantage is that it is almost impossible to move or tilt with equal force and is therefore inconvenient to use in burst shooting. Here's a photo taken with Lensbaby:
Freelensing literally means “without a lens.”
We are talking about the deliberately incorrect use of a DSLR camera lens (or a system mirrorless camera), when it (the lens) is simply unfastened from the body and turned in an arbitrary direction. Freelensing for brave creative people. In this technique, the lens is separated from the camera and rotated in different directions (tilt) by hand. Success, as a rule, is variable; good pictures are not always obtained this way and this, of course, is not an alternative to good optics or software. Stray light behind the lens can cause additional problems. Try it, you might like it.
Photoshop – the tilt shift effect can also be obtained in a graphics editor. This is our next post ;-))
Sample Tilt-Shift Photos
Kyle D. Adams Freelensing
Rachel Landers | Stairway in Rome
Cityshrinker | London
Cityshrinker |New York City
Cityshrinker X Geelong
Cityshrinker | Coney Island
Cityshrinker | Old/New/Old/New
Pixcube Animation Studio | Little Beijing
Also not new, but interesting video Video: Sammy Metwalli | Tiny Town Berlin
Kosare | Mobile Home auf den Kanaren
Claus Jorstad | Volvo Loader
Gary Smith 1968 | Just Plane Madness
mtlockca | San Francisco HDR Tilt Shift (made with Fhotoroom 3)
There's a group on Flickr where you'll find over 18,700 images taken with software, mobile, or in post-production.
Fans of tilt shift should take a closer look at mtlockca's work. You will also find Tilt-Shift - HDR pictures.
sgrais | Beef/Gyros
We wish you pleasure in learning and success in shooting ;-))
Tilt/Shift – lenses for perspective correction
Using tilt/shift lenses, you can improve the functionality of cameras in terms of perspective and depth of field. The capabilities their optics provide cannot be replaced by digital processing. For some types of photography - architectural, landscape - they are often simply irreplaceable.
Shift makes it possible to move the image relative to the digital camera sensor. As a result, the correspondence between the perspective centers of the lens and the image is lost. The result is an effect similar to the shift in cropping from the center of the image to the edges of wide-angle lenses.
The image on the digital sensor of the camera is obtained as a result of the lens transmitting a circular image. In this case, the sensor does not capture the entire circular image, but part of it – the central rectangular crop.
Most lenses have a 360-degree image that is slightly larger than the image captured by a digital sensor. Shift lenses, on the other hand, convey a much larger circular image. This makes it possible to move the image circle to select the desired cropping of a given rectangle. Shift is used when you need to change perspective or expand the angle of view. Multiple shots are used to expand the angle of view.
Added to the shifting capabilities is the advantage of obtaining better image quality at the edges (for the center position). This corresponds to the use of full-frame lenses on cameras with a reduced matrix (crop cameras). As a result, the resulting photo will be of higher quality: vignetting and blur will be significantly less.
The flip side of the coin is that shift lenses are larger and heavier than regular lenses (at the same focal length and largest aperture). In addition, with a significant shift, those parts of the circular image that have already degraded quality will fall into the field of view. But here it must be said that with a regular lens, the constantly available image is often not of the best quality. A tilt/shift lens with a focal length of 24 mm is optically equivalent to a conventional lens with a focal length of 16 mm due to the same size of the circular image. And it follows from this that a tilt/shift lens with a 24 mm focus is inferior in terms of the quality of the resulting optical image to a conventional lens with a 24 mm focus. This is understandable - the wider the angle of view, the lower the quality.
The most common use of shift is in architectural photography . There it is used in perspective to straighten vertical converging lines. Parallel vertical lines begin to converge when the camera lens (the center of the image circle) begins to deviate from the horizontal position. A shift lens is capable of transmitting an image located below or above the horizontal plane, with the center of the imaged circle located on a horizontal line. This makes it possible to influence the future.
Similar results can be achieved in other ways. One of them is to use a wide-angle lens and then crop the print. But at the same time, most of the resulting image will remain outside the frame. Another common method is digital image processing in Adobe Photoshop. The program contains a special tool for correcting perspective. The vertical image is stretched and the perspective improves, but the horizontal image is worsened. Even though shift lenses provide some blurring at the edges of the image circle, they provide the best image quality among all methods that require perspective correction. The most obvious gain in quality is when using tilt/shift lenses with focal lengths of 45 mm and above.
By using a sequential series of offset photographs, you can create a digital panorama. Since with this method the optical center of the lens will not change its location, there will be no parallax errors in the foreground. This means that you will not need to additionally purchase a panoramic head (a device for rotating the camera). At the same time, all images will retain the original rectangular perspective.
Existing Canon and Nikon lenses allow shifting up to 11.5 mm in any direction (left - right, up - down).
Rotation makes it possible to change the angle of inclination of the plane of sharpest focus. As a result, this plane will no longer be perpendicular to the optical axis of the lens. A wedge-shaped depth of field will appear. Its width will be greater the further away the subject is. When using conventional lenses, for many cases, the depth of field is insufficient. Even with a reduced aperture value. And the aperture itself cannot always be closed beyond a certain limit - due to the phenomenon of diffraction, the image blurs in the focusing plane. But by rotating you can use depth of field more effectively. Architectural and landscape photography often requires maximum depth of sharpness. Choosing the most appropriate focus plane position can be challenging. This is because both the angle of the focal plane and the shape of the depth of field are important.
Tilt/shift lenses are limited in rotation angle (8.5º for Nikon and 8º for Canon). Rotation can be done in any direction. If it is impossible to rotate at such an angle that the focal plane takes the best position, then it can be performed at an accessible angle. And in this case, the image will come out better than using a conventional lens. More complex is the use of a combination of shift and rotation. The possibilities here are the most extensive.
Most often, Canon tilt/shift lenses are focused using the principle of trial and error. Control is carried out using the viewfinder. Focusing is achieved as a result of a series of selection of the rotation angle and focusing distance, until the optimal position of the focal plane is found. It is highly advisable to use a tripod.
The problem of depth of field in subject photography and tilt-shift optics - part 2
In the first part of the material, we discussed the problems of achieving the required depth of field in subject macro photography and possible solutions (both those that work and those that don’t).
Today we will talk about one of the most “honest” ways to increase depth of field - the use of tilt-shift optics.
This method is far from universal and only works when you need to put an extended surface in the depth of field that is at an angle to the camera.
Conventional optics allows you to get sharp only a plane parallel to the matrix or film. It copes well with shooting frontal angles of products, but turns out to be powerless when the object is filmed at an angle:
This is where sliding optics .
The optical design of tilt-shift lenses is basically the same as all other fixed-focal optics:
But tilt shifts have a mechanism (a hinge with a vernier) that allows you to tilt the optical axis relative to the camera mount:
To change the direction of tilt in such optics, the front part usually also rotates relative to the bayonet:
There is also a shift mechanism, which is useful for correcting perspective distortions, including in the subject, but today we will not consider it in the context of depth of field control.
If you look at the classic tilt-shift Canon 90 mm TS-E , which is most often used for subjects in the Canon system, you will notice that it tilts within rather small limits - only 8 degrees in each direction:
How does such a slight tilt help us compensate for tilt angles of the products being removed up to 90 degrees?
the Scheimpflug rule comes into force , which is clearly shown in the figure:
Thus, the dependence of the depth of field on the focusing distance (scale) and on the aperture also works in systems with shifts, with the only exception that the depth of field plane here is inclined, and the width is not constant, but increases the further from the camera.
It is easy to see that to compensate for a 45-degree tilt of the product, it is enough to tilt the lens only 8-10 degrees. More accurate values are derived from cumbersome formulas, which you can read about on Wikipedia .
But here there was a very extensive discussion, during which they tried to derive a set of common formulas.
A practicing photographer usually does without calculations, choosing an angle intuitively and visually.
Many photographers have difficulty with tilt-shift optics without understanding how they work.
So I created a scene out of graph paper and shot it with and without different tilts to clearly demonstrate how a tilt-shift lens works.
This is what an object looks like, shot at f/2.8 aperture without tilting , focusing at the corner closest to the viewer. It can be seen that the depth of field is no more than 1 cm:
If you tilt the optical axis of the lens down, the focusing plane will become parallel to the surface of the cube, and the entire upper edge will be in sharpness, while the depth of field will decrease up and down:
In general terms, in addition to the Scheimpflug rule, the principle of slopes can be formulated as follows:
The front lens of the lens, in its tilt, should tend to the tilt of the surface being photographed.
If necessary, for this purpose the lens is not only tilted, but also rotated around its axis.
In this shot, the lens is first rotated 90 degrees clockwise and then tilted counterclockwise to the left, following the tilt of the side of the cube:
When the focusing distance changes, the depth of field plane moves up or down. This is clearly demonstrated in the animation in the post header:
When working with modern cameras that have a live view , there is no need to mathematically calculate the tilts; a live image from the matrix, even with a double magnification, will show where the depth of field plane lies; all that remains is to make corrections, keeping in mind the principle described above.
For tilt-shift applications, the optics must provide coverage of a significant area. However, with strong tilts, the drop in sharpness towards the edge of the frame, especially at open apertures, can be quite serious. This point must be taken into account and not tilt the lens beyond what is necessary, and also place the product in the middle of the frame to achieve maximum sharpness.