Ideal for aerial photography. What you need to know about the DJI Mavic Air
Ideal for aerial photography. What you need to know about the DJI Mavic Air
40°C
- matrix:
- 1/2.3” CMOS;
- number of effective pixels: 12 MP;
- lens:
- FOV 85° 35 mm (24 mm format equivalent);
- aperture: f/2.8;
- focus: 0.5 m to ∞;
- ISO range:
- video - 100 - 1600 (auto), 100 - 1600 (manual),
- photo: 100 - 1600 (auto), 100 - 3200 (manual);
- shutter speed (electronic shutter speed): 8 - 1/8000 s;
- Max. photo size: 4:3 – 4056×3040, 16:9 – 4056×2280;
- Photo modes:
- single shot,
- HDR
- continuous shooting: 3/5/7 frames,
- automatic exposure compensation: 0.7EV in steps of 3/5 steps,
- interval: 2/3/5/7/10/15/20/30/60 s,
- panorama: 3×1;
- video resolution:
- 4K Ultra HD: 3840×2160 24/25/30p,
- 2.7K: 2720×1530 24/25/30/48/50/60p,
- FHD: 1920×1080 24/25/30/48/50/60/120p,
- HD: 1280×720 24/25/30/48/50/60/120p Max;
- video bitrate - up to 100 Mbit/s;
- supported file systems - FAT32;
- photo formats - JPEG/DNG (RAW);
- video formats - MP4/MOV (H.264/MPEG-4 AVC).
- operating frequency range: 2.400–2.4835 GHz;
- signal transmission range (in open space): 80 m (length), 50 m (height);
- broadcast quality:
- remote control: 720p at 30 fps,
- mobile device: 720p at 30 fps,
- DJI Goggles: 720p@30fps,
- Signal delay (depending on site conditions and your mobile device): 170 - 240 ms.
- system requirements: iOS 9.0 and above, Android 4.4 and above.
- Front sensors:
- Accurate measurement range: 0.5 - 12 m,
- general range: 0.5 - 24 m,
- obstacle detection speed: ≤ 8 m/s,
- field of view (FOV): 50° (horizontal), ±19° (vertical)
- Rear sensors:
- precise measurement range: 0.5 - 10 m,
- general range: 0.5 - 20 m,
- obstacle detection speed: ≤ 8 m/s,
- field of view (FOV): 50° (horizontal), ±19° (vertical)
- Lower sensors:
- height range: 0.1 - 8 m,
- operating range: 0.5 - 30 m
- Operating conditions:
- Front viewing system: surface with visible texture, illumination level > 15 lux,
- Rear vision system: surface with visible texture, illumination level > 15 lux,
- Bottom viewing system: surface with visible texture, illumination level > 15 lux and reflectance (> 20%)
- Mechanical range of rotation angles: -100°. 22°;
- Roll: -30°. 30°;
- Rotation: -12°. 12°;
- Operating range of rotation angles: -90°. 0° (default), -90°. +17° (extended mode);
- Stabilization: 3 axes (transverse, longitudinal and vertical);
- Max controllable speed (tilt): 120°/s;
- Angular vibration range: ±0.005°.
- capacity 2375 mAh
- voltage: max 11.55 V;
- charging voltage: 13.2 V;
- type: LiPo 3S,
- energy: 27.43 Wh;
- weight: 140 g;
- charging temperature range: +5
+40 ℃;
- Max. charging power: 60 W.
- operating frequency range: 2.400–2.4835 GHz;
- Signal range (open field) (2.412 - 2.462 GHz): FCC: 4000 m, CE: 2000 m, SRRC: 2000 m, MIC: 2000 m;
- operating temperature range: 0°. +40℃;
- Transmitter Power (EIRP) (2.400-2.4835 GHz): FCC:≤26 dBm, CE: ≤18 dBm, SRRC≤18 dBm, MIC:≤18 dBm;
- battery: 2970 mAh;
- operating current/voltage 140 mA / 3.7 W (Android), 750 mA / 3.7 W (iOS)
- Compatible Device Size: Max. length: 160 mm, thickness: 6.5 - 8.5 mm;
- types of USB connectors: Lightning, Micro USB (Type-B), USB-C.
CHARGER:
- input 100-240 V, 50-60 Hz, 1.4 A;
- main output: 13.2 V / 3.79 A, USB: 5 V / 2 A;
- voltage: 13.2 V;
- rated power: 50 W.
Ideal for aerial photography. What you need to know about the DJI Mavic Air
At the beginning of 2018, DJI released an unusually attractive model of the DJI Mavic Air quadcopter: a very compact device with a camera on a gyro-stabilized three-axis gimbal, capable of shooting 4K video and 12MP photos. Recently, thanks to Youtube, videos have become very popular. And the drone is largely geared towards video. Based on first impressions, the movie looks great. But video shooting doesn’t appeal to me, and I don’t have the appropriate skills. And here's a photo.
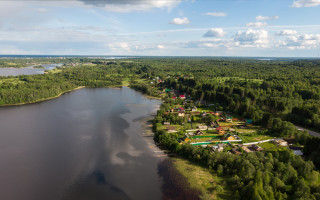
Neighborhoods of Kirillov. Kirillov on the horizon on the left
Photos are much more interesting to me. But miracles, alas, do not happen. The Mavic Air camera has a 1/2.3-inch sensor. This is a small matrix, it is 5.3 times smaller in size than a standard film frame, and 28 times smaller in area. Therefore, even at minimum sensitivity, digital noise is visible in the pictures.
DJI Mavic Air. Those in the know may notice that the red cover is not original.
From the very beginning I wanted to buy a red drone so that it would be easier to find it if something happened. But the seller didn’t have red. I bought a black one and replaced the lid with a branded one, but purchased separately.
The first thing you can do to improve the quality of your photos is to use the DNG format rather than JPG. DNG retains maximum information from the matrix; it is possible to correct exposure and restore details in highlights and shadows. You can also adjust the white balance without worrying about its settings when shooting. But by the way, the default color on the Mavic Air is already good. At least in the conditions in which I managed to shoot.
To demonstrate the processing technology, I took a part (crop) of the title frame measuring 900x900. It is important that when comparing, viewing occurs without scaling, since the scaling algorithms that the browser uses (and these are not the best algorithms) will distort the picture.
Alas, alas. The local engine scales in its own way. This is bad. To see the undistorted picture, you can watch the original article on LiveJournal . But on the desktop, because mobile browsers also scale as they please.
Here you can (and should) look at a scale of 1:1 by clicking on the picture.
Crop of a jpg file recorded by a drone camera
Crop of an image obtained by DNG conversion. Conversion was performed using Adobe Camera Raw (ACR) with default settings and Auto .
In the original jpeg the noise is invisible. This is the result of the built-in noise reduction. Detail is lost due to noise reduction. This can be clearly seen, for example, in the foliage of the bushes on the left in the foreground - there are just green spots there. Due to noise reduction, the picture becomes “plastic”. In addition, the contrast is high, details in the shadows are lost. In the picture obtained from DNG, noise is noticeable, although color noise suppression is also enabled by default in ACR. But in terms of detail, everything is much better: first of all, this can be seen from the foliage. And there is no plasticity. I almost never use auto-correction in ACR, because its results are usually not satisfactory. But here everything worked out well. The shadow side of the trees is no longer a solid dark spot.
However, I want more. You can adjust the noise reduction in ACR. But I don’t want to do this, I don’t like it and I won’t. There is no pixel sharpness. If you sharpen it, the noise will get even louder. That's why we use it.
Super-resolution technology is based on the fact that several low-resolution frames of one scene can be made into a high-resolution frame. The original frames must be taken with a shift relative to each other. Ideally half a pixel. Then, since the pixel has a finite size, it will capture close parts of the scene. And then, by combining such frames, you can count on restoring subpixel-sized details.
The Mavic Air has the ability to shoot in a burst of up to 7 frames. The drone takes these 7 frames in about 2 seconds (at 1/1000 shutter speed in RAW+jpeg mode). Then he processes and writes them down for some more time. Camera on a stabilized gimbal. Consecutive frames must, however, differ slightly from each other. And they are different. Here is the difference between the first and last frames of a series of 7 images .
Of course, you can’t count on a shift of exactly half a pixel. But the probability of a shift by an integer number of pixels is also small. Therefore, after aligning individual frames, you can hope to achieve the effect.
So, the sequence of actions will be like this:
1. Shoot 7 frames.
2. We enlarge all frames by 2 times.
3. Align them by content.
4. We average the aligned frames.
5. The result is a picture of double resolution (quadruple by the number of megapixels)
Alas, we have to note again that miracles do not happen. It is naive to expect that through generally simple manipulations we will get a clean and sharp 48-megapixel picture with a lot of new details from 12-megapixel photographs.
And this is what we get. Here again the crop is made to look without scaling.
Have there been any new details? On the white fence on the right side of the frame, just above center, the horizontal crossbars between the fence posts are now clearly visible. Also in the white house with a green roof, horizontal parts of the frame are visible in the center of the attic window. I can’t find anything else that wasn’t visible in the original footage. The noise has practically disappeared. In fact, noise is a random thing and as a result of averaging it is leveled out. But overall the picture looks blurry. You can try adding sharpness.
We get:
It became sharper, but the noise intensified again. And the confusion remained. And Photoshop's Smart sharpness, which is crooked, almost ate up the horizontal binding. Apparently, you still shouldn’t count on quadrupling megapixels.
What about doubling? Let's reduce the image to the root of two times in linear dimensions, which will correspond to reducing its area by half. And since we doubled the linear dimensions before combining and averaging, we get twice as many pixels as in the original image. Zooming out also applies sharpening. Of course, I resize along with the sharp using the C3C Image Size program. This is exactly what it is intended for.
Here is a crop of the result. When you click, you can see the entire image.
Not bad. Perhaps this option would be suitable for printing. There is no noise. But there is no pixel-by-pixel sharpness either. And we love her. So let's take the plunge and return the image size to its original size. Of course, not from the previous intermediate size, but from the maximum obtained after averaging. Of course, using the C3C Image Size program with automatic sharpening. To do this, in C3C Image Size, select a scale of 50% and Auto Sharpening.
We get a clean and sharp picture. Voila!
And the horizontal crossbars on the white fence are visible!
To automate such processing, Action was created. Even 3 options combined into a Set of C3C Actions. Download here. In addition to the listed processing steps, at the end of each Action, a call to the C3C Color Wizard , which allows you to make the final refinement of the resulting frame. I primarily use Auto Exposure and Auto Saturation (magic wand). You can adjust color balance, lightness, and sharpness.
The three Actions options are:
1. Super Res 1:1 - performs the processing described here, gives a picture of the original resolution ( F10 ).
2. Super Res 1:1 Fast - fast option ( Shift F10 ).
Does not enlarge images, aligns and averages the original version. Accordingly, there is no reduction at the end. The quality of the result is inferior to the previous one, but not much. 3. Super Res MPx2 - creates a final image with twice the number of megapixels than the original ( Ctrl F10 ).
The main version of Action works on my computer for 5 minutes. Intel Core i5 (4 cores), 24GB of memory, solid-state drive with Photoshop cache.
This is the result of fast processing
Procedure for installing and using Action
1. Download C3C Actions .
2. Click on the atn or use Load Actions. in the Actions panel of Photoshop.
3. Install C3C Image Size and C3C Color Wizard.
1. Perform preliminary strictly identical processing of a series of files. It is preferable to use DNG, then you can process it in ACR, having previously selected all files ( Select All .). You can do cropping, exposure and color correction, and correct perspective distortions. Then you can open all files in Photoshop or, if the processing was in ACR, use the Done .
2. Launch Actions. In the dialog that appears, select the files to process ( Browse. ) or use Add Open Files if all files (and no others) are open in Photoshop. Click OK.
3. Wait. When the C3C Color Wizard , you can make final adjustments or click Cancel.
4. Enjoy the result.
Full set of materials used in this article (DNG+JPG+ATN, 99MB)
Materials from Tony Northrup and Ian Norman were used in preparing this article
Updated 06/29/2018 at 19:20 [ARG:5 UNDEFINED]
Ideal for aerial photography. What you need to know about the DJI Mavic Air
Global drone leader DJI has unveiled its latest drone, the MAVIC Air, a foldable model that looks like a mix between the popular Mavic Pro and the miniature Spark. The nice thing is that the new MAVIC Air has many of the features of the older Mavic Pro model, while visually it resembles the smaller Spark.
DJI is clearly aiming the MAVIC Air at travelers, street photographers, and especially adventurers who plan to go into the wilderness. It will also be popular among athletes and adventure enthusiasts, although its combination of advanced features in a small size will likely appeal to all users.
Size and weight
When folded, the Mavic Air is actually slightly smaller than the Spark, although it is still slightly heavier.
Mavic Air weighs 430 grams. It's slightly heavier than the 300g Spark, but significantly lighter than the larger Mavic Pro (734g). What's impressive is that the feature set is much closer to what the Mavic Pro offers than the Spark.
Plus, given the Mavic Air's collapsible design, it's arguably more compact than the Spark, which, while lightweight, doesn't have the ability to fold. Unless cost is a factor, it would be hard not to choose the MAVIC Air if portability is your priority.
Camera and gimbal stabilizer
The Mavic Air uses the same 12MP 1/2.3-inch CMOS sensor as the Mavic Pro, so it's reasonable to expect similar sensor-level image quality, although some miniaturization was required to fit the camera onto such a small quadcopter.
The Air has a lens with an equivalent focal length of 24mm (equivalent) and an aperture of F2.8. It provides a viewing angle of 85 degrees. The optics are slightly darker than the Mavic Pro, which has a 28mm F2.2 lens and 79-degree field of view. In this regard, the Air camera has more in common with the Spark, which is equipped with 25mm F/2.6 optics and 82 degrees of field of view.
Despite its very small size, the gimbal stabilizer can operate in three axes, rather than two as on the Spark. It's a good news. DJI says it put a lot of effort into making such a gimbal on the Mavic Air. It is also the smallest 3-axis gimbal-mounted camera on the market.
Photos
Mavic Air offers many features for photographers. It has the same 12MP sensor as the Mavic Pro and Spark, but unlike the Spark, the Air supports saving in Raw DNG format. The Spark's lack of Raw was one of its biggest drawbacks, other than the dual-axis gimbal. This has deterred many serious photographers from purchasing a drone. The Air has the ability to shoot in Raw format, which will allow many photographers to use it for aerial photography.
In addition to RAW, the Mavic Air can shoot vertical and horizontal as well as 180-degree panoramas. There's also a high-resolution mode that allows you to create 32MP spherical panoramas, which the drone automatically takes from 25 photos and stitches them together in about 8 seconds. Built-in HDR is available for capturing scenes with high dynamic range.
Many photographers were hoping for a 1-inch sensor similar to the one found in the Phantom 4 Pro/Advanced. Unfortunately, it's currently not possible to use such a large sensor on such a small drone, especially since DJI designed the MAVIC Air as a compact model.
Video
The Mavic Air has impressive video recording capabilities, and even beats the MAVIC Pro and Spark in this area. It shoots 4K UHD/30p with a 100Mbps H.264 codec, similar to the more expensive Phantom 4 Pro/Advanced. Unlike those models, however, it doesn't offer the ability to record in HEVC (H.265), which preserves more detail at the same bit rate.
In case you need to shoot slow motion, the Mavic Air can shoot 2.7K/60p as well as 1080/120P.
Controller
The package includes a controller that works with a smartphone within a range of up to 4 km. It's visually similar to the joystick from the Mavic Pro and Spark, but unlike those models, DJI designed the Air controller to make it as compact as possible for transport. You can even remove the flight controls if necessary to fit into very tight spaces. This should be a welcome feature for travelers who want to fill their backpack as much as possible with various equipment, such as climbing gear and ropes, without the risk of damage or wasting extra space.
Gesture control
Gesture control is a feature that the Mavic Air inherits from its smaller brother Spark, which can be used to control the drone using hand movements. This is especially useful if you're trying to film yourself doing an activity, such as rock climbing or kayaking. It also allows you to take pictures when you don't want the controller to be in the frame.
Spark users noted that gesture controls were not very precise. DJI says the Mavic Air's gesture control system has been "significantly improved" and is more accurate and reliable. The drone can respond to gestures more accurately and quickly. Gestures should work at distances up to 5.8 meters.
Another useful feature when using gesture controls is the obstacle warning system. You won't have to worry about accidental collisions. The drone will be able to fly around obstacles.
Avoiding Obstacles
Obstacle avoidance is becoming a feature of all drones, and the Mavic Air has a very comprehensive system, including dual front sensors, a downward sensor, and rear cameras. Any collision can result in costly repairs, so a reliable protection system reduces the risk of damage.
This feature is useful for other reasons as well. The return to home function is automated and a drone with a good obstacle identification system is more likely to return intact in difficult flight conditions.
Advanced Pilot Awareness System (APAS)
In addition to obstacle avoidance, the Mavic Air goes one step further with a feature DJI calls "Flight Autonomy 2.0," which performs real-time positioning by creating a 3D map of the environment around the aircraft.
DJI calls this 3D map "Advanced Pilot Awareness System" or APAS, which allows it to navigate around more complex obstacles. Instead of simply stopping and hovering in the air, APAS allows you to plan a path to avoid obstacles, allowing the drone to continue flying.
Intelligent Flight Modes
One of the most useful features on a DJI drone is its ActiveTrack technology. ActiveTrack allows you to track and follow an object's movement. This allows the pilot to focus on getting a good shot rather than on flying the plane. This technology makes it possible to take better quality photographs. However, the Air is not perfect and often loses its subject.
DJI claims that ActiveTrack on the Mavic Air is much more accurate than on previous models, and notes that it now has the ability to detect multiple objects at once. Although it is not clear what will happen if these several objects go in different directions.
In addition to improved ActiveTrack technology, DJI has introduced two new smart flight modes: Asteroid and Boomerang.
Asteroid creates a sort of hybrid clip where spherical panoramas transition into a short video. Boomerang does what its name suggests. The drone flies along an ellipse, returning to its original point at the end of the path.
Memory and connections
Like most drones, the Mavic Air stores photos and videos to a MicroSD card. However, it also includes 8GB of internal storage. This will ensure you don't miss out on valuable footage if you've already filled up your existing memory cards or if you forgot a spare memory card at home. This is especially true for this model given that the Air is aimed at travelers, many of whom may be far from their car.
The Mavic Air also features the new USB-C standard for connecting to other devices.
Battery
The MAVIC Air battery provides 21 minutes of flight time. That's slightly less than the Mavic Pro (27 minutes), but five minutes more than the Spark offers (16 minutes). However, given that it is more similar in weight and size to the Spark, we can conclude that DJI did an excellent job of optimizing the size and flight endurance.
Speaking of extra batteries, if you want to add extra batteries, they will cost $79 each. DJI also sells multi-battery chargers. This charger can simultaneously charge up to four batteries. For $49, this seems like a very useful accessory.
Flight
Mavic Air has a flight radius of 5000 meters. This is unlikely to be a deciding factor for most people, but mountain explorers will appreciate the feature. DJI lists the Mavic Air as the most Mavic to date, with a top speed of 70km/h in Sport mode. It is important? Maybe. Whether you're filming a cyclist riding down a hill at breakneck speed or motorcycles and cars in motion.
Colors
The Mavic Air is available in three colors: Arctic White, Onyx Black and Flame Red.
Availability
The Mavic Air costs $799 in the standard package, which includes a protective case, propeller guards and a remote control. And the Fly More kit includes an extra set of propellers, two extra batteries, a collapsible charging hub that charges two batteries and a bag. It will be available for $999.
Mavic Air from DJI: FAQ. Everything You Need to Know.
Still undecided whether you should buy the Mavic Air? Or do you have questions about your new drone that you're looking for answers to? Then welcome to the Mavic Air FAQ.
What are the benefits?
Ultra portable and foldable. Want to start your aerial photography journey without any hassle? Not a problem if you have a Mavic Air. In addition to its powerful features, this ultra-portable drone can easily fit in your backpack or large pocket. If you think drones are too bulky and difficult to control, then it's time to reconsider.
Spherical panoramas in 32 MP resolution. Say goodbye to distortion and blur in your panoramic photos. Mavic Air can stitch together 25 photos in just 8 seconds, creating perfectly clear 32MP spherical panoramas. What's more, you can view them from a breathtaking perspective using DJI FPV goggles.
3-axis stabilizer and 4K video. With a reduced circular vibration range of up to 0.005°, Mavic Air guarantees you extremely smooth and clear images. The powerful 4K camera can record video at 30fps, shoot HD video at 120fps, and capture 12-megapixel still images.
Shot by itchban using Mavic air
Visual protection. Are you afraid to fly because you don’t know your surroundings and possible obstacles in the drone’s path? Leave your fears behind because Mavic Air has VIO technology. A powerful sensor system (consisting of a camera, dual vision sensors forward, backward and downward, an infrared sensor system downward, an IMU sensor and a group of computing cores) allows the drone to maintain its position in the air and improves its flight performance. Moreover, the drone avoids obstacles in front and behind it thanks to the Advanced Pilot Assistance System (APAS). Simply put, flight safety has improved significantly.
Gestures. Become a Jedi with Mavic Air and control your drone using a variety of gestures. By selecting Smart Capture mode, you can launch and land the drone, take selfies, record videos and much more using simple gestures! It's fun and simple.
Is video communication via Wi-Fi stable? How far can Mavic Air fly?
We understand that losing control of a drone is every pilot's nightmare. Therefore, Mavic Air uses advanced video signal via Wi-Fi, which can guarantee you better communication and connection quality. The new transmission system supports dual frequency band 2.4/5.8 GHz (5.8 GHz frequency is not supported in some countries) and 720p real-time video over a distance of up to 4 km.
Is Mavic Air waterproof?
Being a lightweight drone (430 grams), how does the Mavic Air perform in high wind conditions?
In high wind conditions, Mavic Air is stable and can withstand gusts up to 10 m/s. Sensors and a positioning system ensure that the drone will fly where you tell it to go. Additionally, thanks to the FOC and ESC sine wave drive speed controllers, the Mavic Air has a smoother motor switching process and overall greater performance from both motors and ESC. After thousands of hours of testing, the drone's propulsion system keeps you safe and reliable, even at altitudes up to 5,000 meters above sea level. So, DJI's latest technology ensures your Mavic Air can float just as fast in strong winds, giving you the confidence to fly safely.
What is the video quality of the Mavic Air?
Mavic Air shoots video in amazing 4K resolution at 30fps and 100Mbps, letting you capture every second in UHD. What's more, you can also use the Mavic Air to capture fast-moving subjects, as it can shoot slow-motion video at 1080p at 120fps.
What makes the Mavic Air's design suitable for travelers and outdoor shooting?
The Mavic Air comes with a carrying case that keeps your device safe and secure and makes it easy to carry. When you order the FlyMore combo, you will also receive a convenient carrying bag that will help you carry the drone and its accessories. In addition, travelers will appreciate the stabilizer protection and removable control sticks. The first accessory completely protects the camera from dents and dirt. And the removable control sticks will allow you to easily put the remote control in any bag, and will also save you from the need to buy special protection for them. So the Mavic Air is made for adventure!
Can a beginner pilot fly the Mavic Air?
Certainly! We've already told you about Mavic Air's impressive features, such as the powerful Flight Autonomy 2.0 sensor-based flight control system and APAS. Pilots can fly without fear of encountering obstacles, as the APAS system will independently select an appropriate flight path in which the drone will avoid obstacles. With an improved Return to Home (RTH) system, Mavic Air takes the safest route possible. This is because the drone records its path in real time.
What are the main differences between Mavic Air and Mavic Pro?
Compared to the Mavic Pro, the Mavic Air is cheaper, lighter, faster and more portable. It has more gesture control modes as well as more Quickshot modes such as Panorama, Asteroid and Boomerang. The Mavic Air doesn't fly as long as the Mavic Pro, but nevertheless, for a drone of its size, a flight duration of 21 minutes is already quite impressive. Additionally, the Mavic Air is the first DJI drone to have its own 8GB internal memory. So even if you forget your SD card, don't panic.
Is it difficult to take a cool photo in Asteroid mode?
Not at all! One click and you will get an incredible video selfie and you won't have to think about the composition of the frame. Asteroid mode makes everyday photos look incredible, and you can instantly share them on social media using the DJI GO 4 app.
DJI Mavic Air Frequently Asked Questions
Q. What control methods does Mavic Air support?
A. Mavic Air can be controlled by:
- Hand gestures
- Control equipment
- Smartphone (IOS/Android via DJIGO4 app)
- Control equipment + smartphone (IOS/Android via DJIGO4 app)
Q. How do I start the Mavic Air?
A. Connect your mobile device to your Mavic Air and follow the instructions in the DJIGO4 app.
Q. Is Mavic Air waterproof?
Q. What microSD cards are recommended by the developer to work with Mavic Air?
A. UHS class cards are recommended:
16GB Sandisk Extreme;
Kingston SDHC-I SDCAC / 16GB 32GB Sandisk Extreme V30;
Sandisk Extreme V30 A1; Sandisk Extreme V30 Pro A1 64GB Sandisk Extreme V30 A1;
Sandisk Extreme Pro V30 A1 128GB Sandisk Extreme V30 A1, Sandisk Extreme Plus V30 A1
Control equipment
Q. Can I connect my smartphone to the drone's control equipment using a regular USB cable?
Oh yeah. You can use a regular USB cable to connect your smartphone to the device via the USB port at the bottom. But this pairing method is not the most convenient. To pair devices, it is recommended to use one of the three short cables included in both kits.
Q. Where can I find my Mavic Air Wi-Fi name and password?
A. For security reasons, each Mavic Air, like any other Wi-Fi enabled device, has a unique username and password. You can find them on one side of the Air itself, in the battery compartment, and on the carrying case (iOS requires at least v9.0).
To connect your smartphone to Mavic Air for the first time, simply scan the QR code (same as your name and password) in the DJIGO4 app. You can also enter your username and password manually.
Q. How do I change my username and password?
A. Connect your smartphone to the drone via Wi-Fi. Login to the DJIGO 4 app, then go to “Wi-Fi Settings”. You can also change the password using DJI Assistant 2 on your PC.
Q. Is it possible to connect via Wi-Fi to Mavic Air using third party apps to scan the QR code?
Oh no. Scanning the QR code to connect via Wi-Fi is only possible through the DJIGO 4 app.
Power point
Q. Do I need to remove the rotors when shipping the Mavic Air?
Q. Why don't the Mavic Air rotors have a folding mechanism?
A: The Air's rotors are designed to be more streamlined, making the drone even more compact and portable when folded.
Q. Do Mavic Pro (Platinum)/Spark rotors fit the Mavic Air?
A: Mavic Pro (Platinum) rotors are not suitable. From Spark, they get up and perform their intended purpose without any problems. In tests it was revealed that when installing Spark propellers, only the flight time is reduced (on stock: 18 minutes / on Spark propellers: 17 minutes).
Q. How wind resistant is the Mavic Air?
A. Withstands wind speeds up to 10m/s.
Q. At what maximum altitude above sea level can the drone be operated?
Peculiarities
Q. At what maximum distance is gesture control (SmartCapture) possible?
A. The removal distance in “SmartCapture” mode ranges from 2.5-6 meters.
Q. What panoramic shooting modes does Mavic Air support?
A. The drone supports 4 modes:
- Vertical: The camera automatically takes three vertical photos, which are later stitched into one panoramic photo.
- Horizontal: The camera takes nine photos from different angles, stitching them together into one panoramic photo.
- 180°: the drone automatically rotates around its axis, and the camera at this time takes 21 images; in DJIGO 4 they are stitched into one 180° panoramic photo.
- Sphere: Mavic Air automatically rotates around its axis while the camera takes 25 photos, stitching them together into one spherical panoramic photo.
Q: In SmartCapture mode, when the drone is flying near the user, why is it limited to eye level?
A: In SmartCapture mode, the drone will position itself at eye level when it is 3 meters away from the user. This approach ensures greater flight safety and control accuracy. Beyond the three-meter safety limit, the user will be able to gesture to raise the drone both above and below eye level.
Nutrition
Q. Can I use the Mavic Air charger to charge the drone and control equipment at the same time?
Q. What is the Battery to Power Bank Adapter used for?
*included in Combo/Combo & DJI Goggles package
A. The user can install this adapter into the drone's battery and thereby turn it into an additional portable power source.
Q. What is the function of the power button?
A. The power button turns the battery on and off and also allows you to check its current charge level. To turn it on/off, you need to press the button twice, where the first press will be short and the second press will be long (keep pressed for at least 2 seconds). To check the charge level, you need to press the power button once, after which an indication consisting of 4 LEDs (where 4=100%) will indicate the current battery charge level.
Q. How long does it take to fully charge the drone's battery?
A. It takes 55 minutes to fully charge.
Q. How often should the battery be charged?
A. It is recommended to charge batteries at least once every three months.
Firmware update
Q. Is it possible to use other applications while updating DJIGO 4?
Oh no. Because this will cause the entire update process to fail. After which the user will have to download the firmware and repeat the update process again.
Q. Why does DJIGO 4 inform the user before the drone is restarted that the user must reconnect to the drone via Wi-Fi to complete the update?
A: The drone will need to be restarted to complete the update process. Then repeat the process of pairing devices via Wi-Fi again. The DJIGO 4 app simply reminds the user what needs to be done to complete the update process.
Q. Is it possible to turn off the Internet after a successful firmware download?
Q. What should I do if the drone firmware version does not match the battery firmware version?
A: Connect your Mavic Air to DJIGO 4 and the app will notify you when new updates are available to ensure full consistency.
Q. What factors can cause the update process to fail?
A. Possible failure factors:
- Low battery charge level. Before updating, make sure your battery level is above 50%.
- Turning off the Mavic Air or control hardware during the update process. If this happens, restart the aircraft and control equipment, and then repeat the update.
- Disabling the Internet while downloading the firmware.
- Device firmware mismatch. If the update fails repeatedly or the control equipment cannot communicate with the drone, connect them to a personal computer and update each device separately using the DJI Assistant 2 software.
Q. How far can the Mavic Air fly in FPV mode?
A. When connecting to control equipment:
- For 2.4GHz: FCC: 4000m, CE: 2000m, SRRC: 2000m (interference-free area).
- For 5.8GHz: FCC: 4000m, CE: 500m, SRRC: 2500m (interference-free area).
When connected to a mobile device:
- The maximum height is 50 meters.
- The maximum distance is 80 meters.
Q. What resolution is the video streamed in?
O. 720p at 30fps.
Q. What is the video latency of the Mavic Air?
A. When running under optimal conditions, video transmission latency ranges from 170 to 240ms. It also depends on the performance of the smartphone used.
Q. Is it possible to manually adjust the frequency range of video transmission?
A. By default, DJIGO 4 automatically selects the frequency range. But the user can manually select between the 2.4 GHz/5.8 GHz bands, as well as select the most free channel. At the same time, it is worth noting that restrictions are imposed on the 5.8 GHz frequency range (depending on the transmitter power) in a number of countries. For example, in Russia, Mavic Air flies exclusively on 2.4 GHz, without the official possibility of manually switching to 5.8 GHz, with all the resulting flight characteristics.
DJI Mavic Mini: the lightest foldable quadcopter
For Russian drone owners, September 27, 2019 was a dark day in history. It was from this date that the rules for mandatory registration of quadcopters came into force in the Russian Federation. As if they heard our complaints and realized the extent of our suffering, DJI engineers rushed to fix the situation to preserve the skies for all aerial photography enthusiasts and attract even more people to the global drone fan community. Today the company released a compact version of the Mavic 2 weighing less than 250 grams: a copter that does not fall under the requirements of Government Decree No. 658. But, besides this, the new product has a lot of advantages. Let's meet the DJI Mavic Mini and look at all its functions.
Frame
DJI gave the Mavic Mini a very compact body. Its length when folded is only 140 mm - that is, no more than an iPhone X. As one of the most famous analysts among OsitaLV drone operators said earlier, “It’s time to sell your old Spark.” Mavic Mini is more compact than this copter and can be carried right in your jacket or backpack pocket. In design, as the name suggests, this is a smaller copy of the Mavic 2. But there are differences in the design of the battery compartment, propellers, the number of visual sensors, the location and shape of the indicators, as well as the installed camera. In addition, the microUSB connector for charging and connecting to a computer, as well as the microSD card slot, were moved to the back of the case, under the battery.
At the same time, the features common to the older model are clearly visible: the body has the same streamlined aerodynamic shape, which reduces resistance to air flow, and an identical folding design.
An already fully assembled drone can be prepared for flight in just a few seconds: simply lay out the arms and propellers of the copter, press the power button, and lift it into the air. And, by the way, taking into account the weight (only 249 grams), Mavic Mini does not fall under the new rules of Russian Government Decree No. 658, according to which, from September 27, 2019, all UAVs weighing more than 250 grams and less than 30 kilograms must be registered with Rosaviatsia. Just one gram saves owners of new items from routine registration.
Flight characteristics
By reducing the weight and size of the drone, DJI had to sacrifice its flight speed. Mavic Mini has new small motors. With their help, the copter reaches speeds of up to 47 km/h in sports mode.
There is also a slight inconvenience associated with the propellers. To completely replace them, you need to spend twice as much time compared to the Mavic 2. The design is such that each blade is separately attached to the motor using screws. The kit even includes a special screwdriver for this.
Of course, DJI equipped the new model with visual sensors and a GPS+GLONASS global positioning system. Below, on the belly of the copter, next to the ventilation slots for cooling, there are a pair of infrared sensors and one stereoscopic camera that help the drone determine the landing surface. The detection range is from 0.5 to 10 meters. The function of automatic return to the take-off point (Return to Home) is available. But DJI advises carefully monitoring the drone's flight path and choosing a high enough altitude to avoid collisions.
But the flight time of this baby is really impressive - a full 30 minutes, provided there is no wind and a heading speed of 14 km/h. And another great news: the 2400 mAh (17.28 Wh) lithium-polymer battery supports Quick Charge 2.0, which can replenish the battery charge in 90 minutes.
Remote controller
DJI is well aware that controlling a drone from a smartphone is not the most convenient solution. That's why the Mavic Mini comes with a foldable remote control, similar to the Mavic Air or Spark controller. All the main control elements are in the usual place: the sticks and front panel keys are located directly under the thumbs, the stabilizer wheel and the video recording button are under the left index finger, the photo key is under the right.
Ergonomics are at the highest level, the remote control is very convenient to use and your hands do not get tired over time. What distinguishes it from the older model controller is the absence of an LCD display with telemetry data and some buttons (for example, C1/C2). Preparing the controller for operation also does not take much time: simply unfold the antennas, install the smartphone in the clamps for the mobile device, connecting it using the cable included in the kit, and turn on the remote control. And removable sticks, which can be hidden in a special compartment in the remote control, make storing the gadget easier.
Thanks to advanced Wi-Fi technology, DJI has achieved high signal transmission speeds over a distance of four kilometers (four kilometers for the FCC-compliant model (MT1SS5) and two kilometers for the CE-compliant model (MT1SD25)), as well as HD video broadcasting with 30 fps from the drone camera. But it is worth noting that you cannot fly the copter without a controller: it does not support control from smartphones via a wireless network.
The battery capacity is 2600 mAh. This is quite enough to work from two to six hours (depending on the operating system of your mobile device).
Camera
Now let's get to the fun part: taking a look at the Mavic Mini camera. The quadcopter has a 12-megapixel module with a 1/2.3-inch CMOS matrix, a lens with a viewing angle of 83 degrees and a focal length of 24 mm. The aperture size is f/2.8, and a three-axis mechanical stabilizer is responsible for smooth shots.
In appearance and characteristics, the camera is very similar to that of the Osmo Pocket. But at the same time, the lens itself is slightly shifted to the right, the maximum video resolution is 2.7K, and the shutter speed range is 4-1/8000 sec. But the light sensitivity of the matrix is identical to a pocket camera: from 100 to 3200 ISO units.
A few more words about the stabilizer: its operating tilt range varies from -90° to +20° and it is protected by a special case for safe transportation. Sensitivity is excellent, as with all DJI products. In the settings, you can adjust the speed at which the camera changes its tilt, the reaction of the stabilizer after the end of the movement, activate the movement of the stabilizer following the movements of the drone, etc.
Videos and photos taken with the camera are saved to a microSD card with a maximum capacity of 256 GB. The copter does not have built-in memory.
Shooting modes
Agree, for such a small copter, the characteristics are quite interesting. But how does the Mavic Mini fare with its shooting modes? It should immediately be noted that setting up the drone’s parameters, controlling it and broadcasting video is carried out through the new DJI Fly application. It is designed specifically for the new product, the intuitive interface makes it easy to fly the Mavic Mini, the built-in editor contains various templates for video editing, and a beginner's tutorial will help you master the basics of flight.
In DJI Fly you will find a Quickshot mode with the familiar sub-modes Dronie (shooting while moving away from the object diagonally), Circle (shooting while flying around the object), Helix (shooting while flying around the object in a spiral), Rocket (shooting the object while climbing from camera pointing vertically down). For flying in confined spaces and for recording ultra-smooth videos, there is a special cinematic mode. And for taking photos, regular single-frame shooting and interval shooting are available.
Free flight in every sense!
Calling a new product a professional tool for photo and video shooting, of course, is quite difficult. Mavic Mini is definitely a model for amateurs or those who are just thinking about a career as an aerial photographer. But, at the same time, the functionality of the drone, given its dimensions, is very impressive. Long flight time, and an amazing stabilization system, and a high-quality camera, even if it does not support 4K video, and various creative shooting modes, the ability to quickly charge, etc. All these advantages allow you to close your eyes to some minor disadvantages. And don’t forget one of the most important features of the Mavic Mini: the drone weighs so little that it does not fall under the new rules for registering copters in the Russian Federation.
roman-smirnov › Blog › Chronicles of a wind-up bird. DJI Mavic Air quadcopter review.
DJI Mavic Air is the golden mean. Of course, there was a fly in the ointment. The characteristics declared by the manufacturer are achievable only in a vacuum.
In my review, I will not overload you with all sorts of technical characteristics that are written on the official website and in any online store.
I just want to share my impressions, talk about the pros and cons, expectations and reality. And I will try to answer questions in the comments.
Selection and purchase
Let's start with perhaps the most popular question: “Why Mavic Air?”
Firstly, it was the price. Mavic Air is a good combination of price and consumer qualities. The capabilities of the device are quite serious, but the price is not so high.
Secondly, these were the dimensions of the quadcopter. This probably should have come first, but I still try to be honest with myself. When folded, the Mavic Air did not require any special space for transportation. It easily fits into my photo backpack, and it fits in and out of a regular backpack too. With such dimensions, you want to take the quadcopter with you in almost any situation. A bike ride, a walk around the city, or even a hike in the mountains. Everything you need to fly weighs less than my favorite Tamron 15-30/2.8 lens.
In general, choosing a model was much easier than the decision to buy a quadcopter itself.
I was able to directly compare my Mavic Air with the Mavic Pro. Everything was expected there - better reception, longer flight, more informative and convenient remote control, more additional functions, autofocus. But I didn’t find any fundamental differences in the quality of the photographs, except for different focal lengths. It was not possible to compare with Spark, but I think that everything will also be predictable there, but downward.
In other words, Mavic Air is the golden mean.
First flights
Installing the application, first launch, configuration and activation did not cause any difficulties for me. Somehow it didn’t even register in my memory.
I made my first flights not far from home, fortunately the terrain allows it. And I remember the very first flight well. It was mid-December, and the field behind the houses was already full of snow. I put the cover on the snow, placed the copter on the cover itself and started the propellers. We managed to take off without incident. Probably, then I was flying within a radius of 30 meters and trying to somehow get used to the controls. The battery charge was running out, which meant it was time to land. And then there was a stupor - it was not so easy to get exactly on the cover, and if it failed, the drone would fall into the soft snow. I decided that I would plant it in my hand. But I didn’t know how to do it. I didn’t even know how to plant it in principle, much less in my hand. It was very scary, but there was no choice. In the end, I just grabbed it with my hand and turned off the engines with my other hand and chin. For some reason, I completely forgot about auto-landing with the left joystick down. But everything worked out.
Then I tried to go outside whenever the weather allowed in order to improve my quadcopter control skills.
There were plenty of different glitches.
The first thing that came to mind: during one of the launches, the drone did not maintain altitude. You increase the height, it rises, and as soon as you release the “up” stick, it does not hang in place, but decreases.
One day it started to pull out of my hand when landing.
There were some unauthorized movements in space. For example, you fly upward, and the drone rotates around its axis by 10-15 degrees. Each such incident frightened me as a newbie, but then I somehow got used to these antics and stopped taking them to heart.
Expectation and reality
Weather
Before purchasing the drone, I did not monitor the weather and wind speed. I think there is no need to explain that it is better not to fly in the rain and snow? The wind also turned out to be a serious obstacle. It is recommended to fly at wind speeds up to 10 m/s. At the same time, the wind speed even at an altitude of 50 meters can be higher, and it most likely will be higher.
Before I launch the copter, I monitor weather sites. Your best bet is www.uavforecast.com. Here you can see the wind speed at different heights, as well as other important parameters. There is also a free smartphone app, UAV Forecast. But you can also focus on gismeteo or rp5.
It turned out that there were not so many days suitable for flying. It will not be possible to fly exactly in our lane every day. So I started watching the weather.
I have had the opportunity to fly in strong winds several times. The application throws errors, the speed against the wind decreases, and the battery is consumed faster. There is a possibility of not having time to return back if the movement “there” occurs in the wind. Also, the sensors do not work due to the large roll. A couple of times I observed a very strong collapse of the horizon when there was a gust of wind.
Flight time
The manufacturer claims a flight time on one battery of up to 21 minutes. In real operation, this will not be so easy to achieve, if at all possible. Air temperature and wind speed greatly affect battery consumption. But besides these factors, there are many more reasons that will not allow you to fly for 21 minutes.
Moreover, you need to take into account the time it takes to return home and boarding. At 30% charge, the quadcopter remote control starts beeping in warning, and at 20% the quadcopter is forced to fly “home” and auto-land. Of course, you can cancel this and fly until the last minute.
The actual flight duration is about 15 minutes.
Is it a lot or a little?
Flight range
This is even more interesting. In general, this is the biggest drawback of the Mavic Air.
Firstly, flight range is directly related to flight time. After all, no one plans a flight in only one direction, although...
Secondly, the flight range is related to the stable connection between the remote control and the quadcopter. In open areas, such as a field, the range will be maximum. If a forest gets in the way of the radio wave, the range will be reduced significantly. Any building can completely break the connection between the remote control and the drone. Therefore, you should not fly “in the shadow” of buildings.
Thirdly, the range depends on the “purity of the air”. There is a lot of electromagnetic, radio and other interference in cities. All this negatively affects the flight range.
In Russia and Europe, DJI drones use the CE standard (transmitter power ≤19 dBm) and 2.4 GHz frequency. The manufacturer claims a signal transmission range of up to 2000 meters in open space. I have not flown in uninhabited steppes and deserts, but in open areas it is not so easy to achieve such results. I believed that if you can fly 800-1000 meters without any glitches, then this is already a success.
The situation in the city turned out to be critical. The connection was broken already at 200 meters. Those. it was almost impossible to use in the city.
The situation is significantly changed by transferring the drone to the American FCC standard (transmitter power ≤28 dBm). In open areas, you can set the frequency to 5.8 GHz, which will also add range. But, probably, in the city or in open areas it is better to stay on the 2.4 GHz frequency. The translation to the FCC is good for everyone, but it is not legal in the Russian Federation.
Photo quality
I didn't expect sharpness and detail like on a good DSLR or mirrorless camera. This was somehow immediately obvious, given the matrix size of 1/2.3”. You can compare the quality of the pictures with a good smartphone or point-and-shoot camera. Using photos on social networks does not pose any difficulties; on Shutterstock, drone photos are accepted without question. I haven’t tried printing on large formats, but here you need to take into account that the resolution is only 12 megapixels. There is practically no maneuver for cropping.
But here too there was a fly in the ointment in a barrel of shit. © In the photo below, which was taken on a cloudy day, the change in color temperature in the center of the frame is very noticeable. This barrel even has an official name - “color shading”. DJI doesn’t admit that this is a defect, but not every drone gets such a twist. I was not lucky.
It's not difficult to deal with this. I made a preset in Lightroom, which consists of a radial filter with temperature (blue) and hue (purple) changes. In sunny weather this does not appear. Probably, without snow it won’t be so noticeable either.
Equipment and accessories
I bought the quadcopter in a simple configuration, without an additional set of Fly more combo accessories. This decision was made solely for financial reasons, and the price of a naked drone was at that moment extremely attractive in one large online store.
The package included the required minimum: drone, control panel, one battery, charger, drone case, wires, propeller protection, spare sticks and propellers. In this configuration I was satisfied with almost everything except one battery. But I understood that for training and for the first time, one battery would be enough. And that was it.
Later I bought something else on Aliexpress:
In the future, most likely, I will take another battery and a charging hub.
If you are planning a purchase, then in most cases, it makes sense to immediately take the Fly more combo option. There are already 3 batteries, a charging hub, a bag for the remote control, as well as more spare screws and other useful items. In any case, the car charger must be purchased separately.
I would also like to say something about memory cards.
The copter uses microSD class 10 cards with UHS-1 support.
DJI lists a small list of compatible cards:
16 GB
Sandisk Extreme
Kingston SDHC-I SDCAC
32 GB
Sandisk Extreme V30
Sandisk Extreme V30 A1
Sandisk Extreme V30 Pro A1
64 GB
Sandisk Extreme V30 A1
Sandisk Extreme Pro V30 A1
128 GB
Sandisk Extreme V30 A1
Sandisk Extreme Plus V30 A1
I bought a card not from the official list - Samsung EVO+ V2 with a capacity of 64GB. With this card, the drone confidently takes a series of pictures and copes with recording video in 4K.
Conclusion
Despite serious discrepancies with what the manufacturer claims, as well as environmental limitations. A quadcopter significantly expands your capabilities. Flying is inspiring.
In addition to direct photo and video shooting, quadcopters can also be used for other applied tasks. I began to use a drone for reconnaissance on the ground and inspection of existing power lines.
Using a drone, you can find the best place for your tent. You can look for a detour to “ambush” places along the way. And many other most daring applied ideas...