What is a polarizing filter and what is it used with?
What is a polarizing filter used for?
Artem Kashkanov, 2015
What is a polarizing filter?
The essence of the filter's action is to polarize light. I will not describe in detail what it is; you can read about the physical meaning of this phenomenon, for example, on Wikipedia or some other specialized site dedicated to physical phenomena. To be honest, I tried to figure out what was written there, but I couldn’t - everything that I was taught at the Polytechnic in higher mathematics and physics 15 years ago was hopelessly forgotten. I’m sure the same thing happened to 99% of readers, so I’ll tell you in simple words - what does a polarizing filter do?
A polarizing filter removes reflected light in photographs - sun glare, reflections from surfaces, sky glow due to the reflection of sunlight from ice crystals in the atmosphere. As a result, shiny objects appear matte, and the sky in clear weather turns out to be dark blue rather than blue.
The polarizing filter can be rotated around its axis, and the nature of the polarization effect will change. Look at the example below and compare what the sky looks like and what the water looks like in these pictures.
There is a reflection of the sky
There is no reflection of the sky, the bottom is visible. The blue of the sky became a little duller.
Another example of an unprocessed photo in Photoshop with an evening sky (by default the camera was set to high color saturation for a landscape).
A little unnatural, but beautiful!
If you don’t yet have a polarizing filter, perhaps now the thought is starting to arise in your mind - you need to get it! I don’t argue that a polarizing filter is a necessary thing for landscape photography. But it has a number of features that you need to know about so as not to be disappointed with the purchase.
Buy a circular polarizer
Polarization can be linear or circular; accordingly, polarizing filters are also divided into two groups - linear and circular. It is impossible to distinguish them by appearance - both have a rotating part, the external difference is only in the markings. Circular polarizers are labeled with the words CIRCULAR, CIR, or simply group C (for example, CIR -PL or C-PL ). If there is no such designation, then the polarizer is linear. It will shade the sky in the same way and remove glare from the water, but with it the autofocus of the DSLR will not work correctly - the phase focus sensors will fail. With a circular polarizer there will be no such problems.
Buy a polarizer with an antireflective coating
The antireflective coating eliminates the effect of re-reflection of light from lenses in the optical system. If there is no anti-reflective layer, then the picture may become noticeably cloudy if the sun hits the lens. Also, uncoated optics have poor glare resistance. If you got hold of a lens with a red or gold ring (“top” Canon and Nikon optics, respectively), you shouldn’t attach a Chinese polarizer for 600 rubles to it. The lower price level at which more or less suitable polarizing filters begin is now in the region of 3,000 rubles.
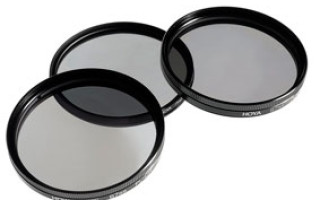
Which polarizer manufacturer is better?
Each optics manufacturer has its own division into classes, so this question is incorrect. In principle, you can take a filter from any manufacturer if the average price for it is higher than the indicated level. Much also depends on the diameter of the filter. The larger the diameter, the more expensive the filter. I don’t have comprehensive information on which filter to choose for N rubles, and I don’t want to give recommendations out of the blue. I use the HOYA CIR-PL HD 77mm polarizer, I am completely satisfied with it. I have personally tested , take the HOYA CIR-PL HD.
For a wide-angle lens, buy a filter with a thin frame
These filters are also called “slim”. They cost a little more, but their frame will not fit into the frame at a wide-angle lens position. If you shoot with a wide-angle and a filter screwed onto it with a standard “wide” frame, it will look something like this:
On “full-frame” 24 mm, a filter with a wide frame produces noticeable vignetting (darkening of the corners)
If you have a device with an APS-C matrix (1.5 or 1.6 crop) and a 15-16 mm wide-angle lens, then you will have the same thing. At 18 millimeters there is no noticeable vignetting from the wide frame.
In principle, these are all the basic recommendations regarding the selection and purchase of a polarizing filter. I will also give some recommendations for its use.
Polarizer is not always useful
If we shoot in such a way that the sun is behind us or, conversely, shining in our face, there will be practically no visible effect from the polarizing filter.
The polarizer only works when we are facing the sun sideways. But because of this, a brightness “distortion” of the sky regularly occurs - on one side it will be noticeably darker than on the other.
The sky on the right is much darker than on the left
It also turns out funny when there is a “polarizing hole” in the center of the frame, and natural vignetting of the lens (shaded corners of the image) at the edges.
There seem to be two light “humps” in the sky
All these things spoil photos rather than make them expressive, so try to get rid of vignetting by closing your aperture to 8. Vignetting can also be easily corrected in Lightroom if it “knows” the profile of your lens (if it doesn’t, it’s a little more complicated).
Regarding the "polarization hole in the sky", see the following recommendation.
Don't overuse the ultra wide angle!
At 24 mm, the brightness distortion of the sky will be very noticeable (see previous photo), not to mention shorter focal lengths. But if you move the zoom to about 35-40 mm (full-frame equivalent), the sky will be more “flat”.
Everything is more or less normal here! The lens in the middle zoom position does not vignett, the polarizer does not “gnaw” a hole in the sky
The polarizer can be combined with a gradient filter
A gradient filter is a piece of glass divided into two halves - transparent and dark. You can read more about it in this article. Then you can get almost fantastic pictures without any Photoshop.
Remember that two filters increase vignetting at wide angles. Increase the focal length so that the filter frame does not fall into the frame.
And one more thing - do not twist the filters tightly together! Due to the notches on the edge of the ring, the filters easily cling to each other and unscrewing them later will cost a lot of work (considering that both have moving parts that will scroll when you try to unscrew the structure you have assembled).
The polarizer can be combined with another polarizer
This will create an imitation of a gray variable-density filter - in theory, a convenient thing for shooting during the day with super-long shutter speeds. By rotating the filters relative to each other, you can achieve almost zero light transmission. However, side effects are also possible - decreased glare resistance, color distortion. Not to mention that autofocus will never penetrate such “armor” and you will have to focus before putting the filter on the lens.
The setting sun, when photographed through two polarizers, unexpectedly turned blue for everyone and gave off huge red highlights
This example was made and given for “what if” reasons. To be honest, I have a hard time imagining the practical value of this solution, but perhaps someone will develop this idea into something interesting :)
The shadowed sky effect can be easily done in Lightroom without any polarizer!
Open the photo and the “Correction” section
We do the following things:
1. Open the photo and select the “Correction” tab
2. Scroll down the tools to the “HSL/Color/Grayscale” section
3. Select the “Lightness” setting (1)
4. Click the mouse on the inconspicuous circle (2). The mouse cursor changes shape from an arrow to a crosshair and a circle with arrows just below.
5. Point the cursor at the sky, where it is without clouds (3), grab it with the mouse and pull it down. At the same time, the sky will darken as if the photo was taken with a polarizer.
You can try other tools in the HSL/Color/Grayscale section, such as Tint. To cancel an action, use the Ctrl+Z key combination.
I'll end here. Regarding whether you need a polarizer, I’ll answer with a phrase from a famous song - “think for yourself, decide for yourself - to have it or not to have it” :)
Rules for using a polarizing filter
This article will describe seven rules for using a polarizing filter from renowned landscape photographer Darwin Wiggett. Darwin says that he starts taking every picture using a polarizing filter. Only if it does not give the desired effect, the search for an alternative shooting principle begins.
Polarizer for side lighting.
When photographing a sunset or sunrise, a polarizing filter can enhance contrast in the sky, highlight details on the ground, and eliminate glare on reflective surfaces.
No polarizer was used in the left photo. On the right I used a Singh-Ray LB Neutral Polarizer. You can see increased contrast and more detail.
Rainbow and polarizer
When photographing a rainbow, a polarizer will produce richer, clearer colors. The rainbow itself is polarized light, so a polarizing filter will either completely erase it from the photo or highlight it. You just need to put the filter in the correct position.
Additionally, a polarizing filter will remove excess glare and shine in the photo, so all the viewer’s attention will be focused on the rainbow.
Cloudy days and polarizer
On cloudy days, the sky is gray and colorless. Viewers don't like this, so it's worth photographing more closed and confined areas. When shooting in this way, a polarizer will remove the shine on the leaves and leaves from the photograph, and will also add overall contrast and saturation.
The third photo clearly shows that the polarizer in the bottom photo made the shot better.
After the rain there is a lot of water around and all of it gives off reflections. In such a situation, a polarizer is simply irreplaceable. The photo has not been processed in Photoshop. These colors were achieved through the use of a polarizing filter.
Reflections on glass, water, metal.
A polarizer allows you to see through the surface of water and glare from glass, as well as remove glare from metal. In some photographs, it is the reflection that is one of the main components, and sometimes, on the contrary, it only covers the main subject. In such cases, only a polarizer will help.
In the photo on the right there is no reflection on the water, which distracts the viewer's attention. In the right photo, a uniform rock bottom creates a more pleasing appearance.
In the seventh photo, the polarizer not only allowed us to see what was happening underwater, but also darkened the sky. All the colors in the photo were created thanks to a warming polarizer. No processing was used.
When shooting with a wide-angle lens, you need to use a polarizer correctly.
Rotating the polarizer for maximum effect when shooting blue sky shots with a wide angle is one of the main mistakes. Image 8 shows this error. The central part of the sky is too dark, and the edges are lighter. There are two solutions to this problem: rotate the filter and reduce the effect, or zoom the frame a little, reducing the capture area.
If you rely on a software solution to this problem, you can simply take two pictures, one with the maximum effect, and the other with the minimum, and then combine them in Photoshop.
In order to obtain optimal contrast, you can use a neutral gradient filter in conjunction with a polarizing filter.
In landscape photography, one of the main problems is the contrast between the sky and the ground. The sky can be so much lighter than the ground that the exposure can only be adjusted so that there is detail in the sky and the ground becomes dark, or vice versa, the ground is detailed and the sky is very light. A gradient filter solves this problem.
The polarizer removes shine from the water, making its surface more transparent, so that the stones at the bottom become visible. A gradient filter evens out brightness throughout the scene.
A combination of a solid neutral density filter and a polarizer.
A neutral density filter that darkens the frame by about five stops allows for long exposure photography. This, in turn, makes it possible to capture movement in nature. A polarizer can be used to achieve any of the effects described above, while a neutral gray filter allows you to capture the movement of clouds, the flow of water, the movement of grass or tree branches.
In the left frame, only a polarizer was used. On the right, neutral gray was also used in conjunction with a polarizing filter, which made it possible to set the shutter speed to 121 seconds. In windy weather for such a long time, the camera captured the movement of the clouds, and the grass looks like brush strokes.
Photo 11 shows the beautiful colors that were produced using a polarizer (see rule 3), and the neutral density filter allowed us to capture the movement of all nature. The photo looks fabulous or painted.
What is a polarizing filter and what is it used with?
So what kind of animal is this? As promised, there will be no theory or physics lessons from the “Optics” section here.
Nowadays it is impossible to imagine landscape photography without polarizing filters. To make your landscapes look rich and clear without additional processing, you need to use a polarizing filter.
A polarizing filter is a filter consisting of 2 rings; one of them contains specially treated glass (polarizer); by rotating the ring with polarizing glass, you can adjust the degree of polarization. This filter allows you to remove glare from glass or water when shooting, trapping reflected rays. The filter also allows you to take more saturated pictures, in which the clouds will be more clearly drawn, the vegetation will look more juicy, here, just like with water, the air contains water particles that reflect light, hence in pictures without a filter it is dull, not always blue sky, and “indistinct” clouds.
Types of polarizing filters.
There are two types of PL filters according to the polarization method: linear (PL) and circular (CPL). For most manual focus cameras, linear polarization filters are used; for autofocus cameras, use circular polarization (CPL) filters. In terms of price, CPL filters are slightly more expensive than linear ones. But the Circulars in no way allow the camera's autofocus and exposure metering to do its job. Designed for wide-angle lenses, Wide-CPL filters in a narrow frame prevent the appearance of vignetting (darkening in the corners of the frame). Some PL filters are protected by a water-repellent coating that does not affect the operation of focusing and exposure automation.
Using a polarizing filter.
Simply screw a filter of the desired diameter onto the lens of your photo/video camera. By rotating the crystal in the filter, select the desired degree of polarization, which will allow you to remove glare from glass or water when shooting, and also get a more saturated sky and whiter and fluffier clouds. Enough words, let's look at the examples.
But of course there are some restrictions on the use of such filters.
1) When rotating the polarizing filter, you need to take into account that the expected zone of maximum effect will be approximately 90 degrees from the initial position.
Rotating it 180 degrees will return the image to its initial state. For example, if the sun is directly above you, the polarization effect will be observed in the range (we focus on the hands of the wristwatch) from 12 to 6 “o’clock”, and in the worst way it will manifest itself from 3 to 9 “o’clock” on the dial. Once you try it in practice, you will immediately understand everything.
2) Polarizing filters weaken the light flux entering through the lens onto the camera matrix, so it is often necessary to increase exposure compensation by 1-2 steps.
Polarizing filters: how they work and what they are needed for
Short answer
Because they make the colors of the photo more saturated, and also eliminate glare from the picture.
Visible light, like any other electromagnetic radiation, is a wave. Polarized light is radiation whose waves vibrate in one plane. Initially, sunlight is not polarized, that is, its waves do not have a clearly defined direction of transverse vibrations. But on the way to the camera, the light is constantly reflected and refracted. As a result, we have glare on various surfaces, and a specific veil appears on the sky. A polarizing filter is designed to combat this.
Long answer
To fully answer the question “Why are polarizing filters needed?”, you need to start with what polarized (and any) light is.
Light waves are the visible spectrum of electromagnetic radiation somewhere between 400 and 700 nm. It consists of electric and magnetic waves. They look quite cumbersome together (plus magnetic waves have nothing to do with the issue of polarization), so let's limit ourselves to the electrical component. The wave oscillates perpendicular to the direction of its movement.
What is polarization? Imagine a wave of light directed directly into your eye. If we rotate the previous drawing 90 degrees, then all we will see is the wave oscillating up and down. Such a light beam is called polarized. So polarized light is that light whose electric field oscillates in only one direction. Vertical in this case. It can be horizontal or, in principle, any orientation.
Okay, but how do you get unpolarized light then? No problem. Most of the light we see is not polarized. Light coming directly from the sun is not polarized. The same applies to an incandescent light bulb, any hot luminous object. At one moment in time the field can be directed in one direction, and at another - in a completely different direction. This happens in a random order.
Linear polarization
Let's say for some reason you need to get polarized light. How to do it? Just use a polarizer. This is a material that transmits light. But it only transmits light oriented in one direction.
Let's imagine a polarizer that transmits only vertically oriented light. If you put it in line with the lamp and the eye, it will cut off any light except vertically polarized light. Naturally, due to the loss of part of the radiation, we will get a slightly darker picture.
Taking a polarizer with a horizontal orientation, we get horizontally polarized light.
And how to use all this?
Great, but why is all this polarization needed in everyday life, since few people are going to conduct daily experiments? Think about polarized sunglasses (no, they're not called that just because marketers latched on to a buzzword and found a reason to raise their prices several times over) and how they combat glare and reflection.
How it works? Imagine yourself standing on the shore of a lake in sunny weather. Light enters your eyes from all directions, reflecting off clouds and any nearby surface. Calm reflected sunlight. But if you look directly at the water, you will see a bright glare straight from the sun. There is nothing good about it: it blinds, it hurts. “It’s time to put an end to these annoying glares!” - they will say in the marketing department of some sunglasses company. Fortunately, although direct sunlight is not polarized, when reflected from the surface, it is at least partially polarized (at some angles of incidence - completely). Moreover, the direction of polarization is parallel to the plane from which the light was reflected.
It turns out that most (if not all) of the light reflected from the surface has a clearly defined polarization. All we have to do is put on sunglasses with a vertical polarizing filter and thereby cut off the glare.
These same glasses will allow you to look under the surface of the water.
All this is true for a polarizing photo filter. The main difference is that due to the variable plane of rotation, you can set the direction of polarization yourself.
Circular polarization and why it is needed
In addition to linear polarization, there is another type of polarization - circular.
Here are two waves oscillating in planes perpendicular to each other. In the case when they oscillate in the same phase, their total vector is directed diagonally. That is, we again get linearly polarized light.
But if you shift the horizontal wave by 1/4 phase, the total vector of the two waves will rotate clockwise or counterclockwise. That is, the polarization will not always be directed in one direction, it will be circular.
To understand how a circular polarizing filter works in practice, you need to accept the fact that linearly polarized light does not consist of a single electric wave, but of the vector sum of two perpendicularly oscillating waves, as in the picture above. Actually, the filter itself consists of two parts: a linear polarizer and a special material that slows down one component of polarized light by 1/4 phase.
So, why all these troubles with circular polarization when there is linear polarization?
The thing is that the electronics of modern cameras cannot adequately work with linearly polarized light. Metering and focusing errors may occur. Circularly polarized light does not have this problem because it behaves like normal natural light.
Using a polarizing filter on your camera
As I wrote at the beginning, a polarizing filter makes the colors of a photo more saturated and also eliminates glare from the image. Increased saturation and contrast are useful when shooting landscapes.
The left photo was taken without a polarizing filter. The right one is with him. In the second image, both the increased overall contrast of the image and the increased amount of detail in the clouds are clearly visible. It is worth noting that due to the filter cutting off part of the light, the lower photograph was taken at a longer shutter speed than the upper one: 1/125 of a second versus 1/250. ISO and aperture settings are the same.
Sometimes a similar effect can be achieved with processing (often spending more time on it), but what you definitely cannot achieve is getting rid of glare and reflections. Using a polarizing filter on the right photo helped remove most of the glare from the windows. This can be damn useful when you need to take a photo through glass, but the reflections mean you can't catch anything.
The same effect is observed with reflections on the surface of the water. The photo on the right was taken with a polarizing filter.
Of course, sometimes a polarizing filter can make a photo worse by its effect. For example, when you need to maintain haze in the atmosphere or leave reflections. It all depends on how you want to use it in your hands. And don't forget that a polarizing filter always darkens the image a little.
What is a polarizing lens filter?
One of the essential accessories for a landscape photographer is a polarizing filter for your lens. Photographers often argue about its use on various thematic forums. According to some, any additional glass screwed onto the lens makes adjustments to the operation of the lens system. Most people believe that a polarizing filter is indispensable for a landscape painter. Let's take a closer look at what a polarizing filter for a lens is and why it is needed.
What is polarization of light
To understand why one of the most popular light filters has such a name, you need to understand the concept of polarization. But since we are not on a site for beginner physicists, we will consider the issue of polarization from a practical point of view.
Light is a wave, we know this fact from school. When propagating in space, a wave behaves differently, since its propagation does not occur in a homogeneous mass. Light tends to be reflected repeatedly, so we see some surfaces with noticeable distortions. For example, everyone knows glare. It seems impossible to eliminate them without blocking the light that produces them. However, it is not. If we talk about the atmosphere, then everything is even sadder here because of the particles suspended in the air. They reflect light on a large scale, which is why we often see the blue sky differently.
A polarizer can partially transmit light through itself. For example, only vertically or horizontally oriented, thereby filtering out part of the light and revealing details that were hidden by this filtered spectrum.
This concludes the consideration of the physical side of the issue; let’s move on to the practical part.
Polarizing filter markings
There are many different solutions available on the photographic equipment market. They all look almost the same. The difference lies in the labeling and, of course, the inscriptions on the packaging. The store will help you when choosing, but it is better to know about polarizing filters in advance, before purchasing. This gives you a better chance of understanding what the seller is saying and avoiding possible deception.
The photo shows the packaging of a typical circular polarizing filter, which includes inscriptions and an example of operation. Everything here is more than clear. If you pay attention only to the inscriptions on the outside, then it is quite difficult to understand what kind of sample we have in front of us.
When looking at a polarizing filter outside of the package, we should look for markings such as CPL, C-PL, PL-C. Instead of the letter C you can find CIR, which in any case indicates its circular type. The linear type is difficult to find on sale today.
When to Use a Polarizing Filter
Using a lens polarizer is not that easy the first time. There are also plenty of nuances when it is better to stop using it. The first use, without first familiarizing yourself with the features, can lead to a sad result. The first problem is the lack of effect when shooting in the direction of the sun or against it. A polarizer is most useful when shooting at an angle of 90 degrees relative to the sun.
The second practical problem is incomplete filling of the frame when using wide-angle camera optics. Thus, using an 18mm lens will result in uneven coverage of the polarizer. If one side of the frame, conditionally, falls at the desired 90 degrees to the sun, then the other side will fall at unfavorable angles, where the work of any polarizer will be reduced to zero. In practice, there is a voluminous, spectacular sky of one color in one part of the image and a less expressive sky in another part, but having a different shade.
Using a wide angle is also undesirable for another reason. Any filter makes design changes due to its thickness. The polarizer extends the end of the lens, moving it back a good 3-4 millimeters. Wide-angle optics instantly respond to such changes with vignetting. Often in such cases it is impossible to do without editing the vignette during post-processing, or it is worth abandoning the wide angle in favor of more standard ones.
Using a lens polarizer in low light conditions will make the situation worse. When a polarizing filter is attached, the overall throughput of the lens is noticeably reduced, approximately by half. This is worth considering, since increasing shutter speed is not always possible. In addition, focusing deteriorates, making periodic mistakes. The option of increasing photosensitivity is not very attractive due to the deterioration in image quality.
In these cases, it is better not to use a polarizer for the lens in order to avoid obtaining a poor-quality result. In such situations, it is better to spend time post-processing photos in an editor in an attempt to replicate the effects of a light filter without using it, fortunately this is more than possible.
Still, some features of using light filters will never be replicated in photo editors. And if achieving a certain result is necessary, then it is recommended to use a polarizing filter for the lens despite possible deterioration in quality. Such a goal may be the need to remove glare and reflections in a photograph. Shooting an object behind a shop window that is not visible under normal conditions will become more accessible when wearing a polarizer. The flora and fauna of the underwater world is often hidden from view by the reflections of light on the surface. A polarizer will help out in this situation as well, making the glare of the water less noticeable. And such a result cannot be achieved using Photoshop.
Polarizing filter and wide angle
As already mentioned, wide-angle optics are not very friendly with polarizing filters for the lens. The reason is the narrow range of polarization efficiency, or rather a certain angle relative to the sun at which it is most effective. This is a 90 degree angle. But when using wide-angle camera optics, within one frame the angle relative to the sun changes significantly, because the wide angle in the lens can reach a 160-degree view. As a result, a clear unevenness of processing is noticeable in the sky.
There is no other choice but to produce photographs with more traditional lenses and a standard viewing angle.
Wide angles also result in noticeable vignetting due to the edges of the polarizing filter being pushed into the frame. A way to combat this phenomenon could be to use a thinner version of the polarizer for the lens, but purchasing it will be more expensive for the photographer. A simpler option is, again, to use smaller angles.
Price-quality ratio
When used, a polarizing filter becomes an integral part of the optics. If a photographer uses a kit lens, or another simple lens of a different brand, then purchasing a polarizing filter for 300-500 rubles as a test may be advisable. In other cases, you should be more careful about your choice. The abundance of manufacturers and price ranges on the market makes it difficult for a beginner to quickly make the right choice.
It is worth taking a closer look at the products of the following brands:
These manufacturers have proven themselves well in terms of quality. It’s stupid, having top lenses, to spoil the quality of the final image by putting on another low-quality glass. And since top lenses, as a rule, have a large aperture and a large radius, filters for them cannot be cheap. So, good polarizers for a lens will cost from 3,000 rubles.
If photographs are taken for private use or posting on social networks, then the use of good optics and a high-quality polarizing filter is not so necessary. But advanced amateurs and professionals who take photographs for the purpose of selling works understand that at 100% magnification the difference will be noticeable to the naked eye.
A polarizing filter for a lens is an auxiliary element for most photographers who at least occasionally photograph nature. They know all the advantages of using it. You can only find out how useful this accessory is through its practical use. Therefore, in one price category or another, it is recommended for purchase by every fan. Even the simplest polarizing filter will make the photographer feel positive about the result. Next, everyone will decide for themselves whether it will be needed for everyday use or whether it will become another purchase that will lie idle in a backpack without ever being put on a lens.
Polarizing filter
The essence of a polarizing filter is very simple - such a filter is capable of blocking reflected polarized light . For example, it is possible to block reflected light from water, glass, etc., thereby making the water and glass transparent. But the filter’s capabilities are not limited to this.
The polarizing filter itself consists of two parts - movable and fixed. The fixed part of the filter is screwed into the thread of the lens filter. The moving part can rotate freely 360 degrees. By rotating the front part of the polarizing filter, the filter is adjusted to a certain type of polarized light, and at the same time it is delayed by such a filter. Due to the fact that the filter operates by rotating the front part, this filter is best used on lenses with an internal focusing system. If the front lens of the lens rotates along with the frame, this causes inconvenience when working with a polarizing filter.
The polarizing filter can be screwed onto the protective filter. You can put a lens cap on the polarizing filter, or you can add another filter. The only thing is that the more filters are screwed into each other, the greater the likelihood of getting vignetting in the corners of the image. Some polarizing filters may not have a thread on the front.
To select a polarizing filter for a lens , you must know the diameter of the lens thread for the filter. For example, the standard lens for the Nikon Nikon 18-55mm f/3.5-5.6G VR central lens has a diameter of 52mm, and it requires a polarizing filter with a diameter of 52mm. This may seem funny, but many people cannot choose a filter precisely because they do not know whether it will fit their lens. The effect of a polarizing filter can be seen on any lens.
Some features:
-
A polarizing filter blocks reflected polarized light. This is the main property of the filter; it can be used in a large number of situations. For example, using a polarizing filter, you can remove water glare (light reflected from water) and photograph the bottom.
Seabed with different positions of the PL-CIR filter
Different colors with different polarizing filter positions
The sky when using a polarizing filter. The filter allows you to even out the luminosity of the sky and provides a slightly different rendering of the green color.
Long exposure. When using a polarizing filter, you can noticeably increase the shutter speed, which can serve, for example, for the effect of smooth water in photographs.
Color of grass and leaves when using a polarizing filter on a bright sunny day
Water clarity due to filtering of water reflections
The operation of a polarizing filter can be easily seen using a regular computer monitor. The display light is always polarized in a certain plane, and with the help of a polarizing filter it can be easily removed as shown in the example below:
An example of how a polarizing filter works
Polarizing filters themselves come in two types: linear and circular polarized. In general, circularly polarized filters are better. I don’t want to repeat myself; this has already been written about many times, for example here.
The polarizing filter is abbreviated as 'PL filter' or simply 'polarizer'. A good polarizer is not a cheap thing. As usual, the more expensive the filter, the better it is. True, inexpensive polar lenses are also suitable for amateur photography. For example, I use Hoya 58mm PL-CIR Made in Japan. My colleagues say that very high-quality polarizers are B+W and Rodenstock, but very often it is very difficult to feel the difference between the cheaper Hoya, Marumi, Kenko.
Conclusions:
A polarizing filter is an interesting and useful device for achieving unique effects in photographs. This filter is an indispensable item for shooting landscapes, working outdoors in sunlight, etc.
In the comments, you can ask a question on the topic and they will definitely answer , and you can also express your opinion or describe your experience. To select photographic equipment, I recommend large catalogs of various photographic equipment, such as E-katalog, or large online stores such as Rozetka. A lot of little things for photos can be found on Aliexpress.
How to use a polarizing filter.
Polarizing filters are good for shooting in sunlight, as they reduce glare from non-metallic surfaces and add richness to colors. The effect created by a polarizing filter cannot be replicated in processing. In this tutorial we will learn how to use this filter correctly.
What does a polarizing filter do?
There are 2 types of polarizing filters, linear and circular (circular). Linear is traditionally used in film photography, circular is used in digital photography, as it is designed specifically not to create problems with autofocus. When you attach the filter to the lens, you will find that it can rotate, changing the direction in which the light is polarized.
When shooting in direct sunlight, you may experience a phenomenon where your photos will look harsh and overexposed, as if you were in the sun without sunglasses. A polarizer allows light to pass through only in a certain direction, while attenuating light from other directions, thus reducing glare. Take a look at the photos below, the first photo was taken without a filter, you can see that the light is reflected very strongly from the road, as a result, the light areas are overexposed. This impairs the perception of small details and reduces the overall quality of the photo.
Now take a look at a similar photo taken with a polarizing filter. Road glare is significantly reduced and the perception of light details is improved. For example, the left shoulder now stands out much more. as the contrast between him and the road increased. Overall, photos taken with a polarizing filter look much better.
A polarizing filter also removes haze from a photo, which is a great effect when photographing a distant subject or scene. This makes the sky bluer and the colors more vibrant and saturated. Take a look at the two photos below. The first was taken without a polarizing filter, the second with a filter.
How to Use Polarizing Filters
The effect of a polarizing filter is maximum when the angle between it and the sun's rays is 90 degrees. This way you get maximum effect, however. Be careful when using the filter with wide-angle lenses. Since they cover most of the space, the direction of the rays will be very different from 90 degrees. As a result, we may get a change in the color of the sky from dark to light in the image, which is undesirable
The filter has the least effect when the sun is behind the lens. The photo below shows this. The left photo was taken without a filter, the right with a filter.
Polarizing filters tend to be quite dark, so make sure the shutter speed you use is fast enough to shoot handheld. Typically, polarizing filters are used in bright sunshine. so this shouldn't be a problem. If the shutter speed is still not fast enough, increase the ISO from 100 to 200.
It is important to make sure that automatic white balance works correctly with a dark filter. It is better if you set it to “Daylight” to avoid automatic errors. A polarizing filter only works well in sunlight, so if you're shooting at night or on a cloudy day, remove the filter from the lens.
Be careful not to overdo the effect and end up with a too dark sky in your photo. Take a look at the photo below, the result of using a polarizer is quite extreme and looks unnatural. Sometimes this effect is justified, but in some cases it is better not to use a filter.
An illustrative example is presented below. Here, the reflection from the ground in the left photo adds detail to the image, unlike the right photo, taken with a filter, where this area is dark.
A polarizing filter is often used to remove reflections from glass and water. They are incredibly effective in this regard and are often used when photographing bodies of water, as they make the water “transparent”.
Finally, it is very important to choose the correct angle of rotation of the filter. take a look at the two images below. In the photo on the left, the color of the sky is uneven; in the photo on the right, the angle of rotation of the filter is chosen correctly and the sky looks much more natural.
What to look for when buying a polarizing filter.
A: Make sure the filter diameter matches the lens diameter. Look at the front lens or the inside of the lens cap.
B: If you have a digital camera, make sure the filter is circular.
(from the translator: a circular filter is designated C – PL, circular polarizing. Currently, in modern professional-level SLR cameras, all autofocus sensors are cross-shaped, and the autofocus system is more advanced, so this advice is losing its relevance)
Q: Use the best quality filter you can afford. It's stupid to buy a $1500 lens and then screw a cheap, low quality piece of glass onto it. Personally, I use a high quality Hoya filter.
D: Buy a filter case. When not using the filter, place it in its case to protect it from dust and scratches.